Creating an Accordion element

Creating an Accordion element
A very useful tool, to group your contents, is the Accordion element. You can find it in the section of the Grid Elements indicated by the yellow circle. Just click on the Accordion element icon, indicated by the yellow line, to create one. >>Here you can see how it will look like.
The other two Grid Elements indicated by the yellow line, the Two column and the Three column are as their names say, made up of two columns or three columns. We will start to explain their configurations starting from IMG 36.
Configurating the Accordion element
Configurating the Accordion element
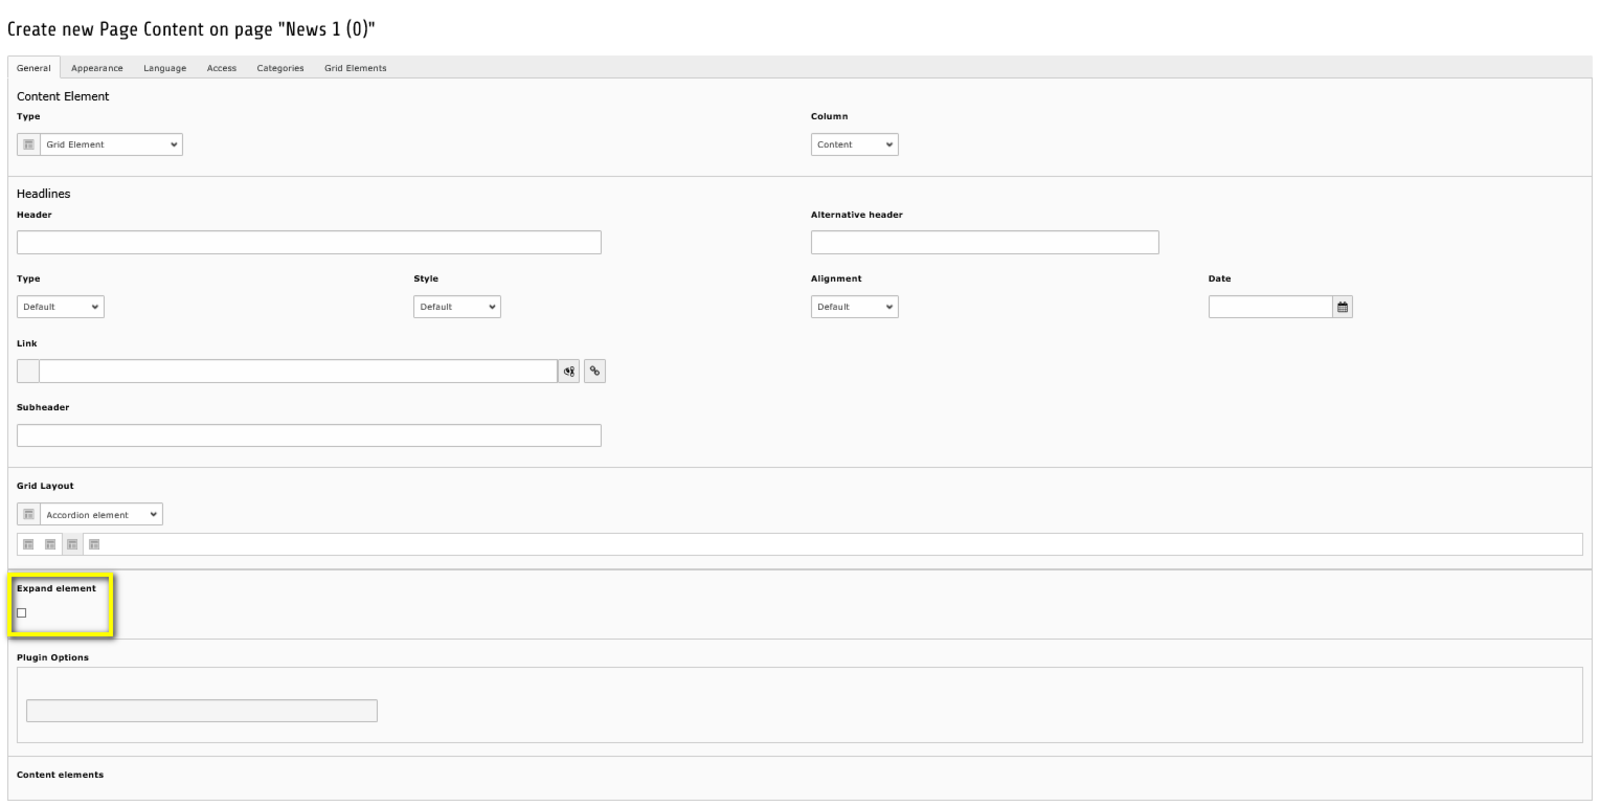
There is just one difference of settings compared with all the other standard items. It is indicated here by the yellow circle. If this checkbox is activated the Accordion element will appear always opened with all its content visible, not just the header, as it is for standard.
Configurating two and three column items
Configurating two and three column items
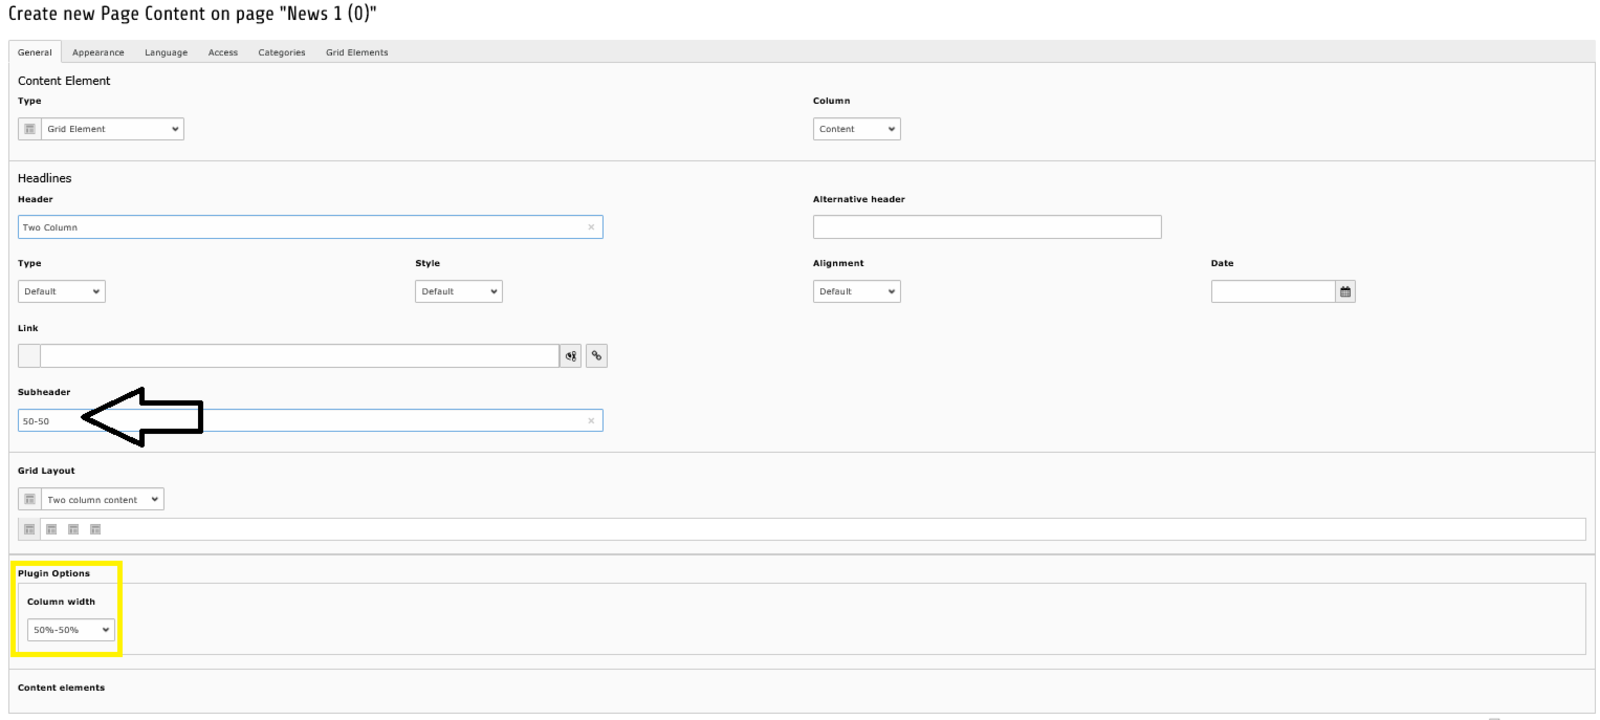
The Two column and Three column items are very simple to set up. As usual you can set a "Subheader" in the box indicated by the black arrow.
In the two column item the only thing you have to choose, is how to divide the space for the two columns with the "Columnn width" box indicated by the yellow circle. As a standard this box is prefilled with 50-50 percentage. You can also choose to divide it in 33-66 or 66-33.
For the three column item there is also additional settings to adjust. As standard this box is prefilled with default which is 33-33-33. But there's an other option with 25-50-25. See an example for two and three column items >>here.
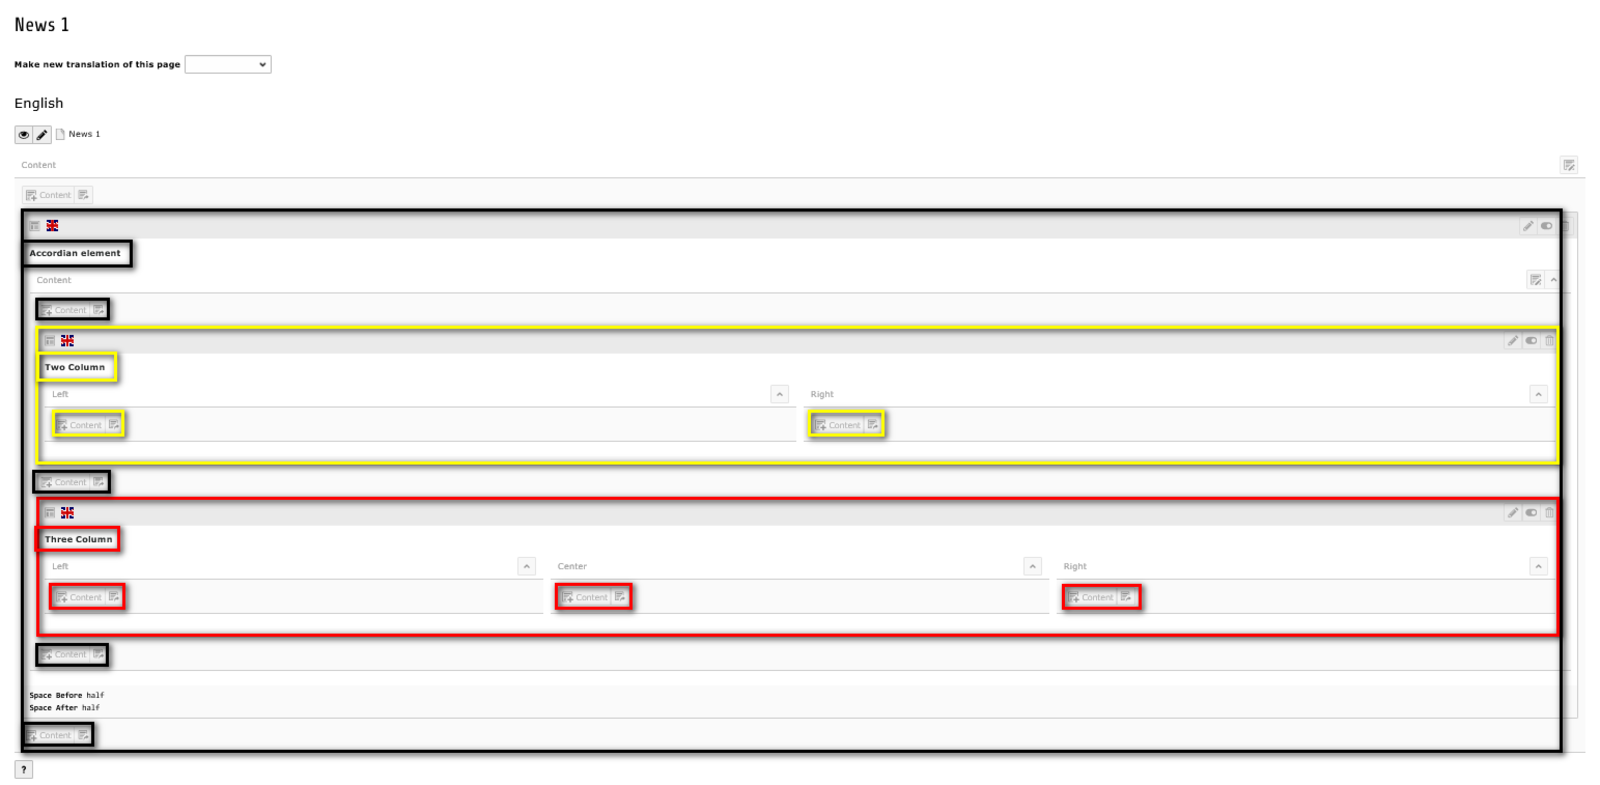
All the "Grid Elements" are set up as particions, in which you can insert additional content. It can be "Typical page content", or further "Grid Elements", and also "Special Elements". Simply said, you can insert whatever element you want.
You can see in the image, how the "Grid Elements" look like. In this case, the "Accordion element" is indicated by the big black circle. Here we inserted a "Two column" and a "Three column" element. You could go on inserting new elements by clicking on the "Content" buttons indicated by the little black circles.
The yellow circle indicates the "Two column" element. Here we inserted two special elements, of which you will find a tutorial later. The two columns are already separated, so you can choose where to insert your content, whether on the left, or on the right hand side of the page.
The red circle indicates the "Three column" element. We didn't insert any content for this item, but you can see clearly the three "Content" buttons, one for each column, where you can insert your elements.
You can see >>here how these grids will appear on the website.