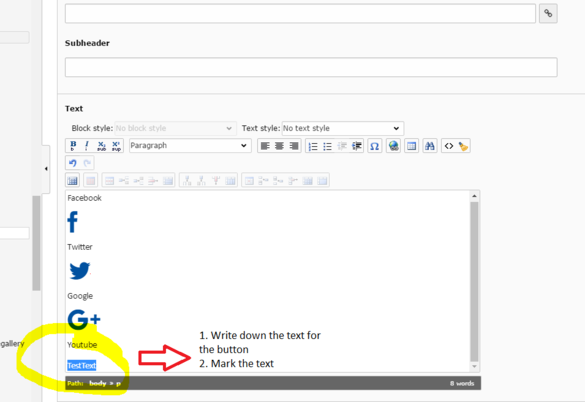
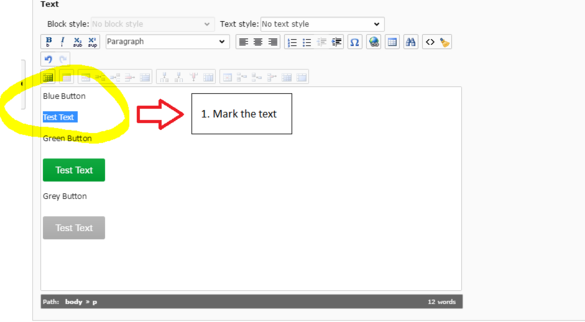
1. To insert a button add a new Text & Media and write down the text you want to be visible on the button and mark it.
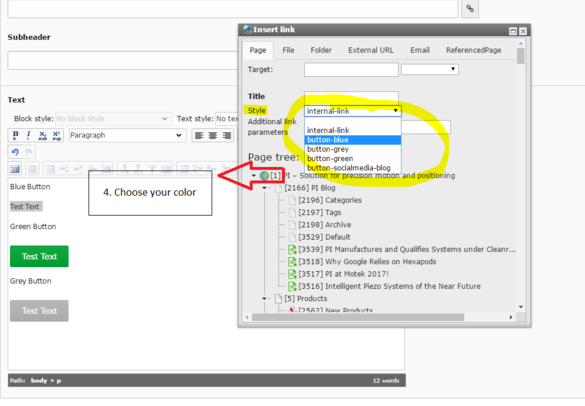
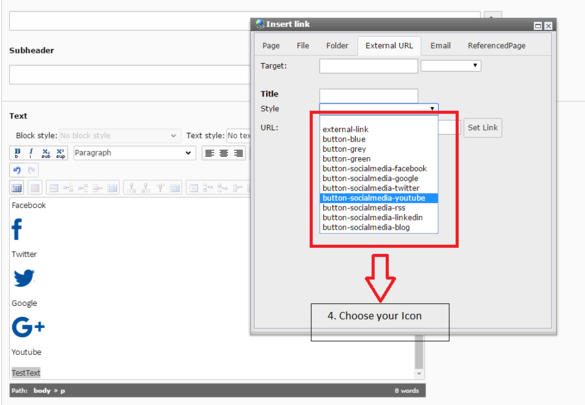
4. Choose your Button style:
- Blue Button
- Grey Button
- Green Button
- Or Blog Button Blog

Optional Buttons
There's an option to add a colored text onto the buttons.
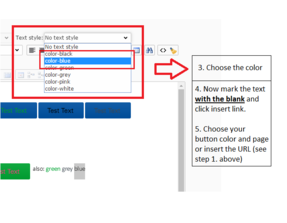
You can choose pick of following colores:
- black
- blue
- green
- grey
- pink
- white
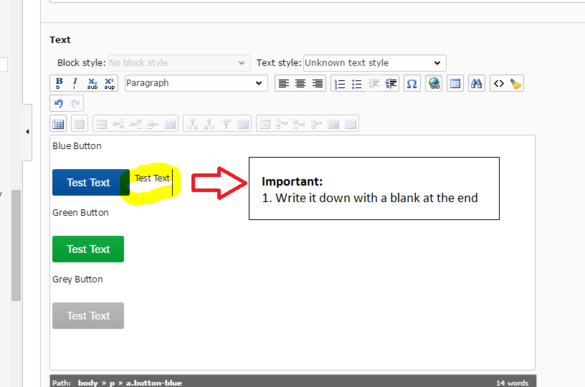
1. To add a colored text write down the text you want to be visible on the button and add a blank at the end.
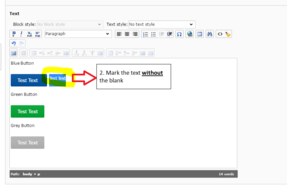
2. Then mark the text.
Important: mark the text without the blank. Otherwise the RTE does not get the color.
3. Open the "Text Style" drop down menu and choose your text color.
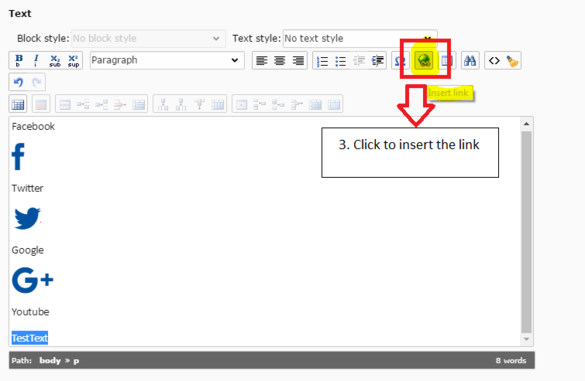
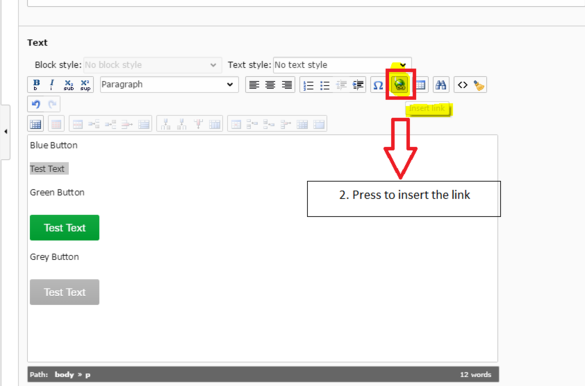
4. Now mark the text with the blank and click on the globe to insert the link.
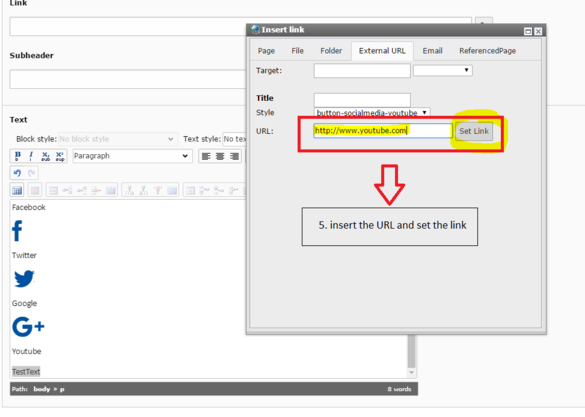
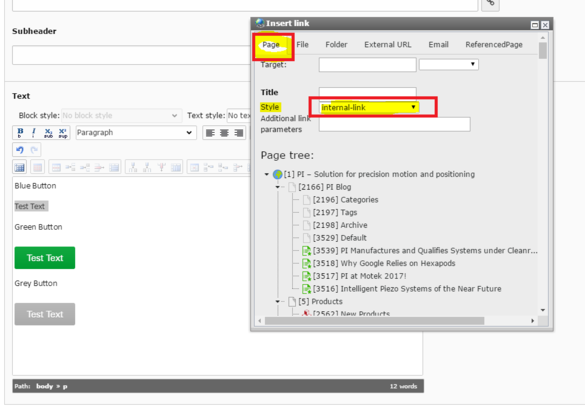
Choose your button color and pick your page via the page tree or insert the URL. ( See Step 1. above)