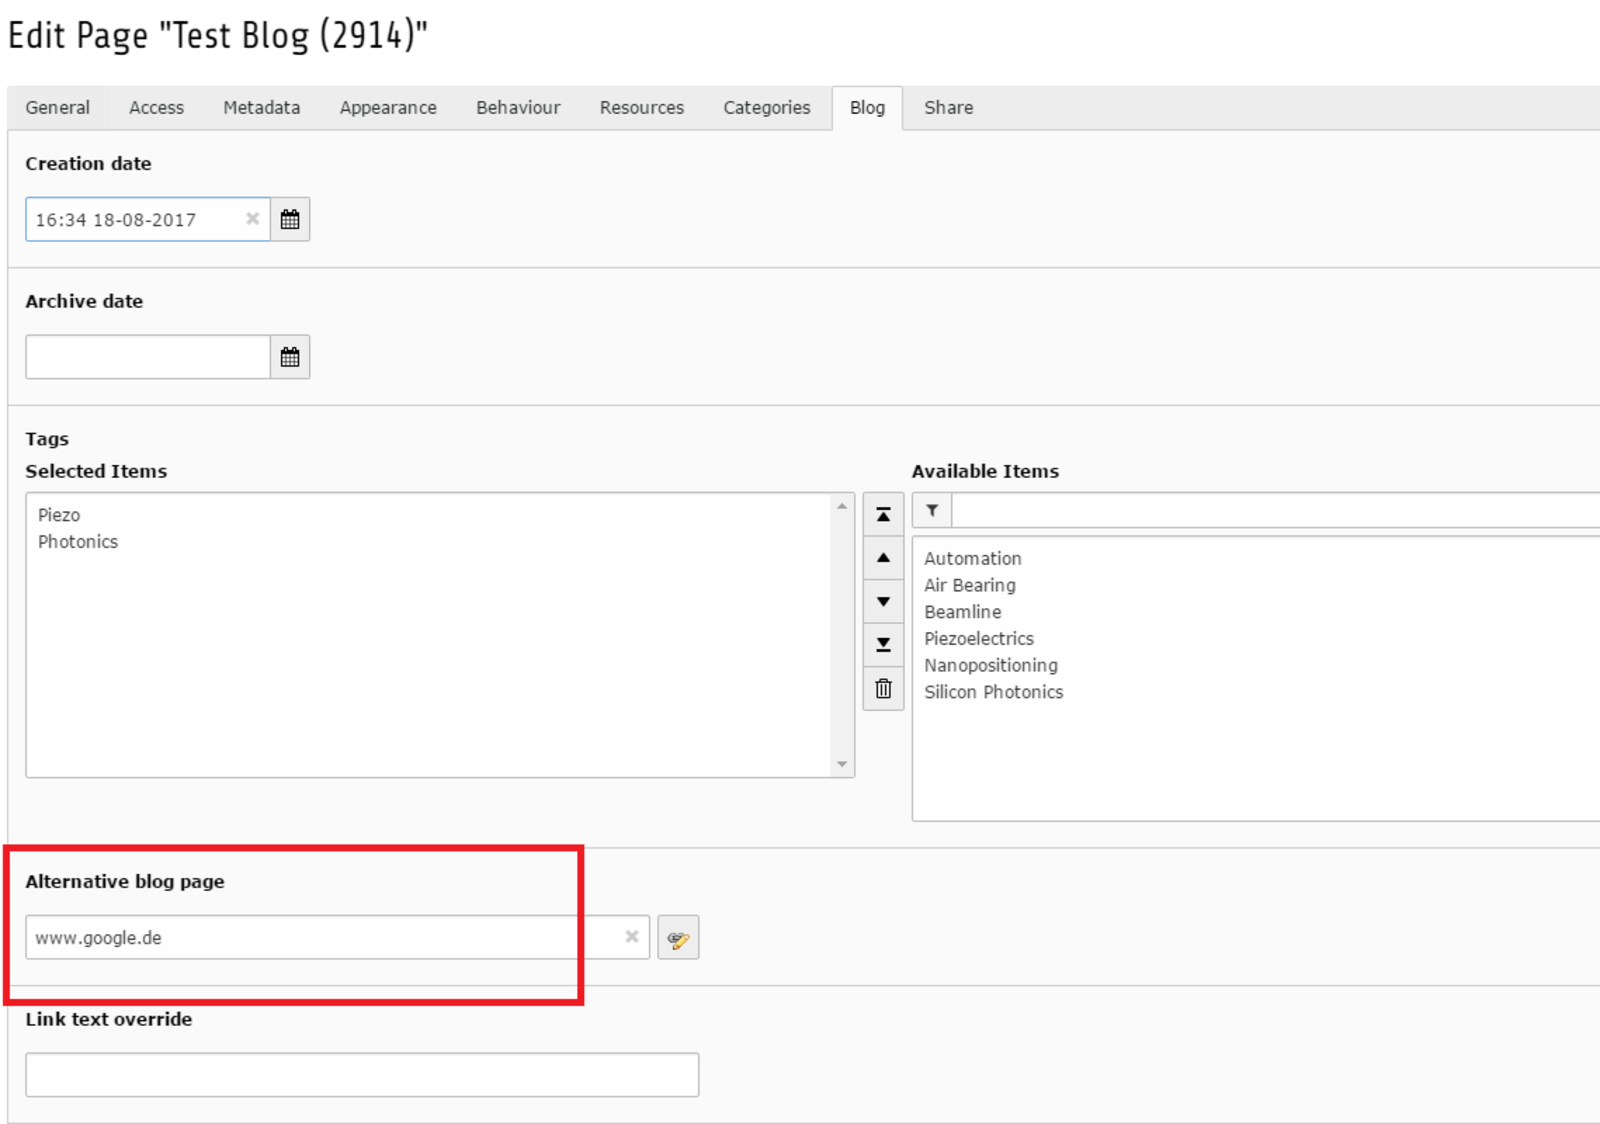
PI Blog
Blog pages can either be seperate articles, link to existing PI website pages, link to videos or external pages (e.g. fair websites).

Please note:
- Blog posts need to be disabled or excluded from search until they go live.
- Otherwise the blog newsletter will be sent (to a test group) and not be sent again when the post is live.
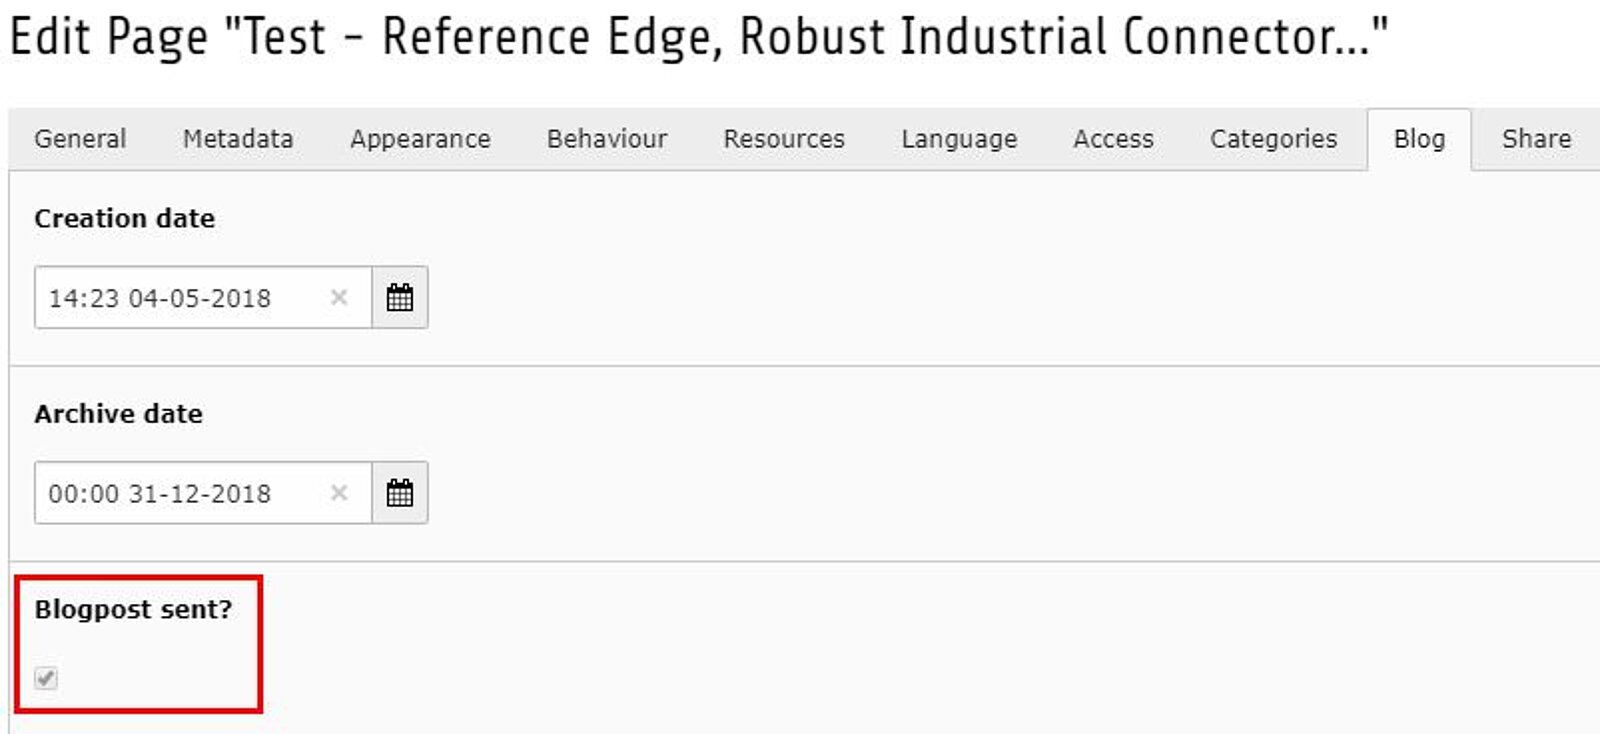
- A check mark was added to the "blog" tab that indicates if the newsletter was already sent.
- So if it happens by mistake that the newsletter was sent while not live yet, you can see this by this check mark -> let me know, the check mark can be removed.
What it looks like
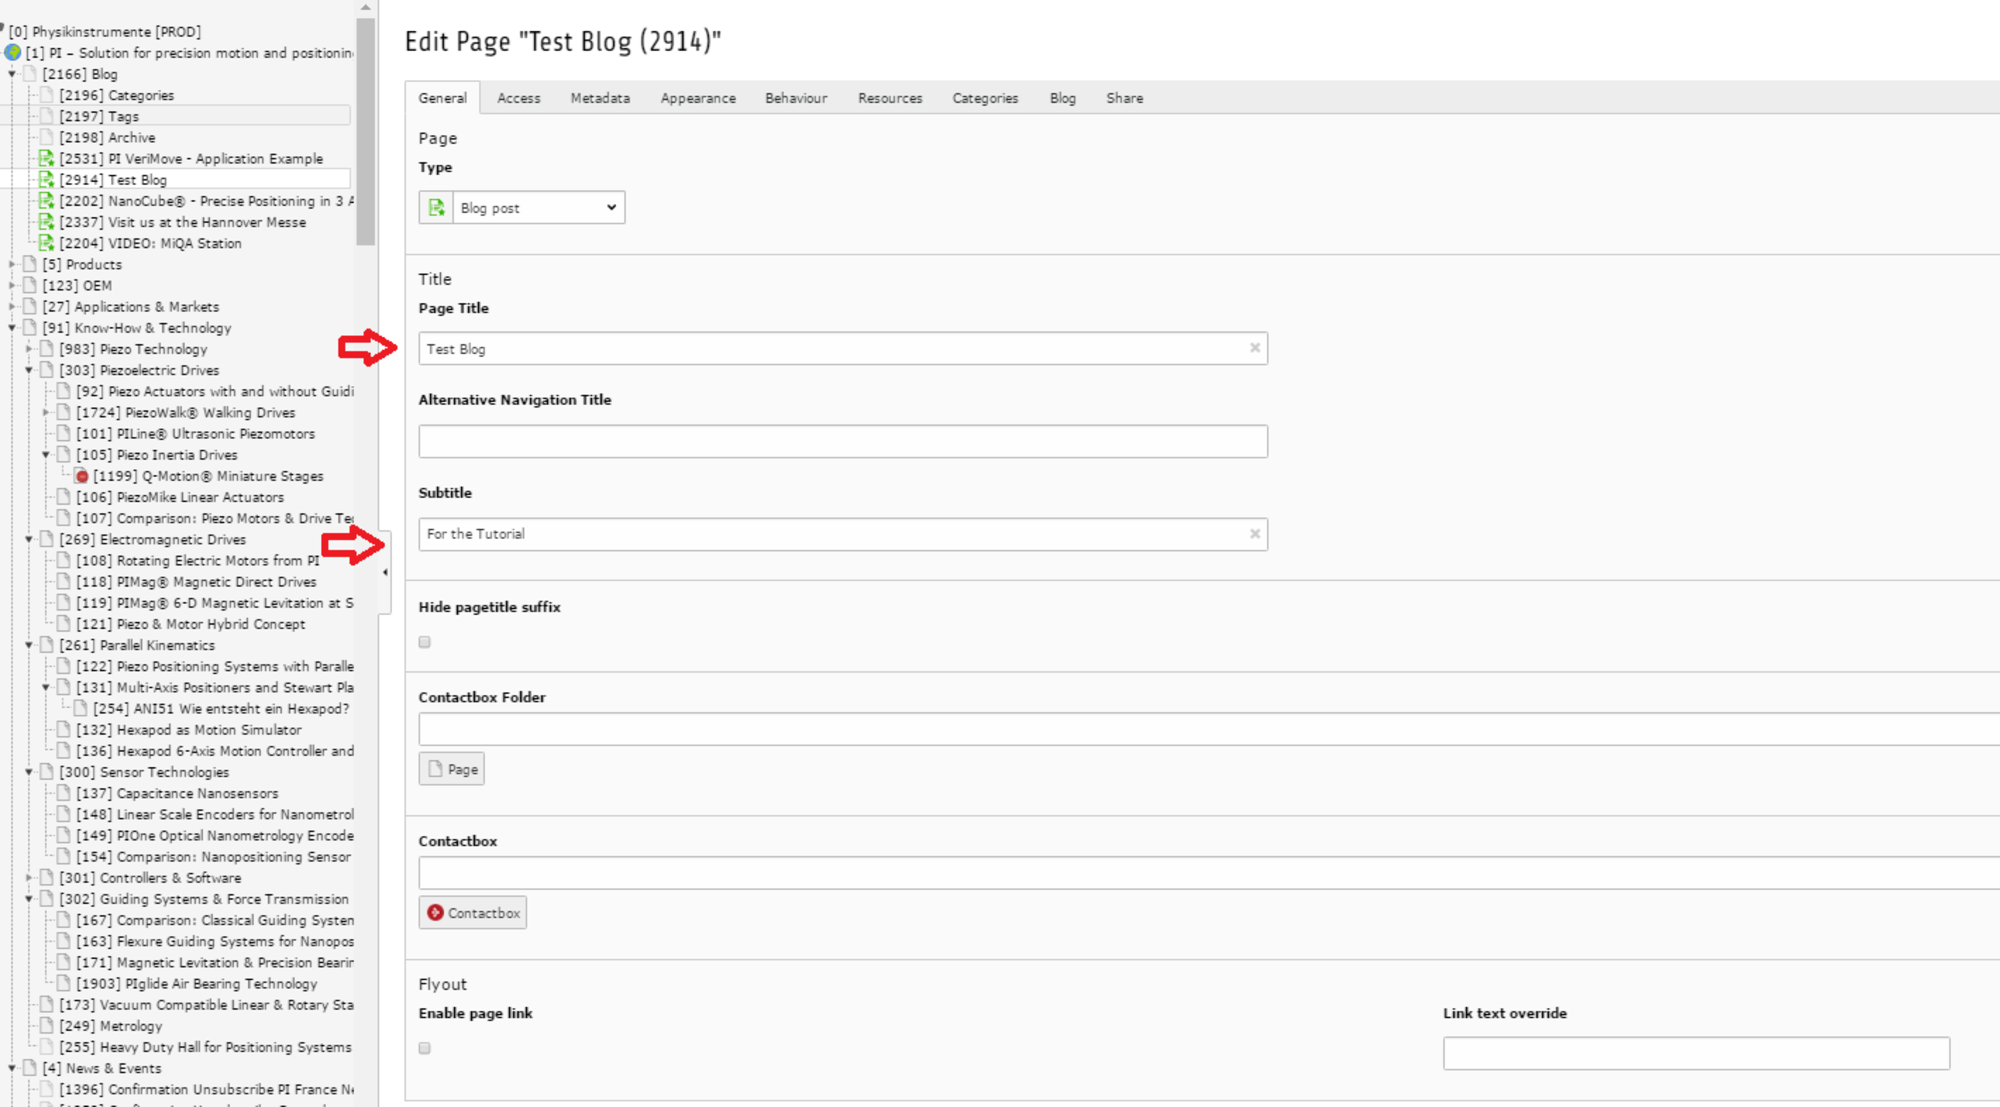
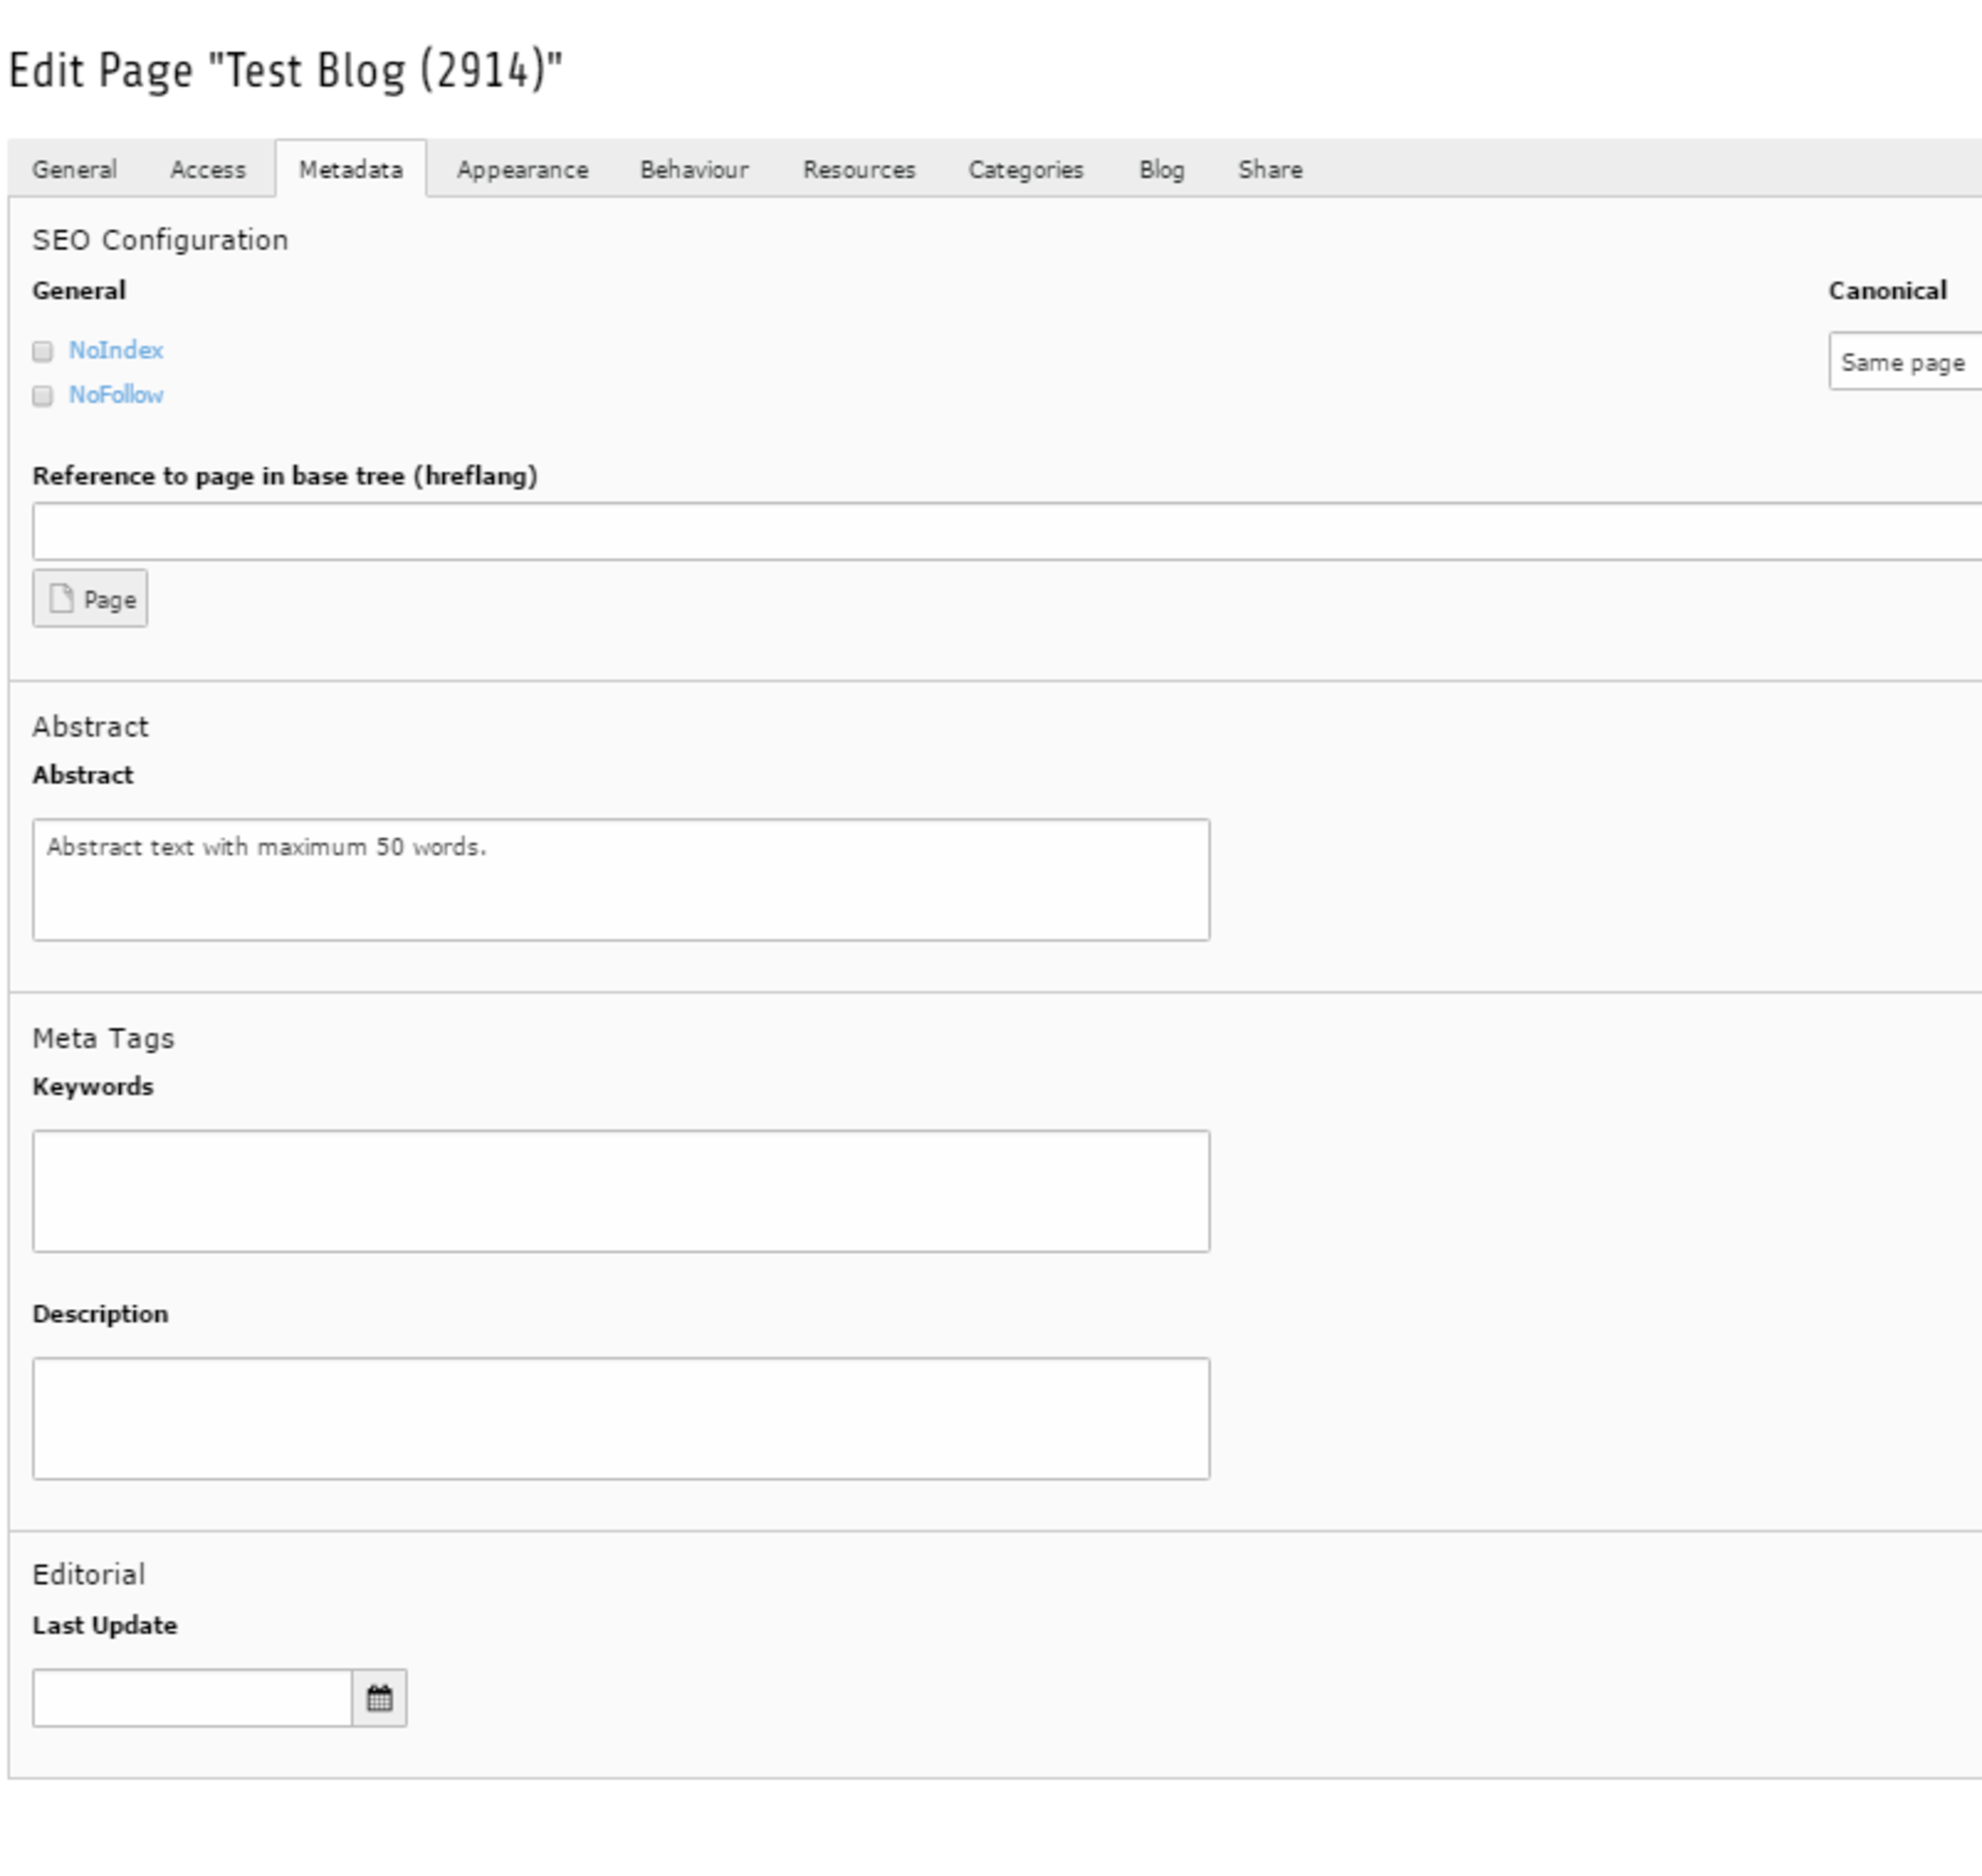
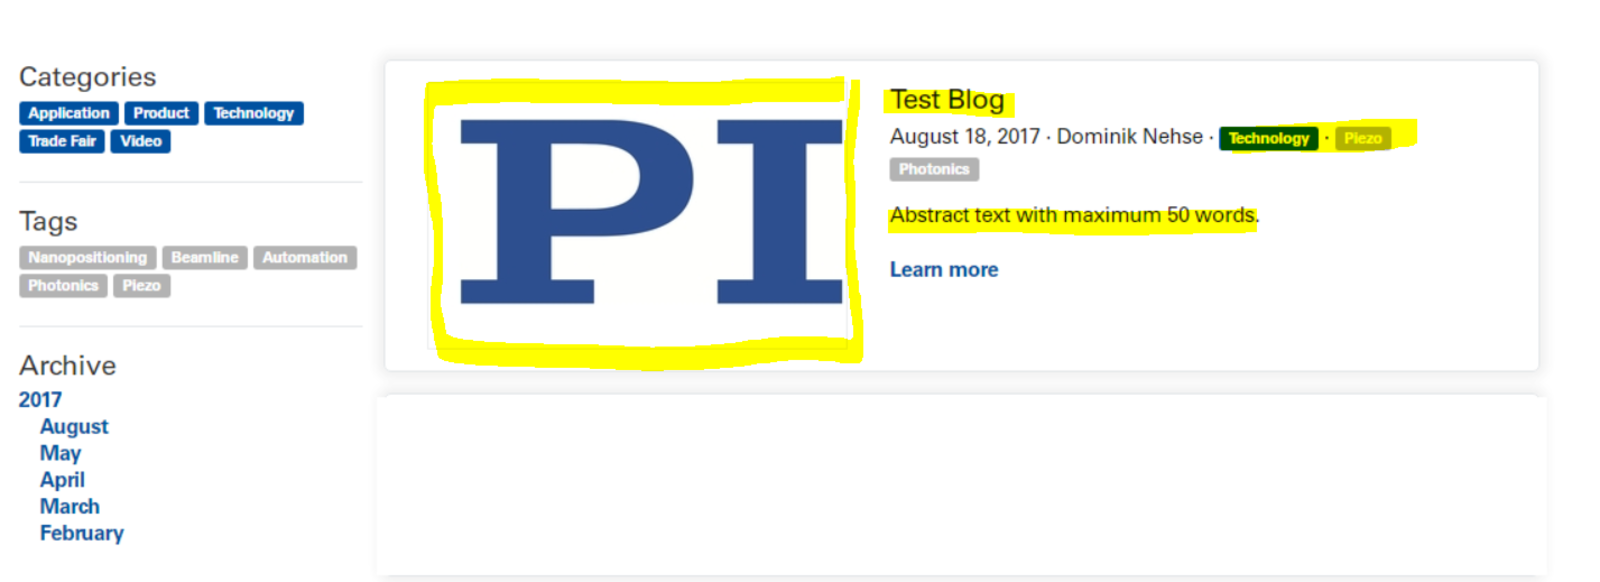
- The page title appears as the Blog Title.
- The Abstract Text is the Teaser text, but with maximum 50 words.
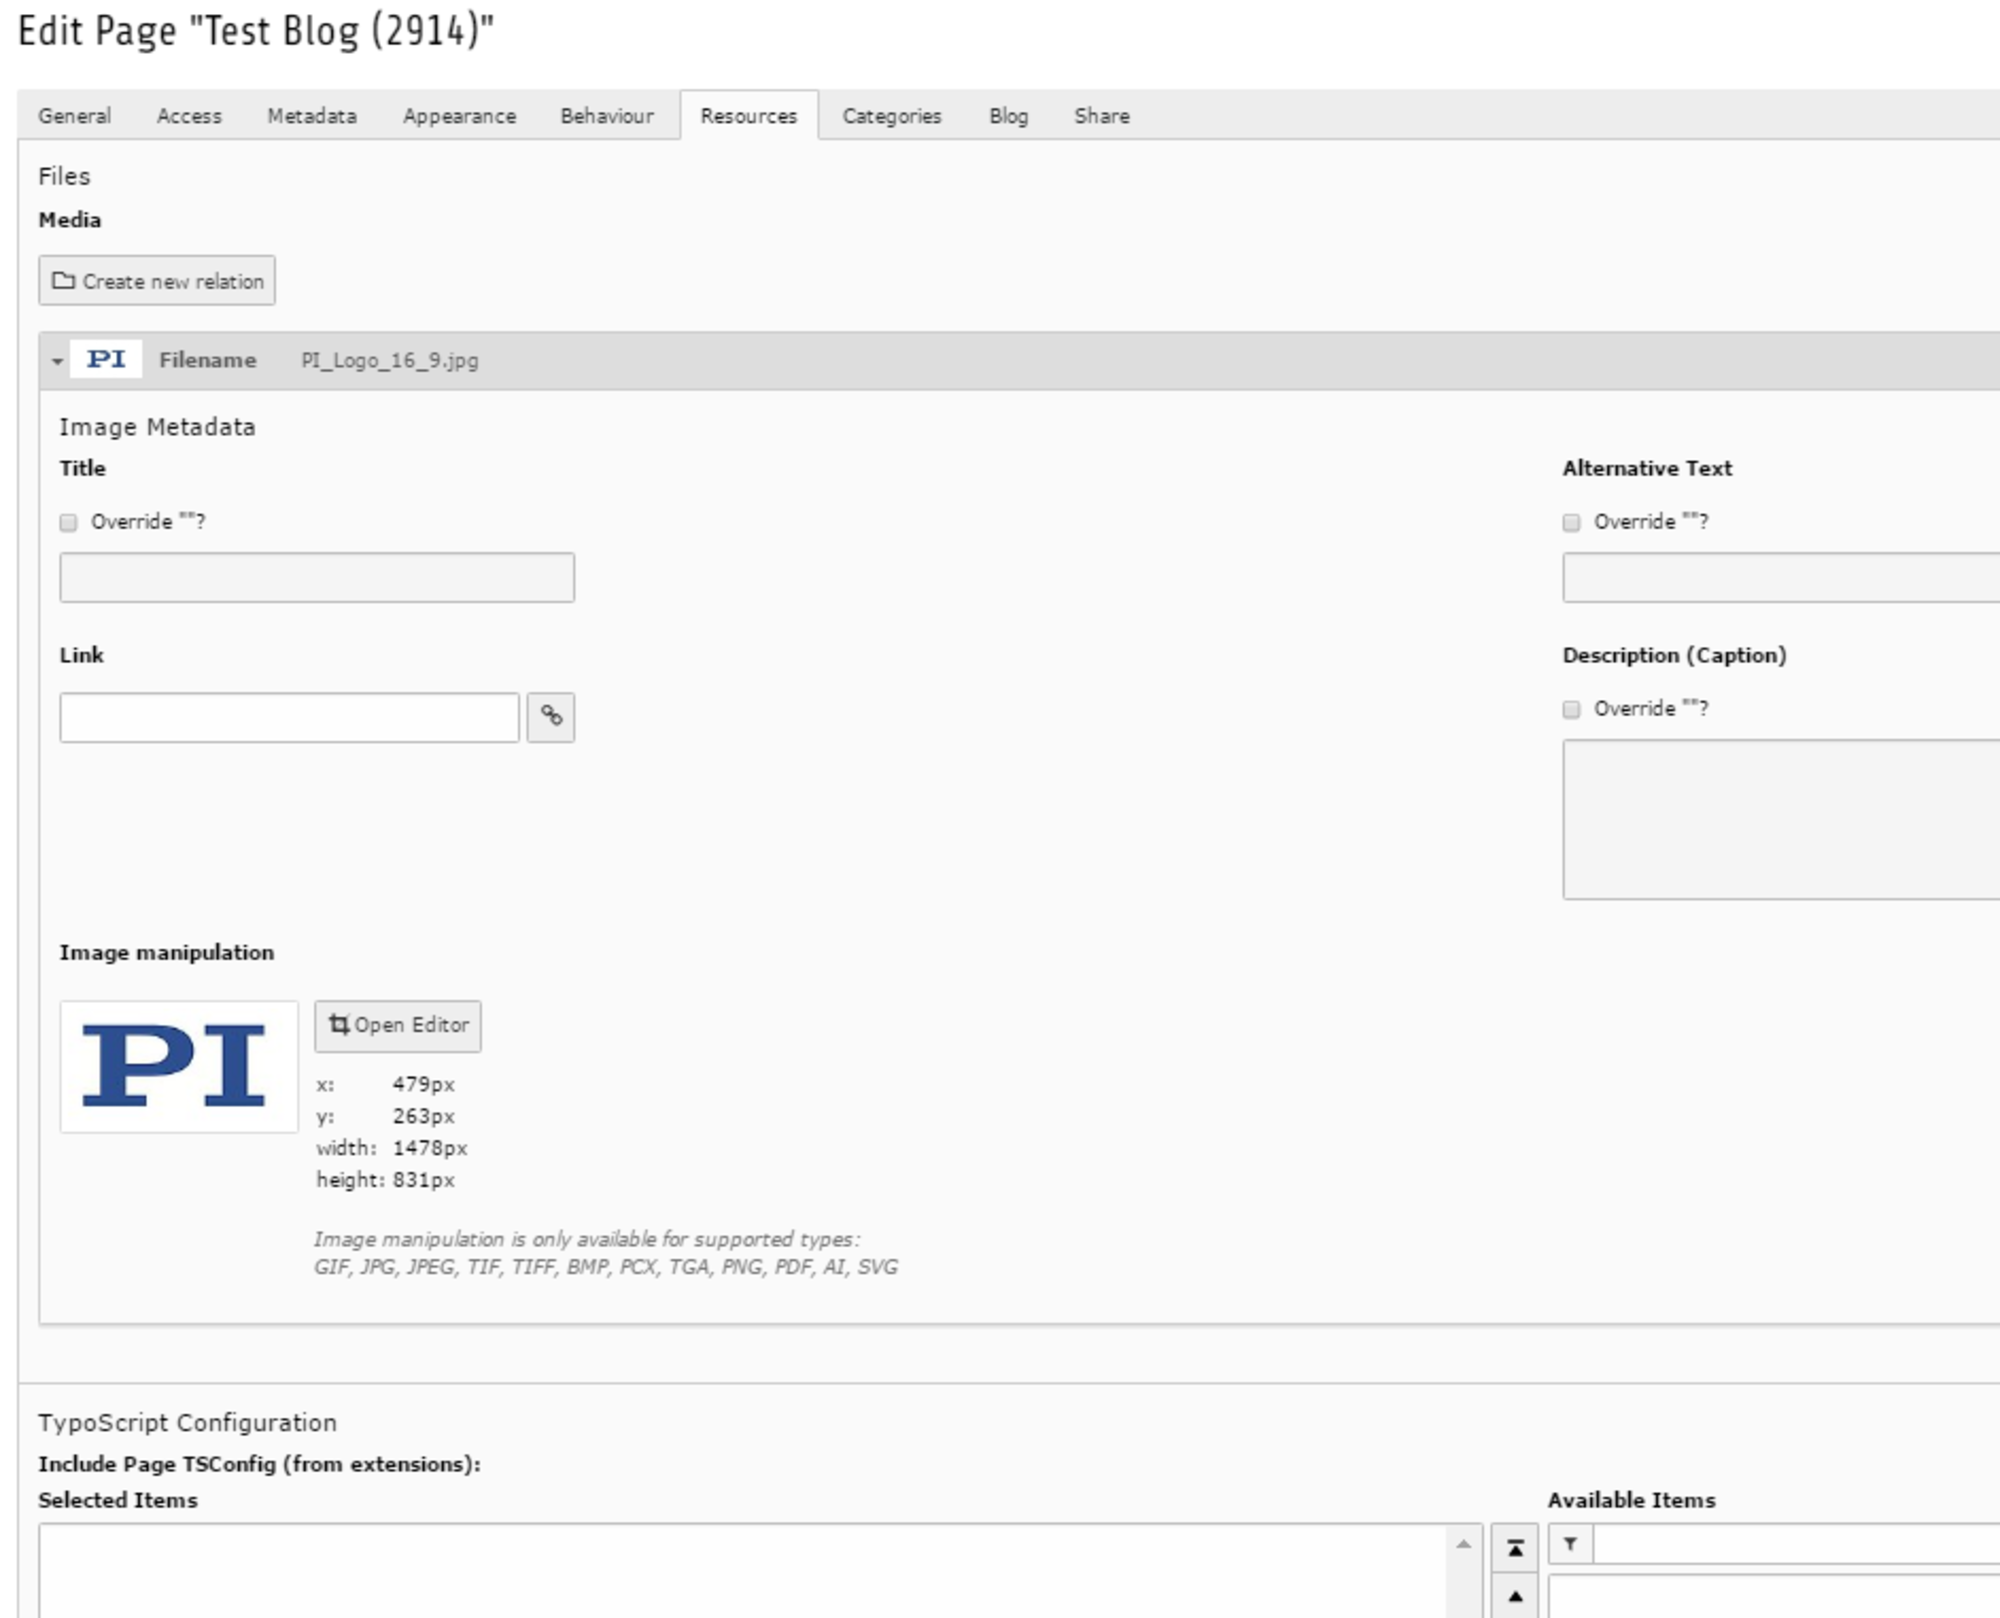
- The picture can be added by the resource picture and has to be 16:9.
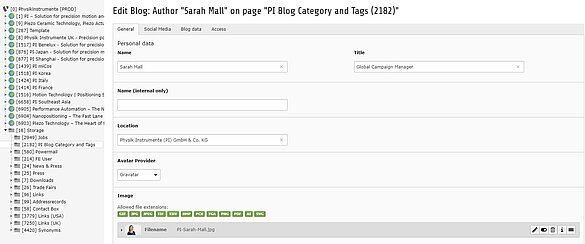
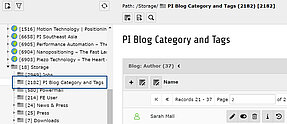
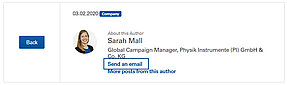
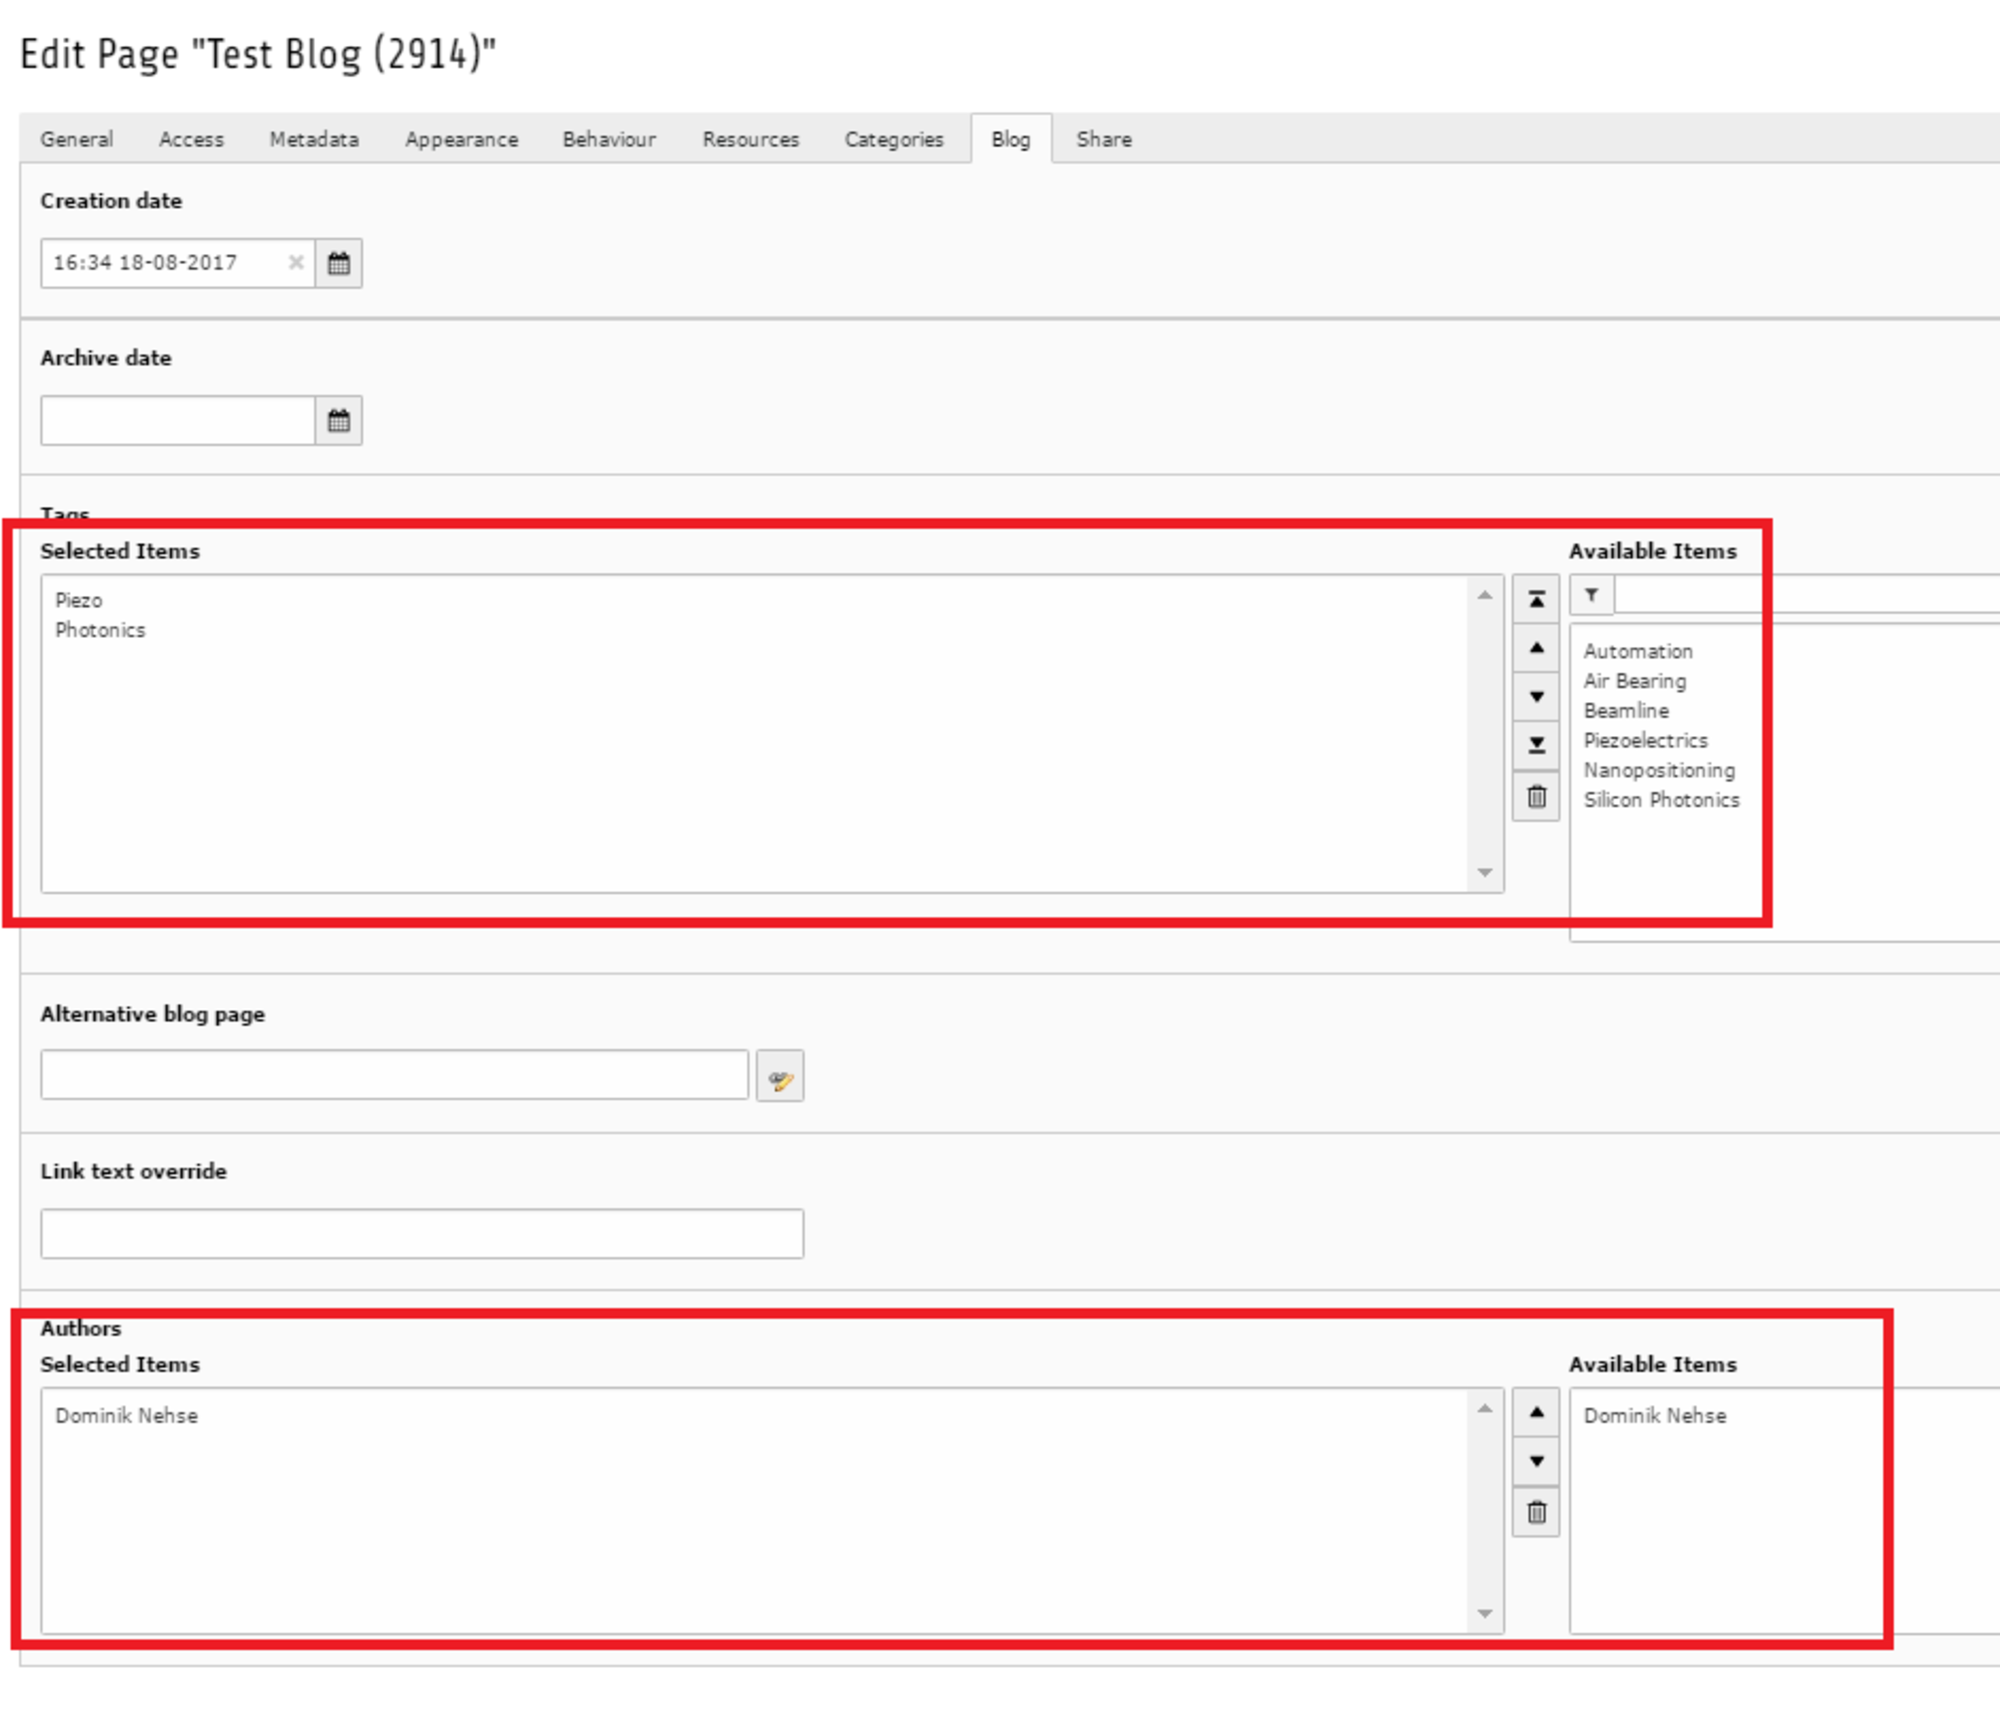
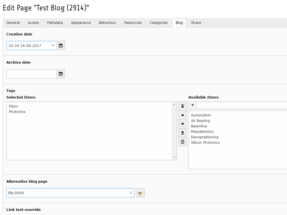
- In tab Blog the author and the Tags (grey ones) can be added.
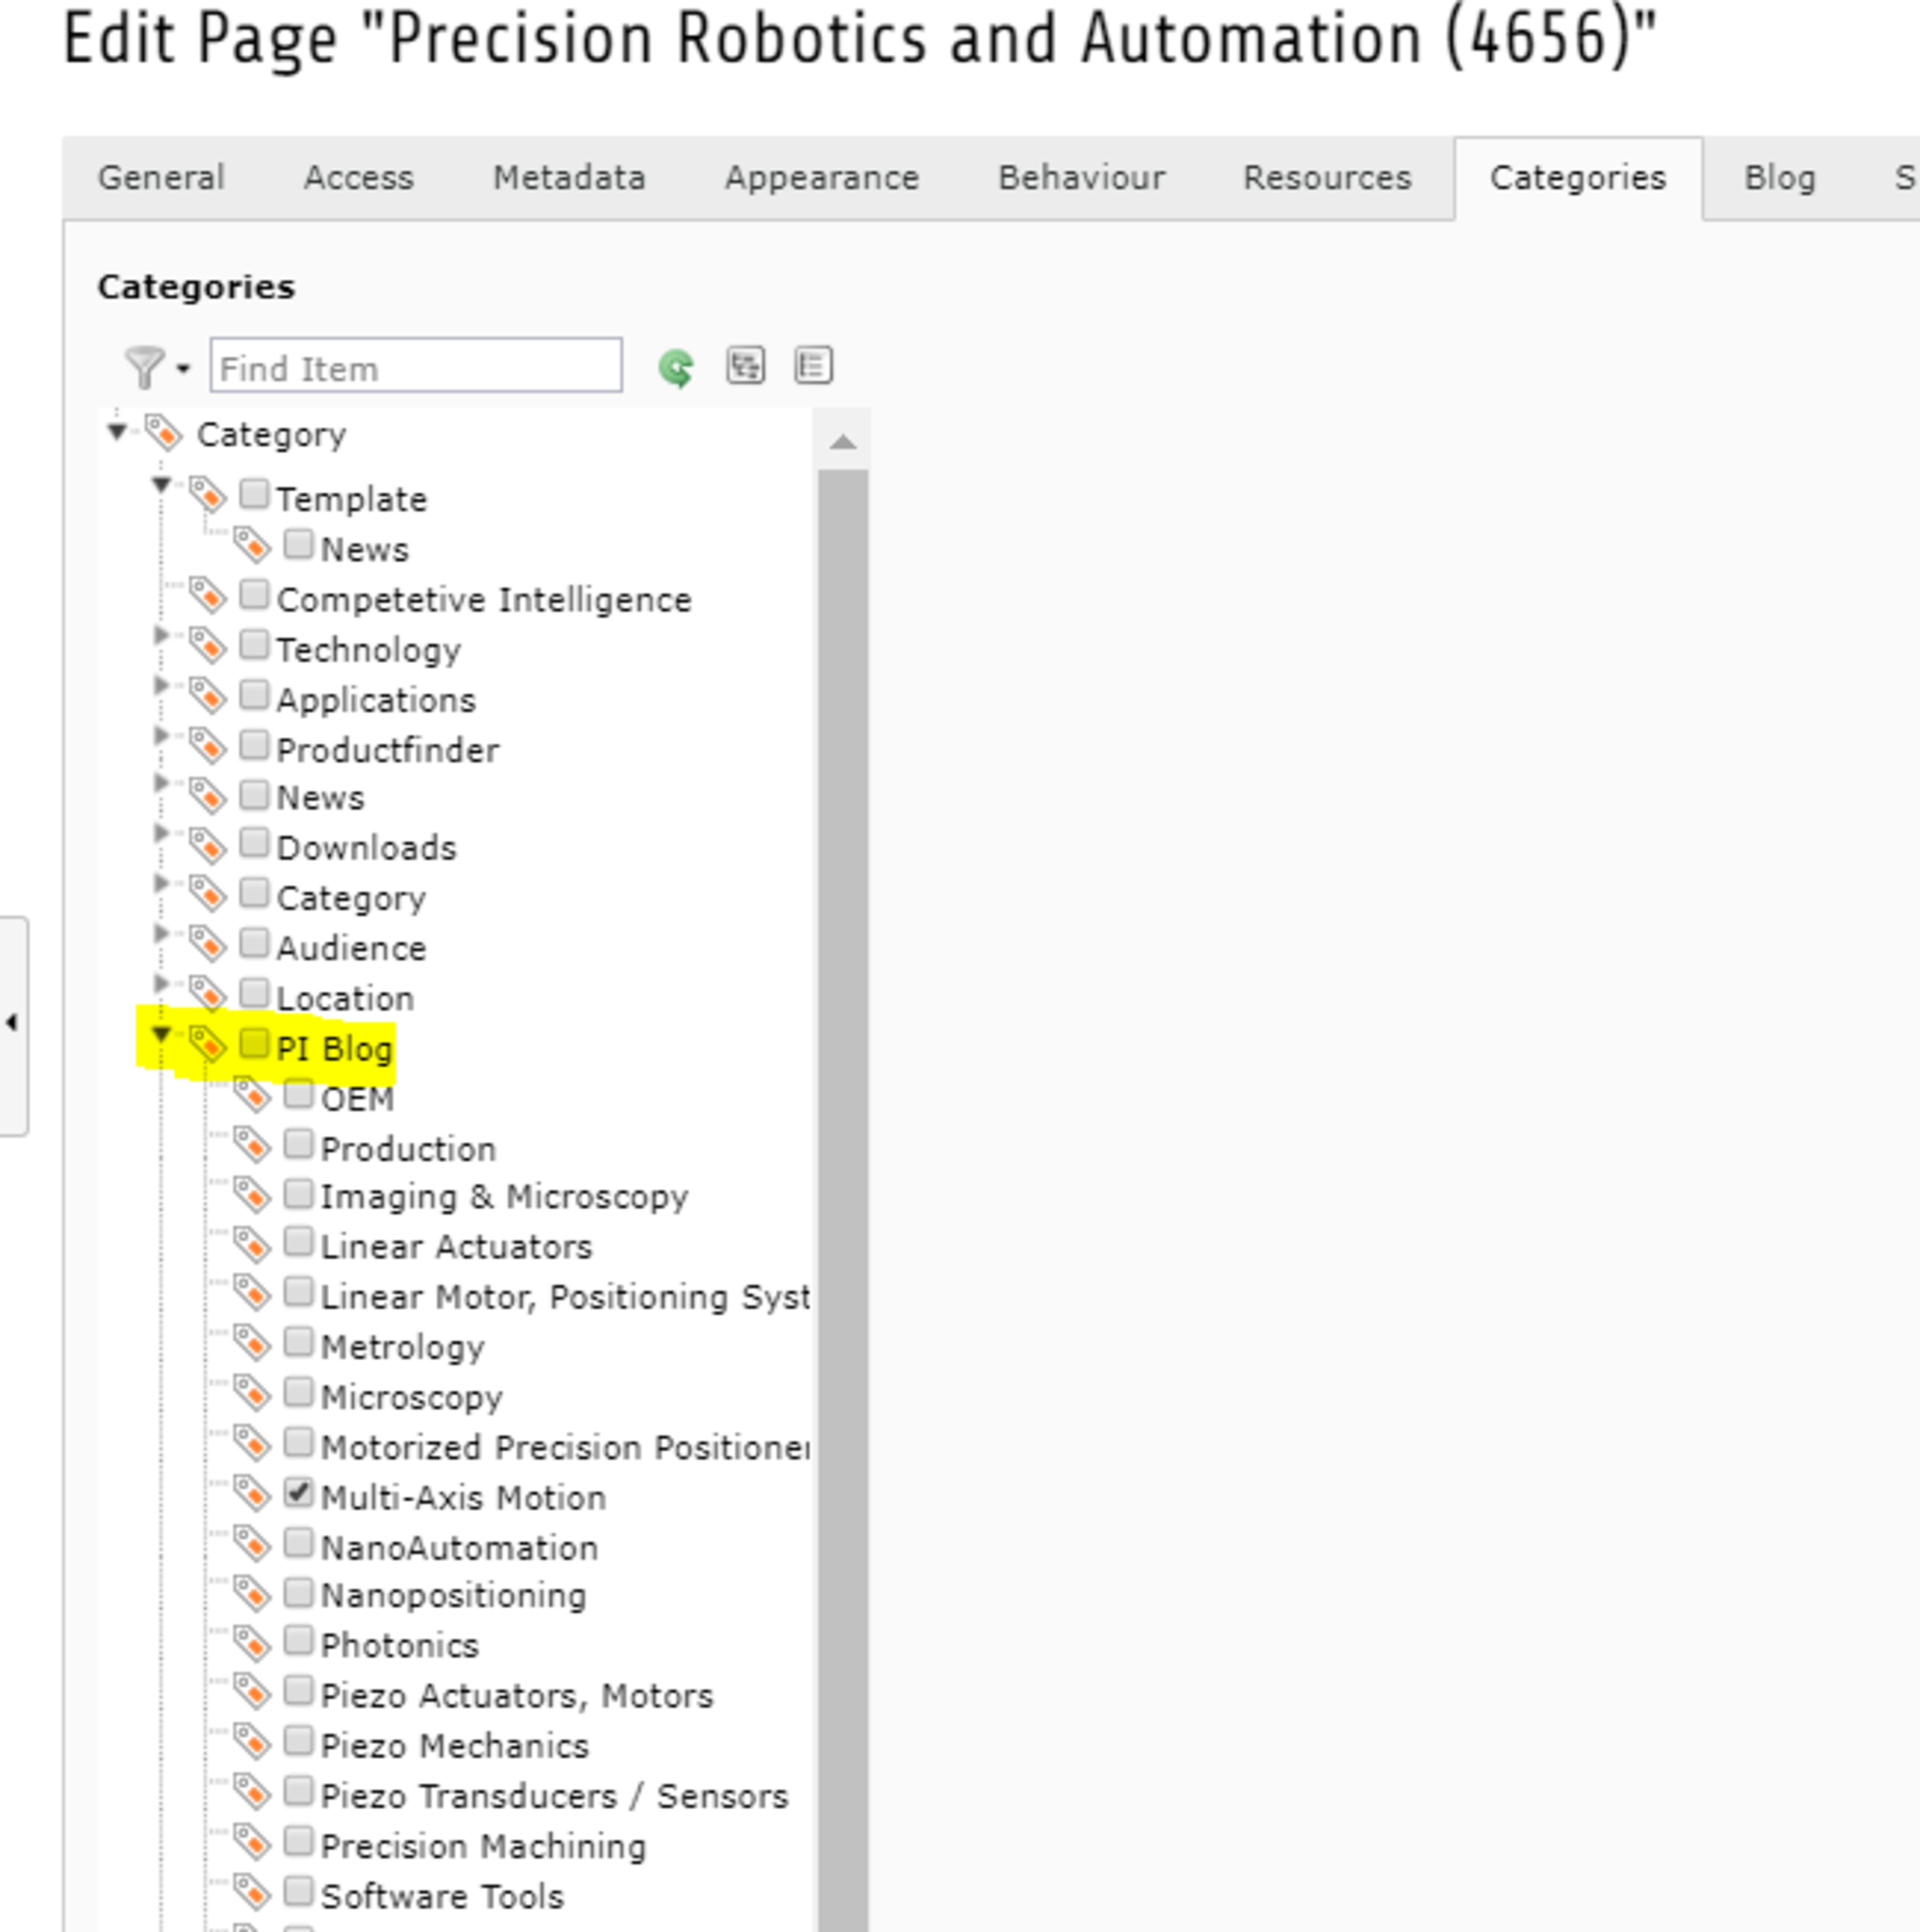
- In tab Categories the Blog Categories (blue ones) can be added.
Tags and Categories
- Please note that there are already a lot of categories and we do not want add thousand more. Nevertheless should it be necessary to add some please contact Katrin Wilhelm to do so.
- Aim is to classify the Blog Articles into a few superrdinated themes.
- Tags can be added if needed and should be more specific.
Note
- Please make sure that there is always a Page Title and Teaser Text.
- The ressource Picture should to be used in the article again.
- Your article should consist of a teaser text ( this one can be more than 50 words) and a picture.
- The main body, can have further sub headlines in H2 style.
To avoid problems with the Google search you need to indicate which is the original page whenever you are copying the same content or at least 80% of the content of a page.
- When a blog article appears under the PI.com root node in the CMS, you always need to include that as hreflang (even if the article was originally posted from the US for example). As the PI.com site is the first one in the page tree of the CMS which is the crucial factor for blog articles. That means, even if the blog article is for example originally from the US root node, the US needs to set the PI.com page as the hreflang.
- When the article is not used under the PI.com root node, you don't have to include a hreflang.
A practical example:
- Original article from the US, Japan is copying this article, no copy on the PI.com site -> no hreflang needed.
- Original article from the US, PI Karlsruhe is copying the article, PI Japan is copying the article -> PI USA and PI Japan need to add the article from the PI.com site as hreflang.
- You can add the hreflang as follows:
- Navigate to the “Metadata” tab of the blog article and add the blog article from the PI.com root node as hreflang:

Specificity When Copying US Posts
These steps must be followed when you copy a blog post from the US site:
- We need to copy the US post to the PI KA page tree (we will keep it disabled).
- You should then add the blog post that was copied into our page tree as hreflang.
- Do not use the canonical. the canonical should show "same page".
- Remove the "no index".

- In case you set up a blog post in English and want to show this language version on both languages of you website it is quite simple. Just translate and the English post will be dsiplayed on both sides.
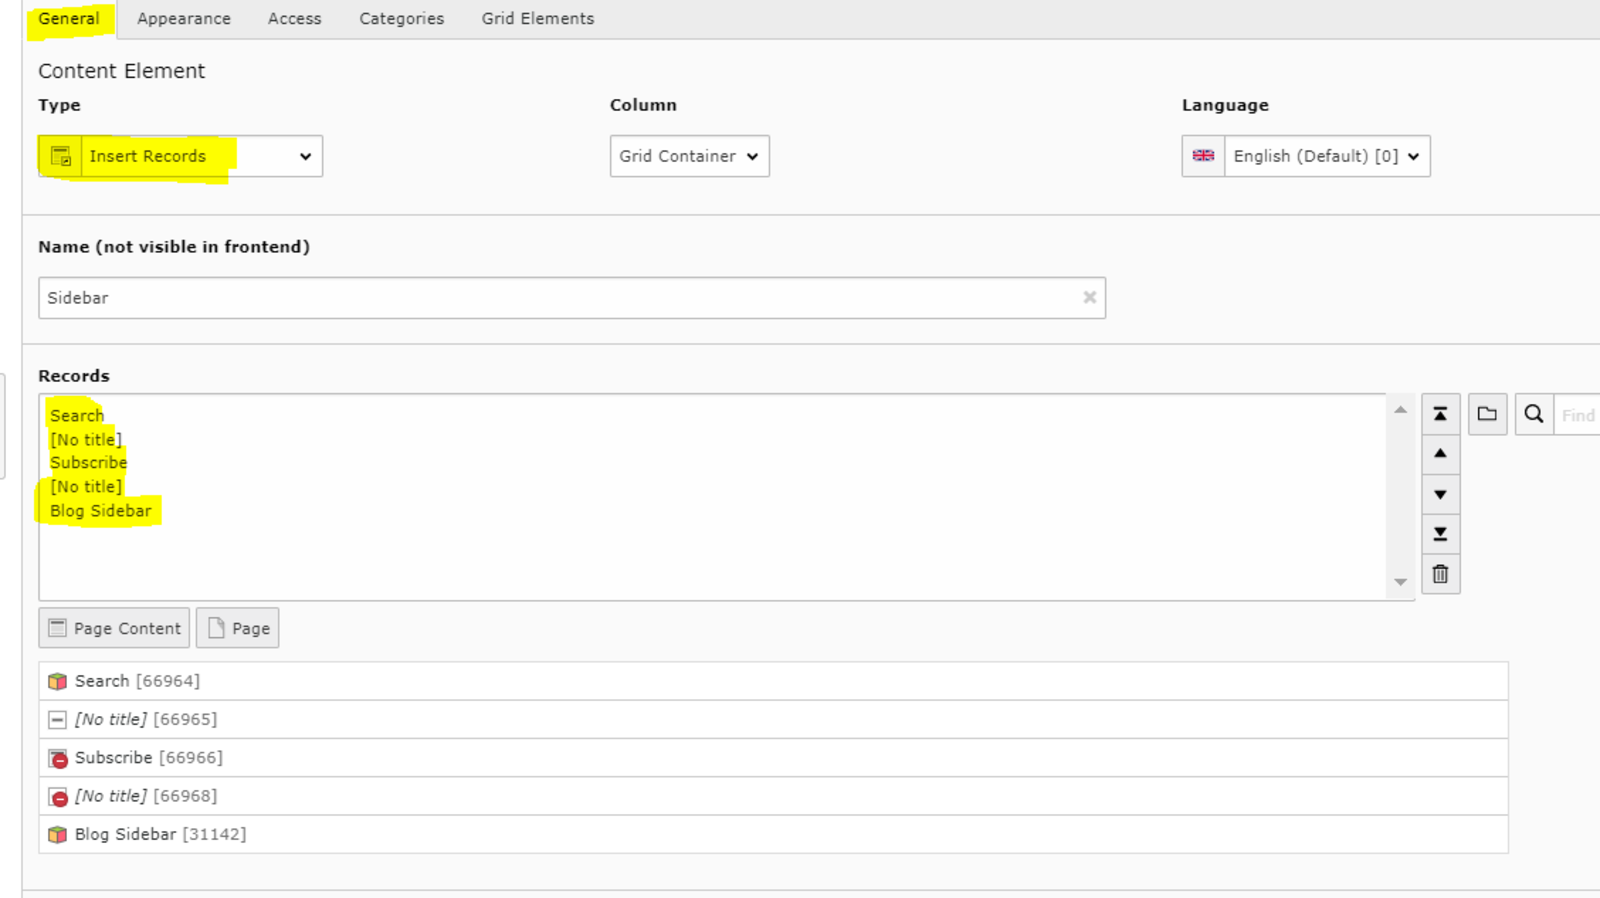
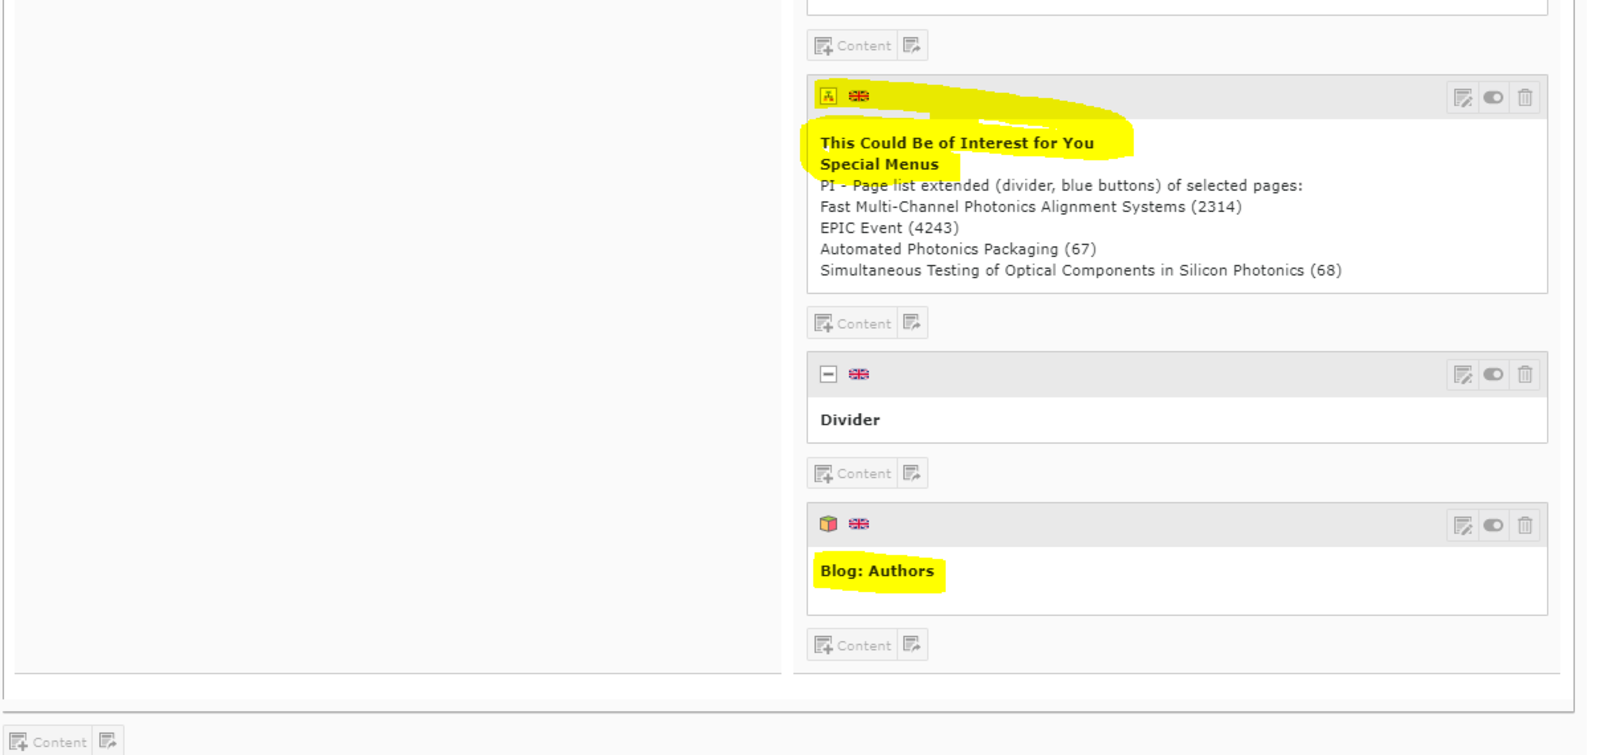
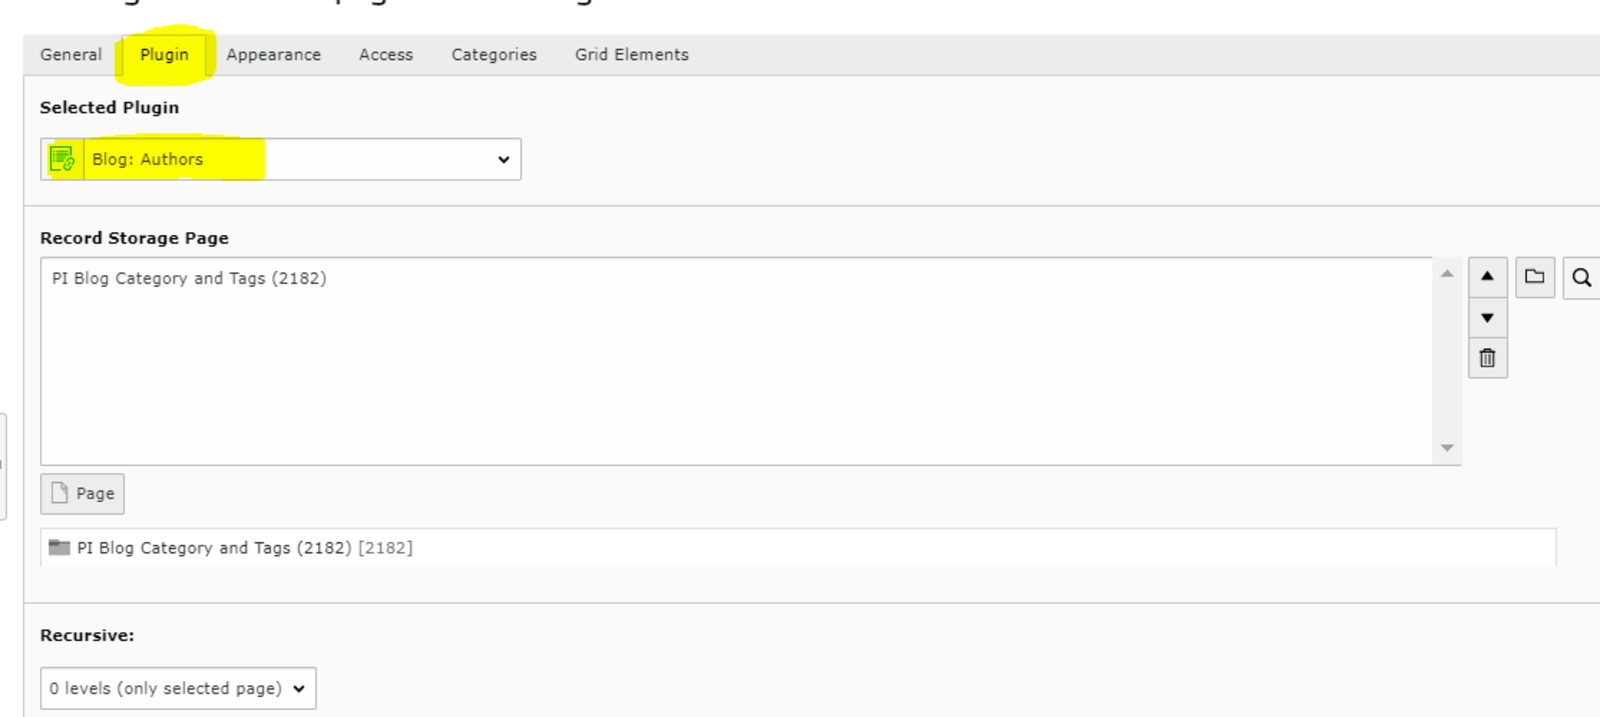
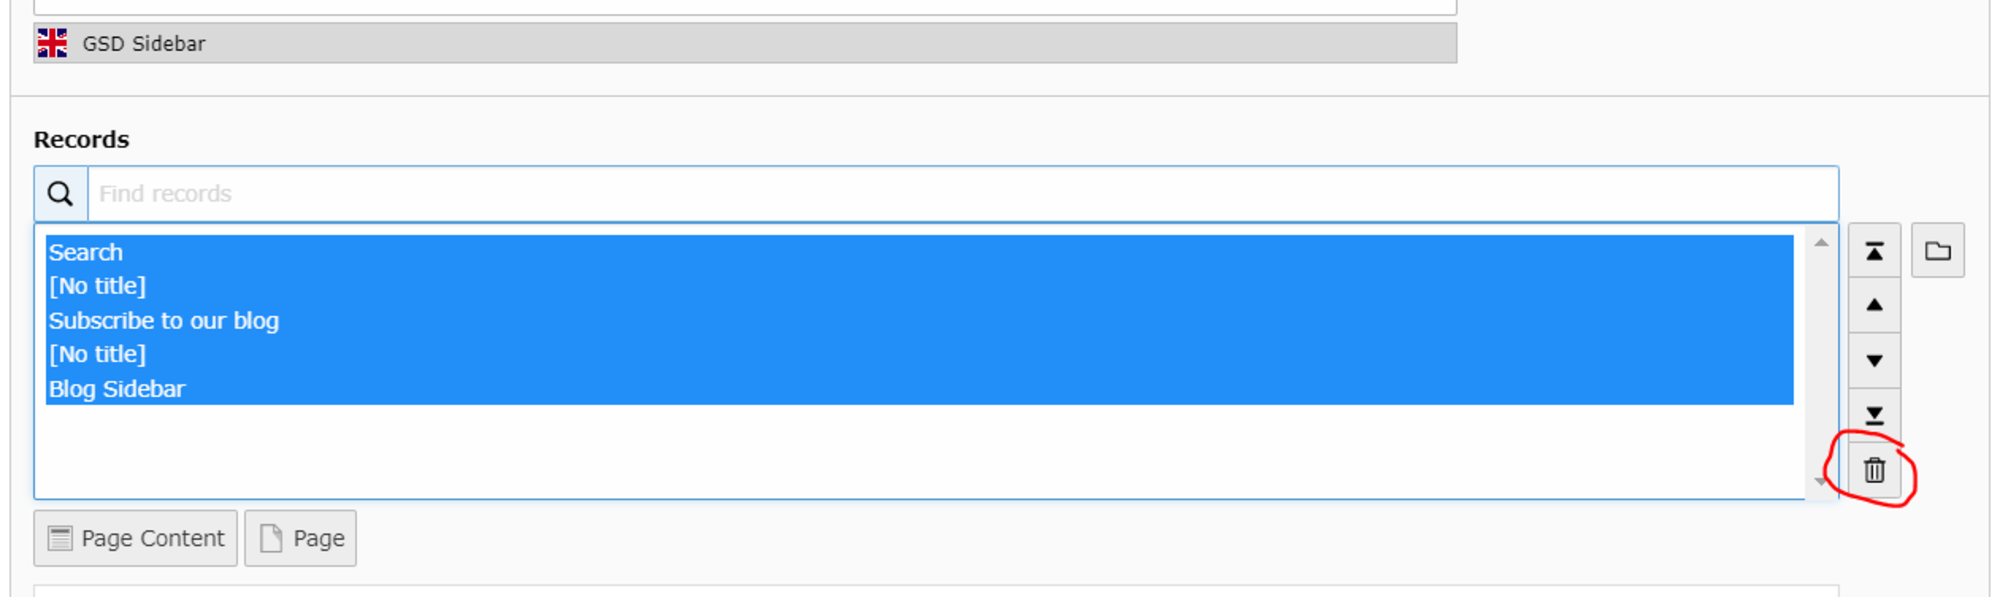
- Nevertheless do not for get to translate your sidebar:
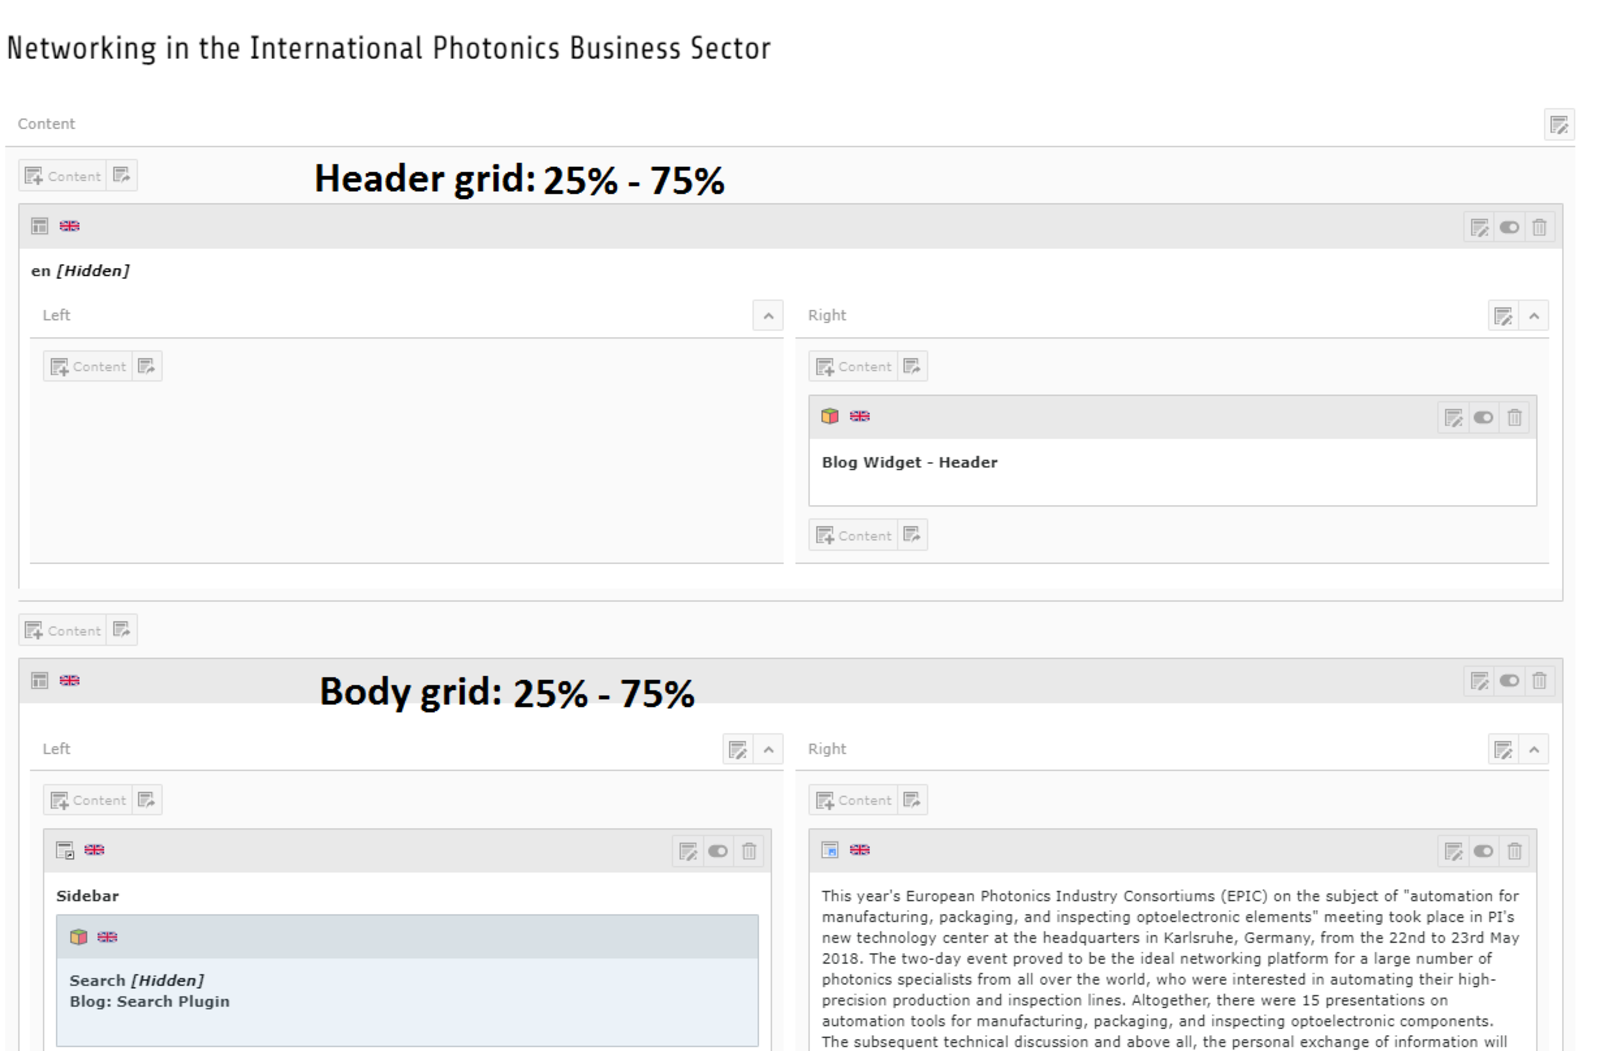
Change English side bar in the translation column to your native language:
1. Click the pen to edit (Fig. 1)
2. Select all records and delete them (Fig. 2)
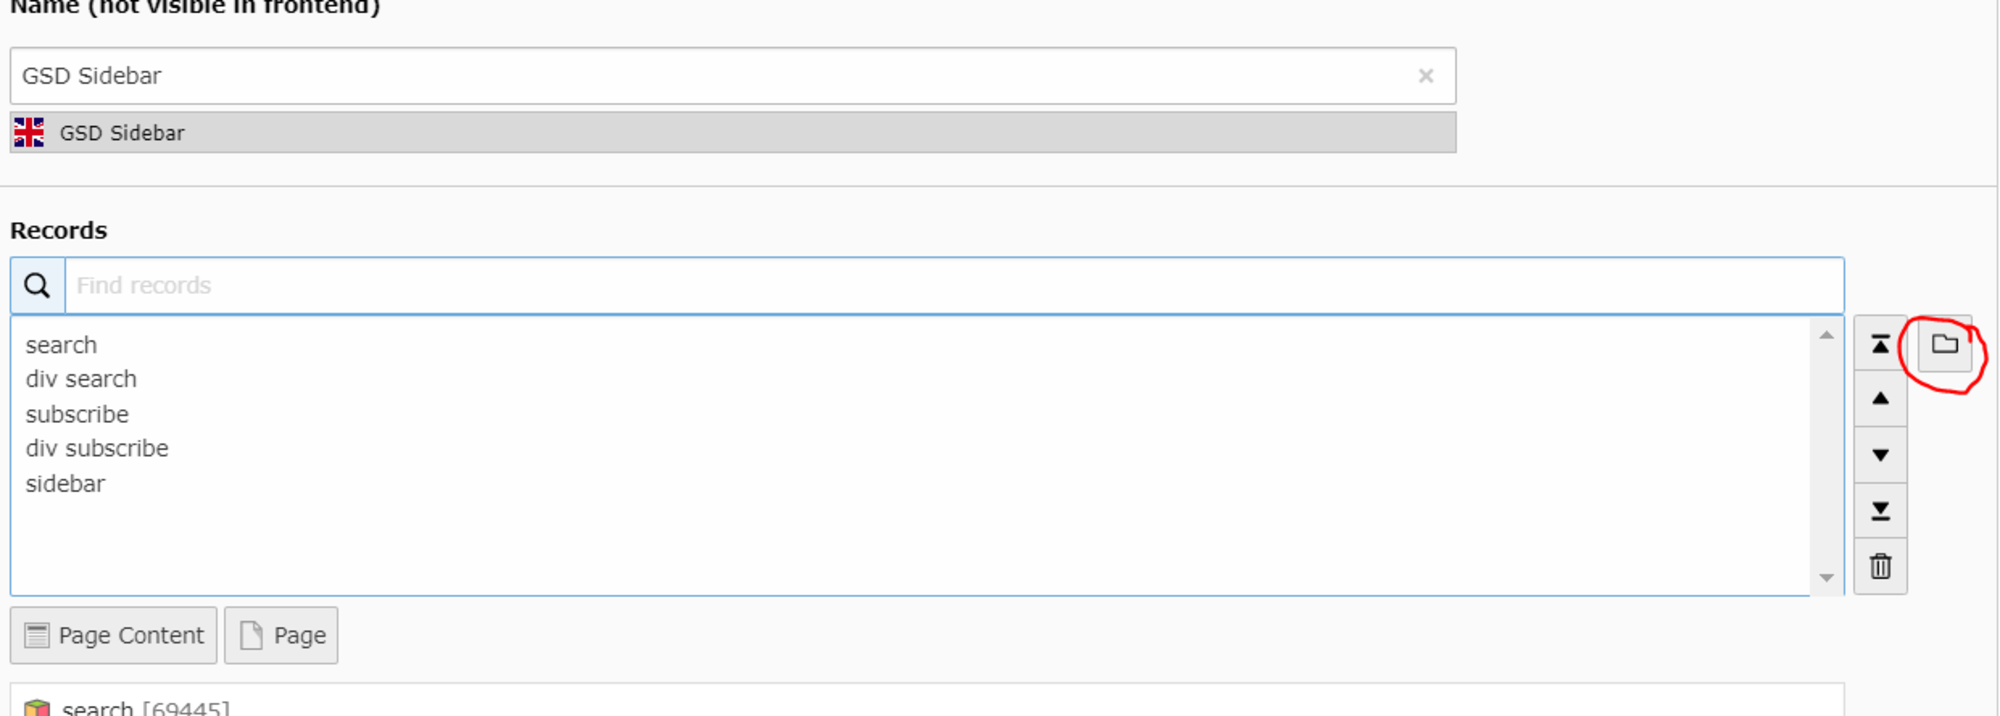
3. Select the translated records by clicking the folder icon (Fig. 3)
4. Select your PI blog overview page (Fig. 4)
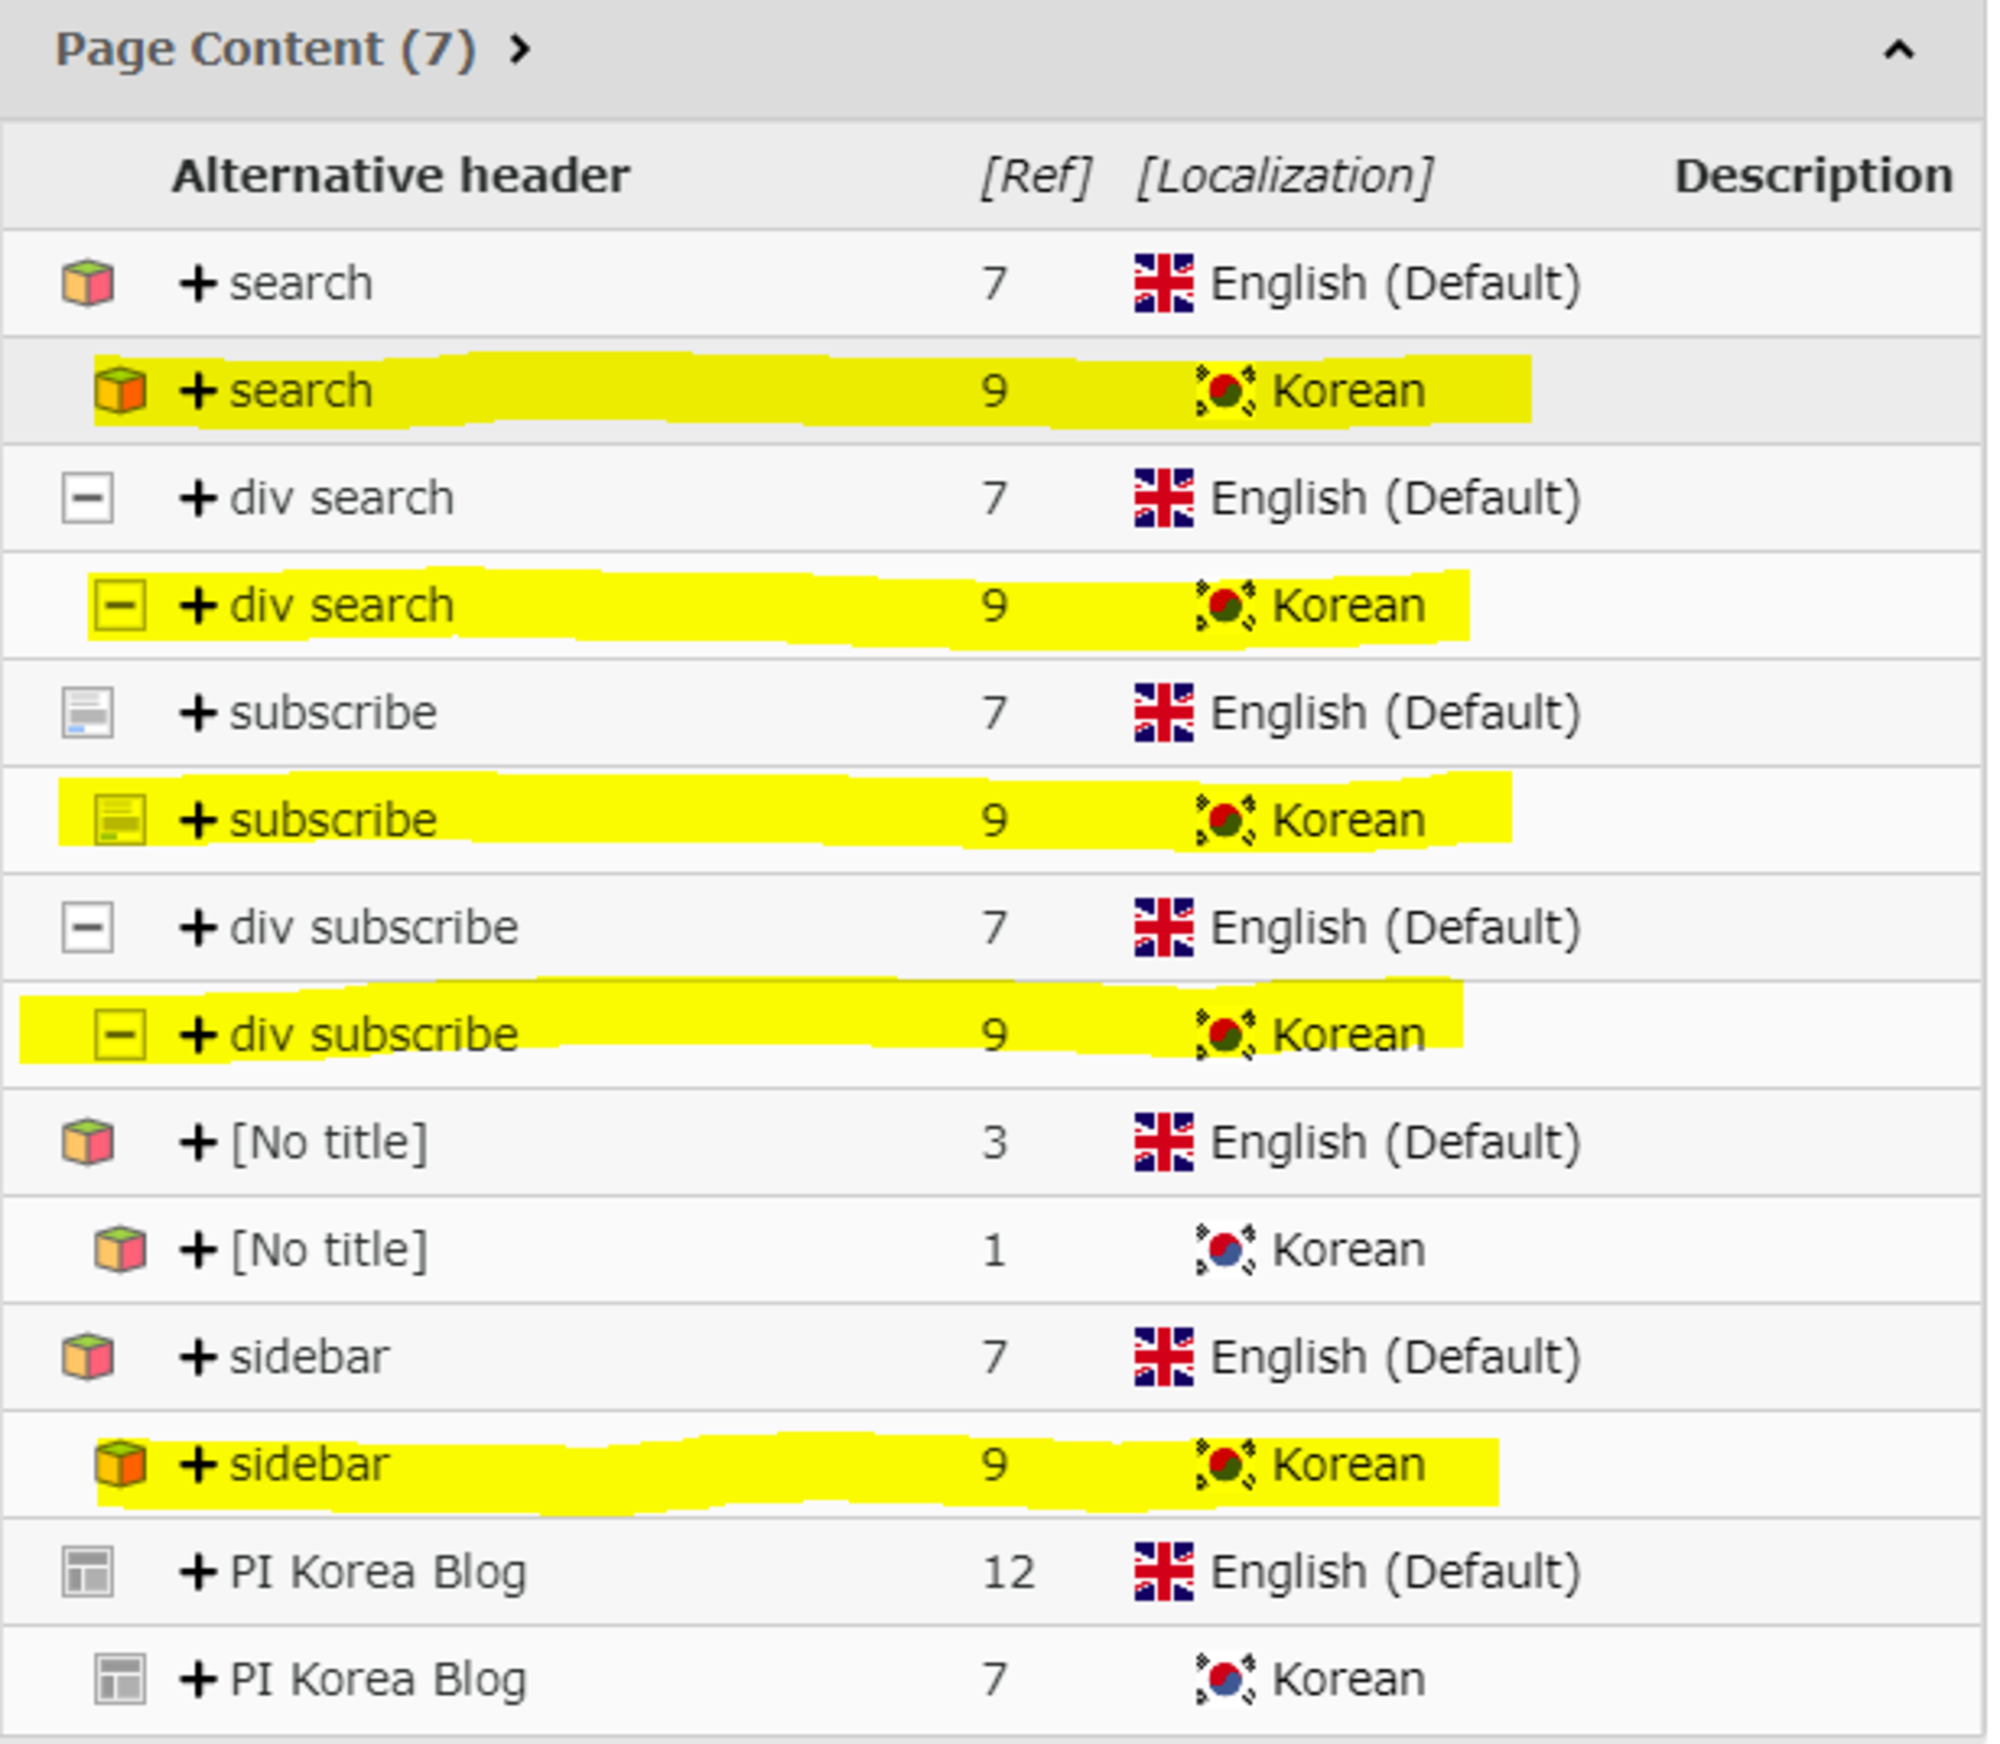
5. Scroll down to the Page Content section and select as following (Fig. 5)
6. Save and close


Blog category pages
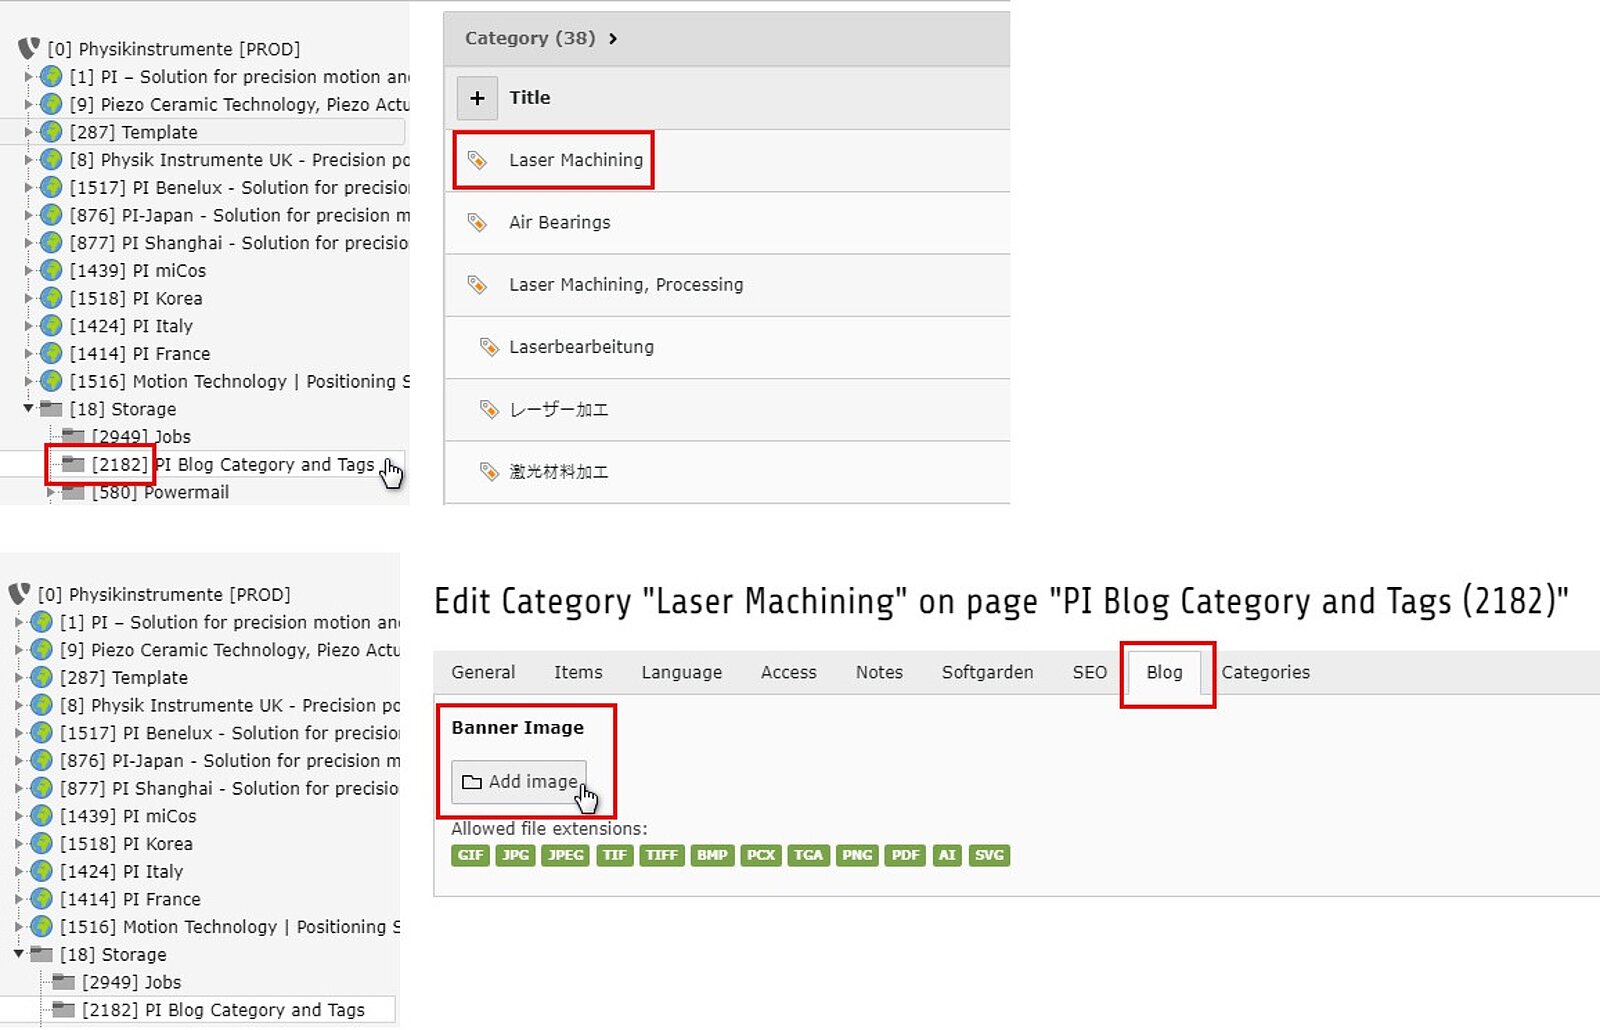
You can add overview banners to your blog category pages.
You can find an example here: PI Test Blog - Category
Upload the banner in the storage on page [2182]:
- Select the category on whose overview page the banner should appear.
- Choose the tab "Blog" and upload the banner using the "Add image" button.
- The banner needs to have a minimum size of 1060 x 200 px as otherwise it will be blurry.
- The correct aspect ratio is selected automatically.
The banner does not appear automatically on all domains.
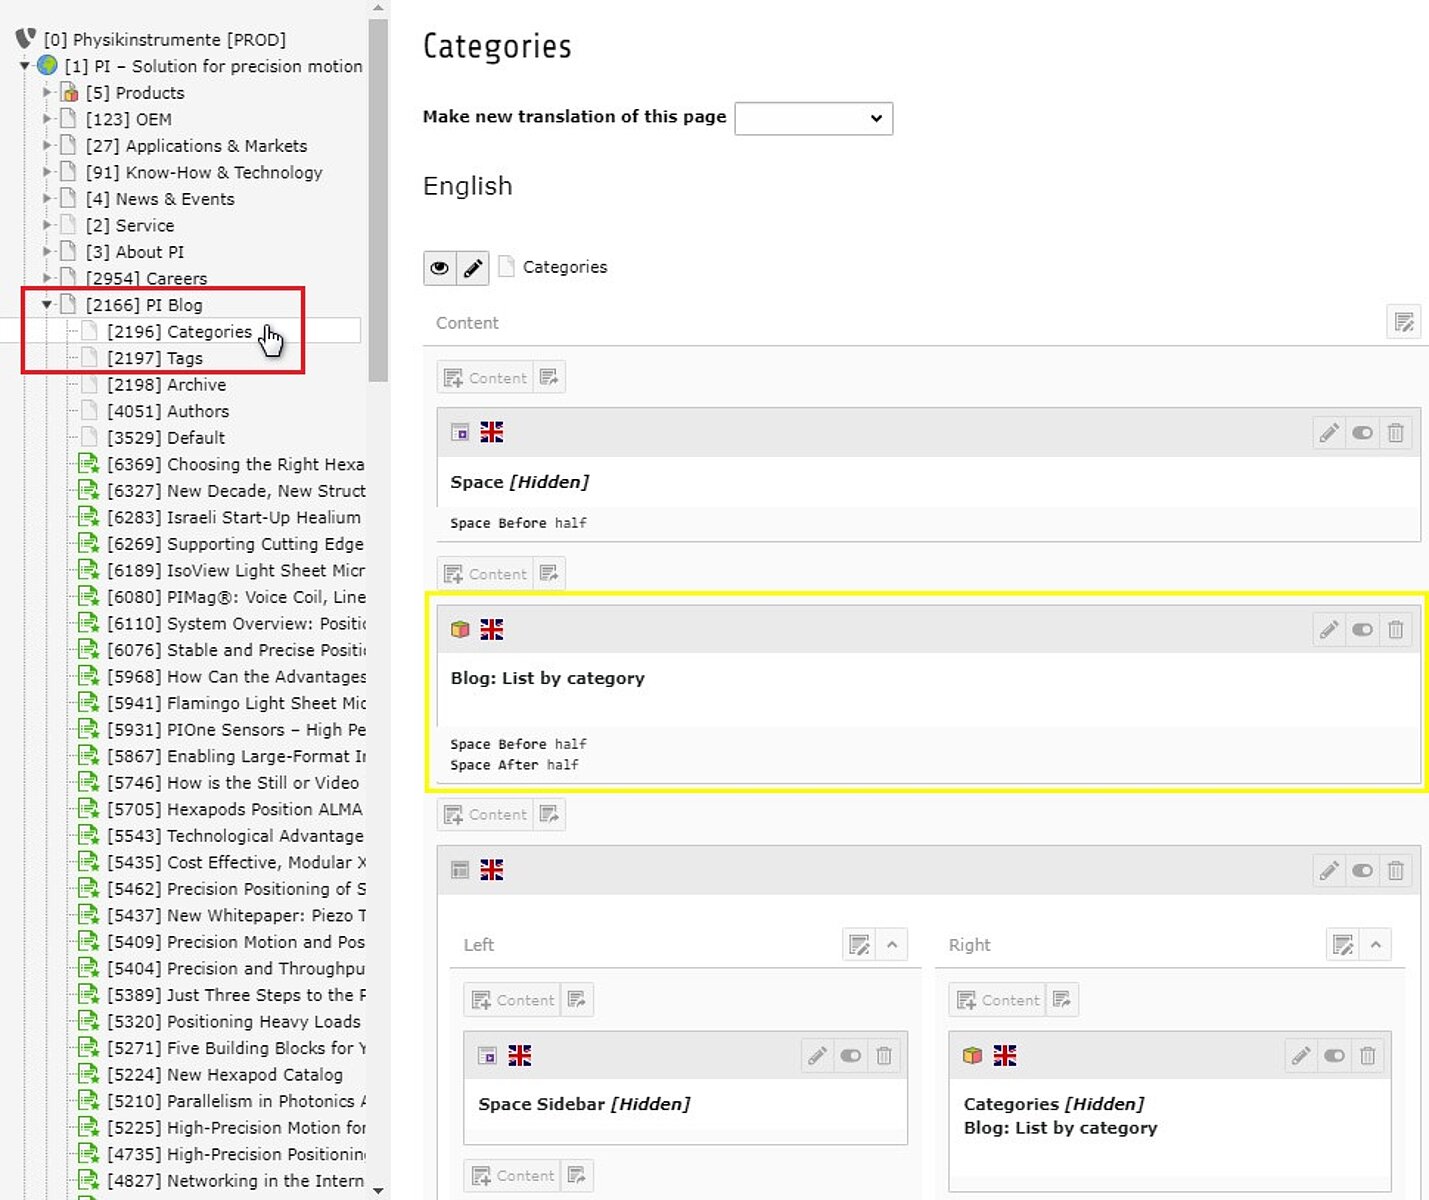
To have it displayed on your domain:
- Go to the "Categories" page of your local blog (e.g. [2196] for the PI Karlsruhe blog).
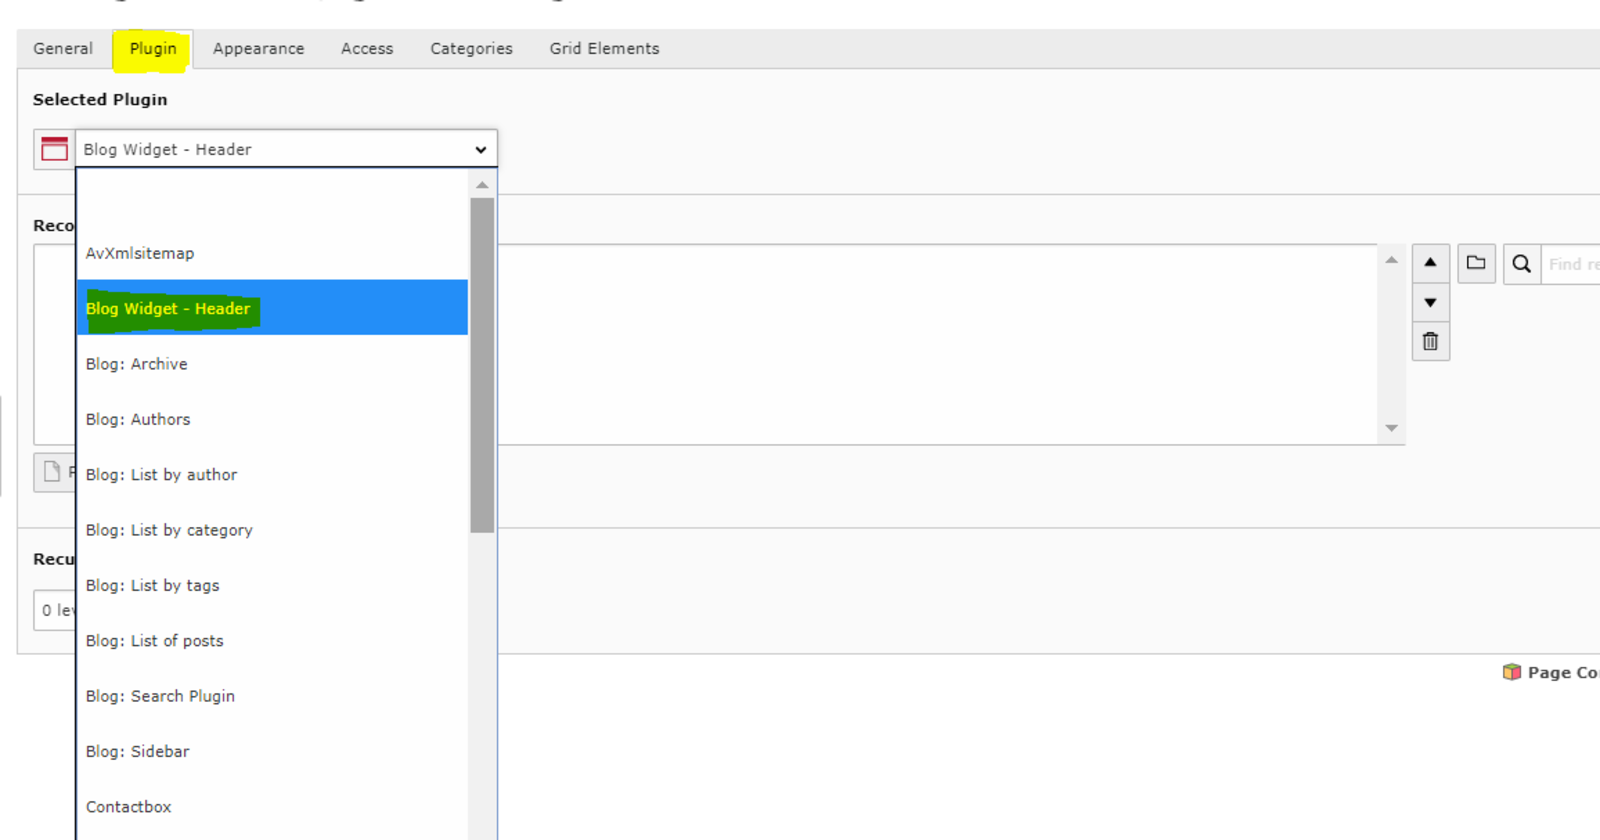
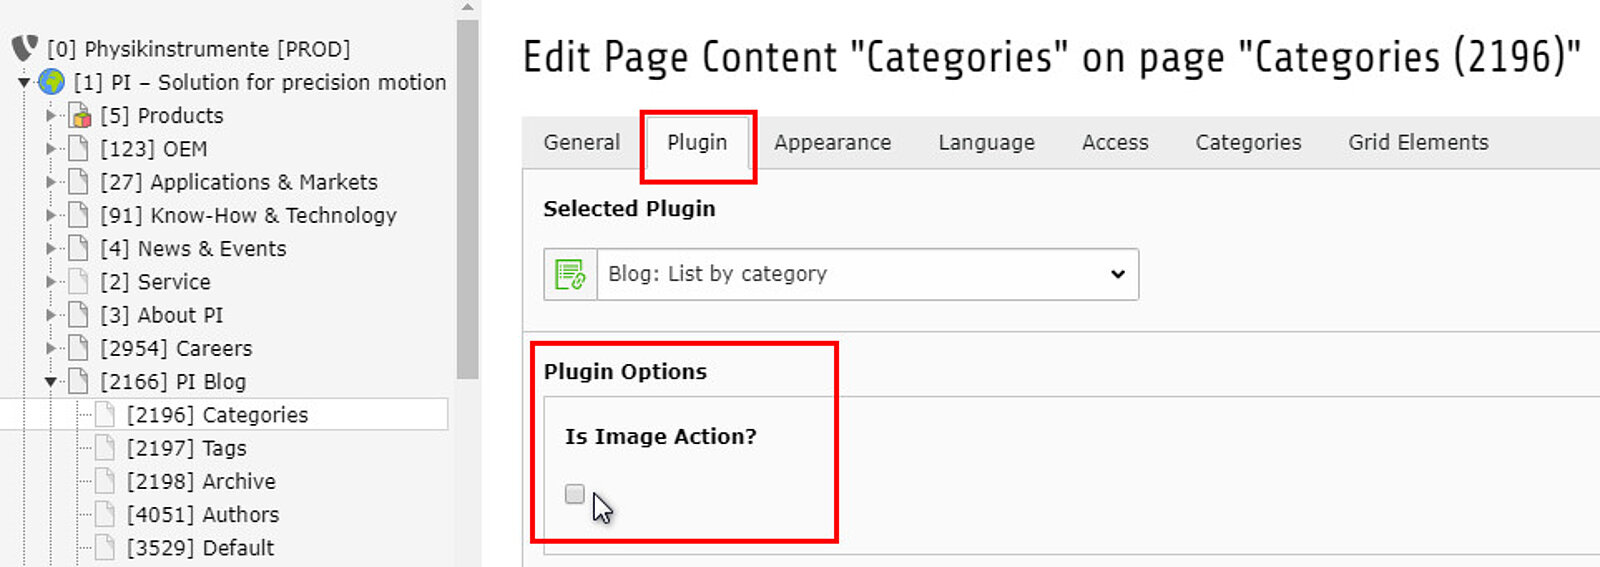
- Create a new content box "Blog: List by category" on the page (marked in yellow).
- Navigate to the tab "Plugin" and activate the checkbox "Is Image Action?" under "Plugin Options".
- The banner will appear on the category page.