Creating new forms
Creating new forms
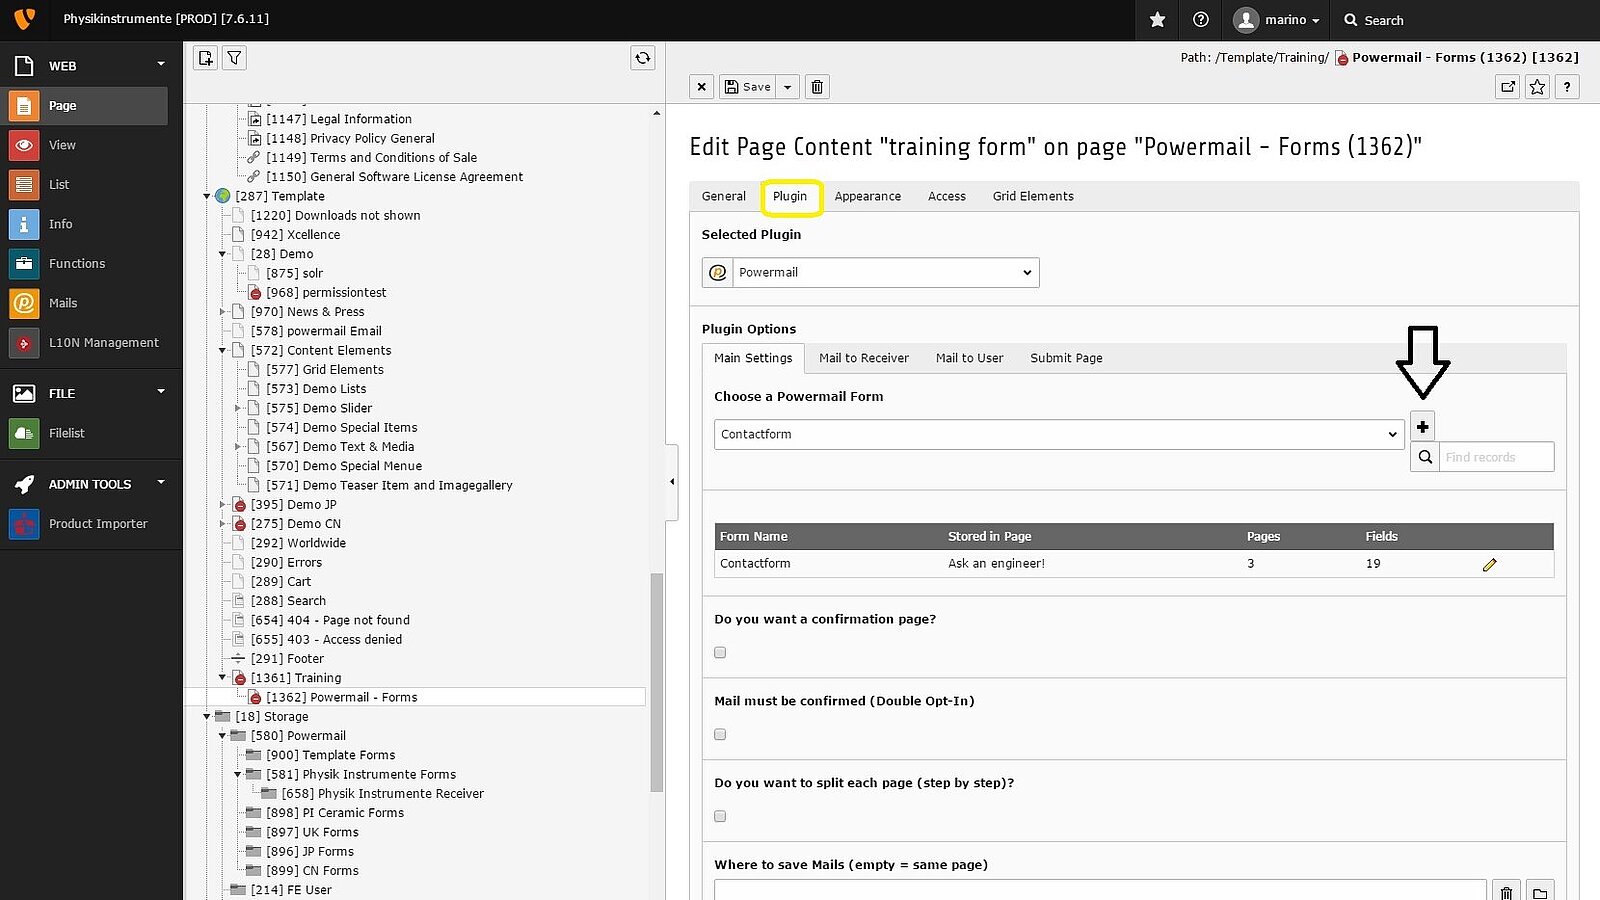
To create your own forms, you can click the button "+", indicated by the black arrow and choose "Create new form".
Setting the titles, subtitles, and the first field of your form
Setting the titles, subtitles, and the first field of your form
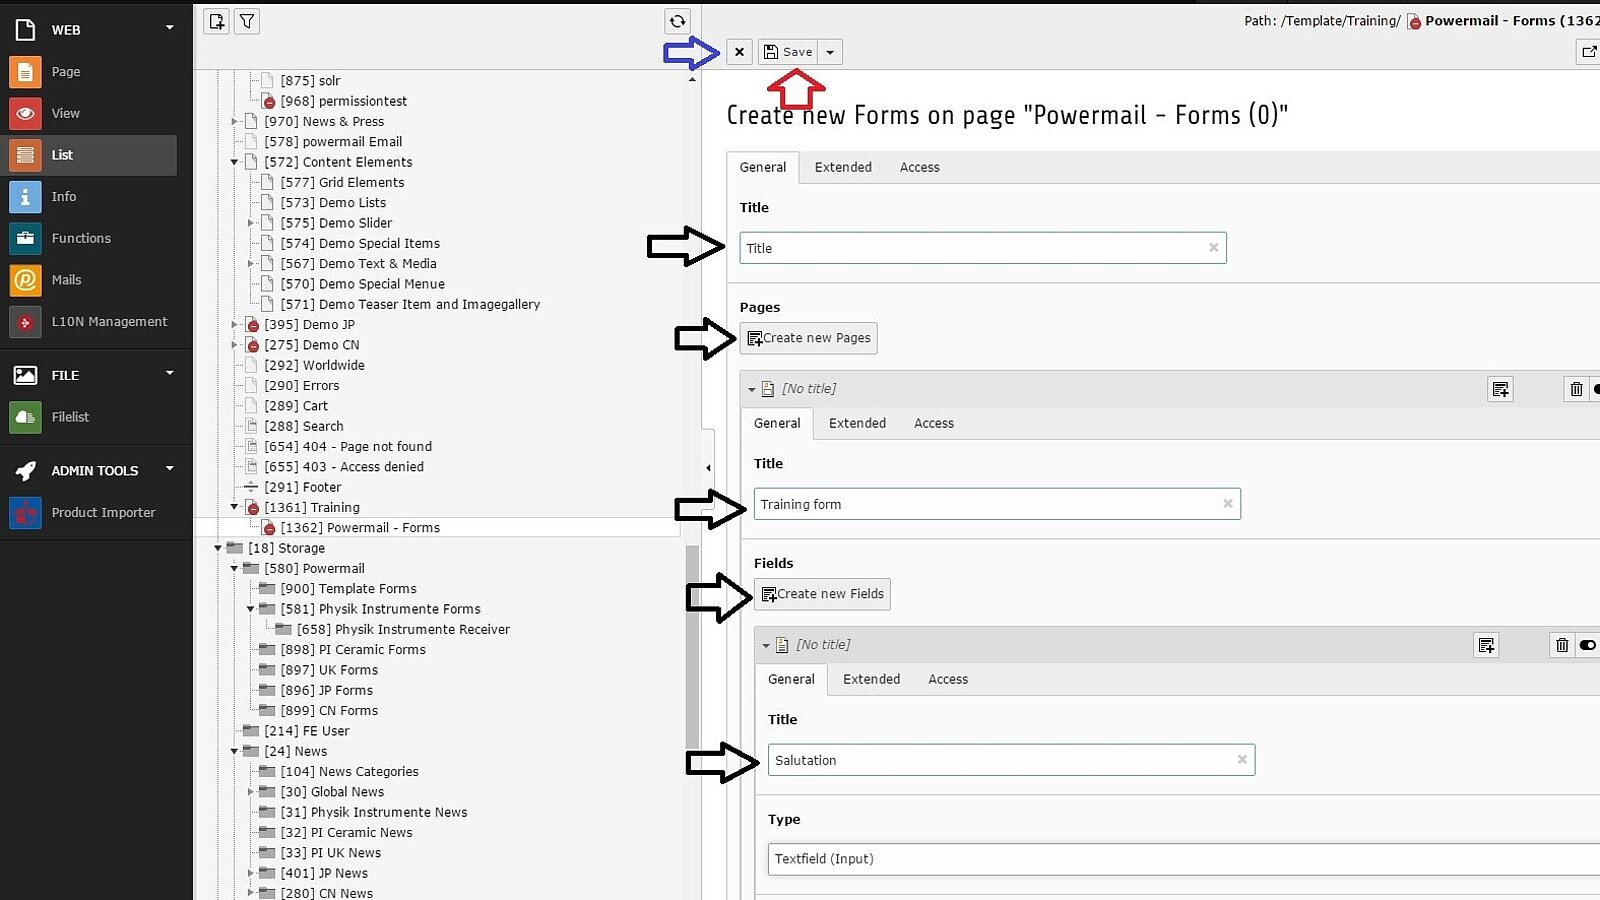
The "Title" indicated by the uppest black arrow is the name of the form - you won't see it online.
After setting this first "Title", you have to "Create new Pages", where you will indicate the subtitle of your form, in this case "Training form", which will be visible on your new page.
After that, you can start creating the fields of your form by clicking "Create new Fields" for each one you decide to create. More information about the single fields on the next images.
Setting up the fields of your form
Setting up the fields of your form
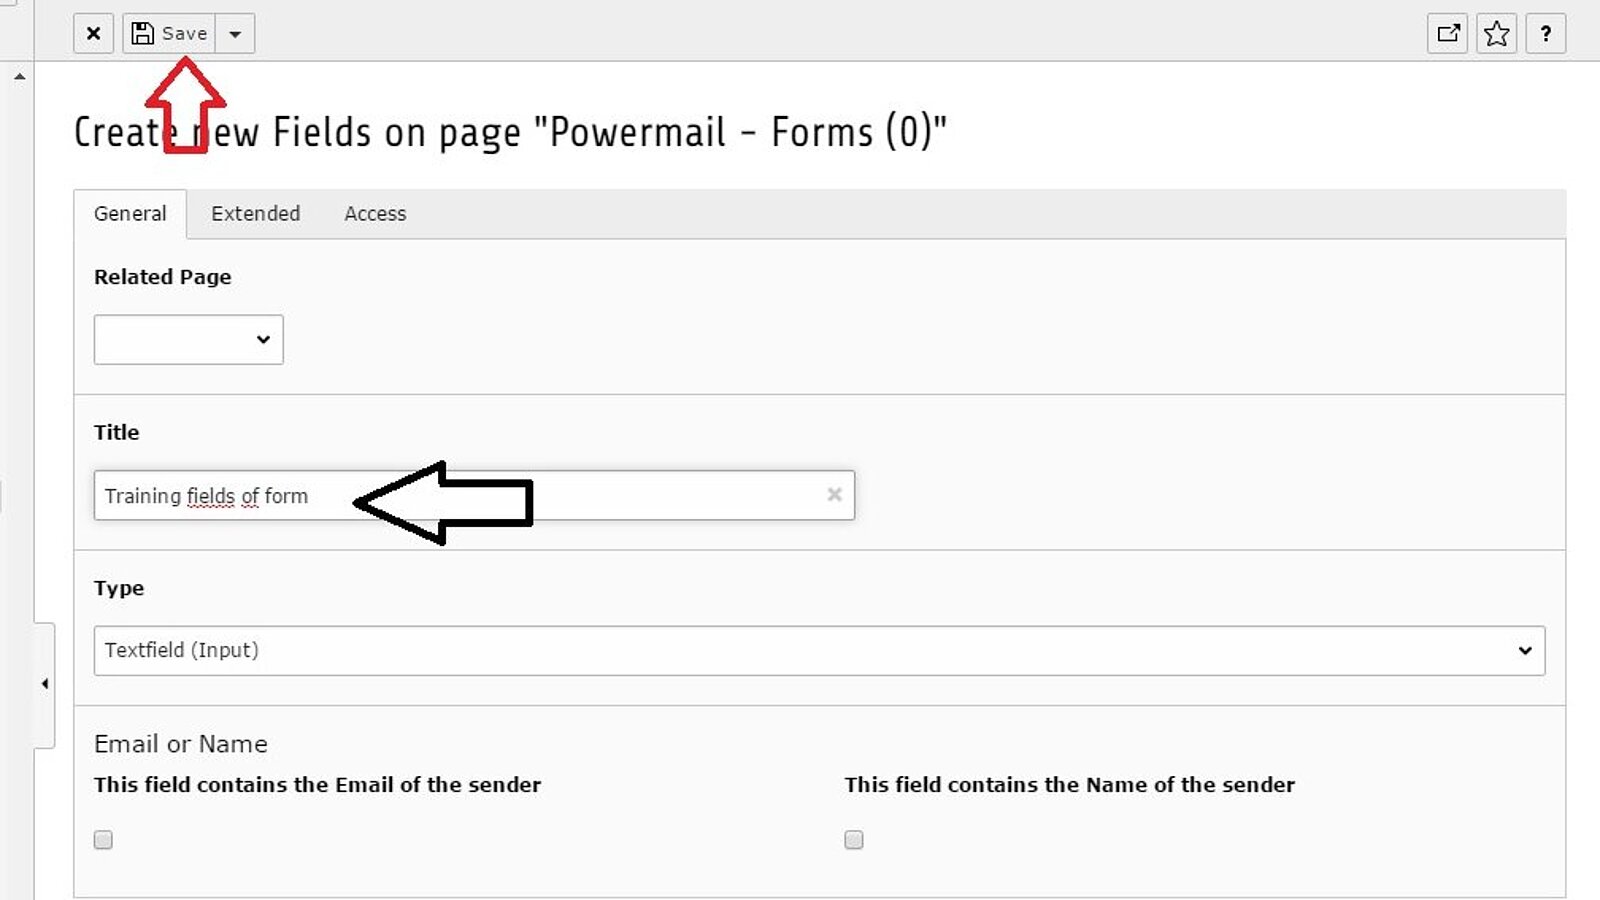
For each one of your form fields, you need to insert a title, in this case "Training fields of form". Normally you start with a "Salutation", or the "First Name", or "Last name".
Type of fields
Type of fields
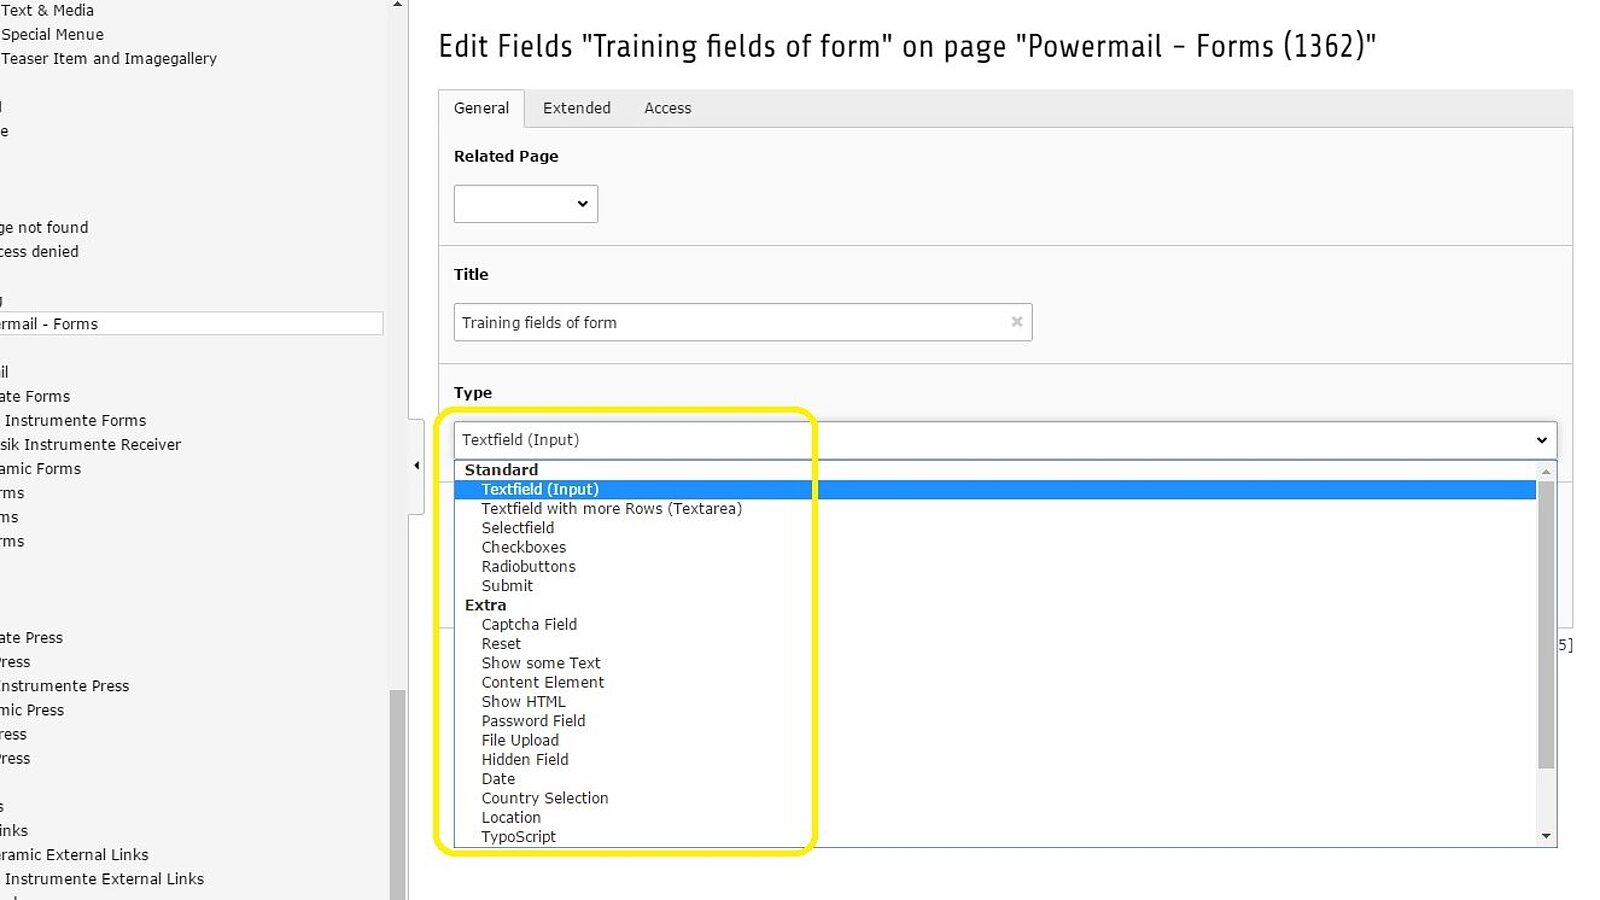
There are many different type of fields. For example, for "First Name", "Last Name", "Address", etc., you mainly use the "Textfield (input)", where the customer can write his name or address in, with no restrinctions.
The "Selectfield" is a field, where we give the customer some options and he must choose the right one for him. For example it is used for salutations - more about this on IMG 17.
The "Submit" type is the button, which the client clicks to send the filled request.
About the field type "Selectfield"
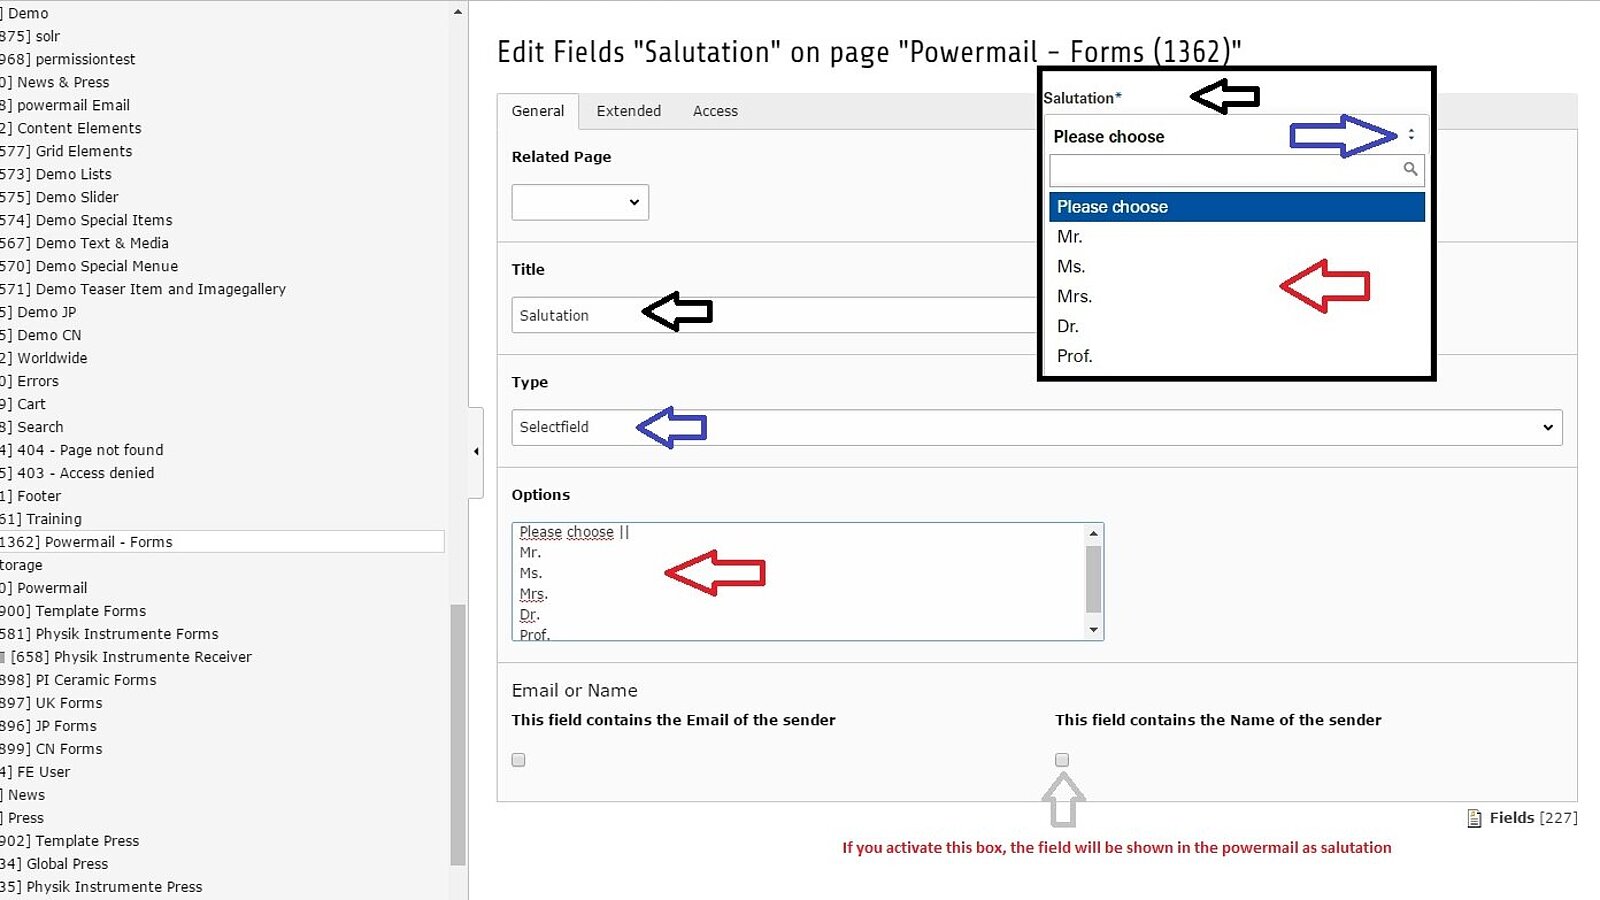
About the field type "Selectfield"
In this image we choose the field type "Selectfield" to give the customer a few options, from which he must choose the right one for him. To make the options appear when the customer clicks on the selectfield, we need to arrange the options like in IMG 17 (in the black box you can see how it will look like):
Please choose --> will appear on the form field, when the customer didn't yet make his choice - the two straight lines at the end (||)are necessary for the program to recognize that.
As soon as he clicks onto the field, the options listed below will appear, in this case indicated by the red arrow
Mr.
Ms.
Mrs.
Dr.
Prof.
At the bottom, on the right hand side of every single field, you will find the possibility to activate the box "This field contains the Name of the sender". It means, that this item will be shown in the email you receive from the customer when he submits the form.
About the fields "Captcha Field" and "reCAPTCHA"
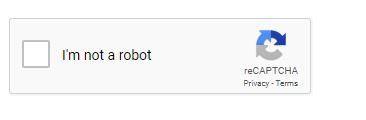
You have the possibility to add a captcha (a human validation test) to block spam and bots that try to automatically harvest email addresses or try to automatically sign up for or make use of websites, blogs or forums to your form.
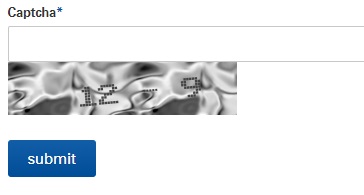
- Captcha Field: People have to solve a very easy calculation task, written in blurry letters, in order to proceed.
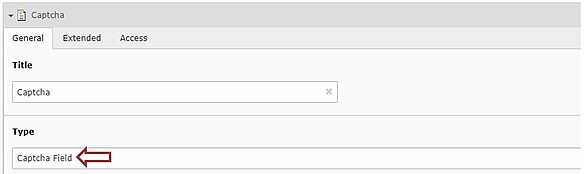
Under "Type" -> "Extra" there is an option called "Captcha Field", indicated by the red arrow:
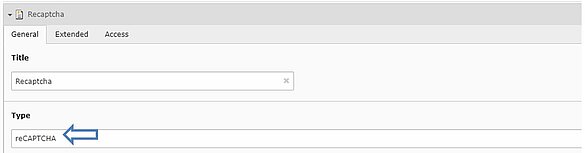
Create a new field, choose one of the options, name the field and define a layout under "extended" (as explained in "How do I layout a form?"). The captcha or reCAPTCHA is automatically generated.
Further configurations of the fields
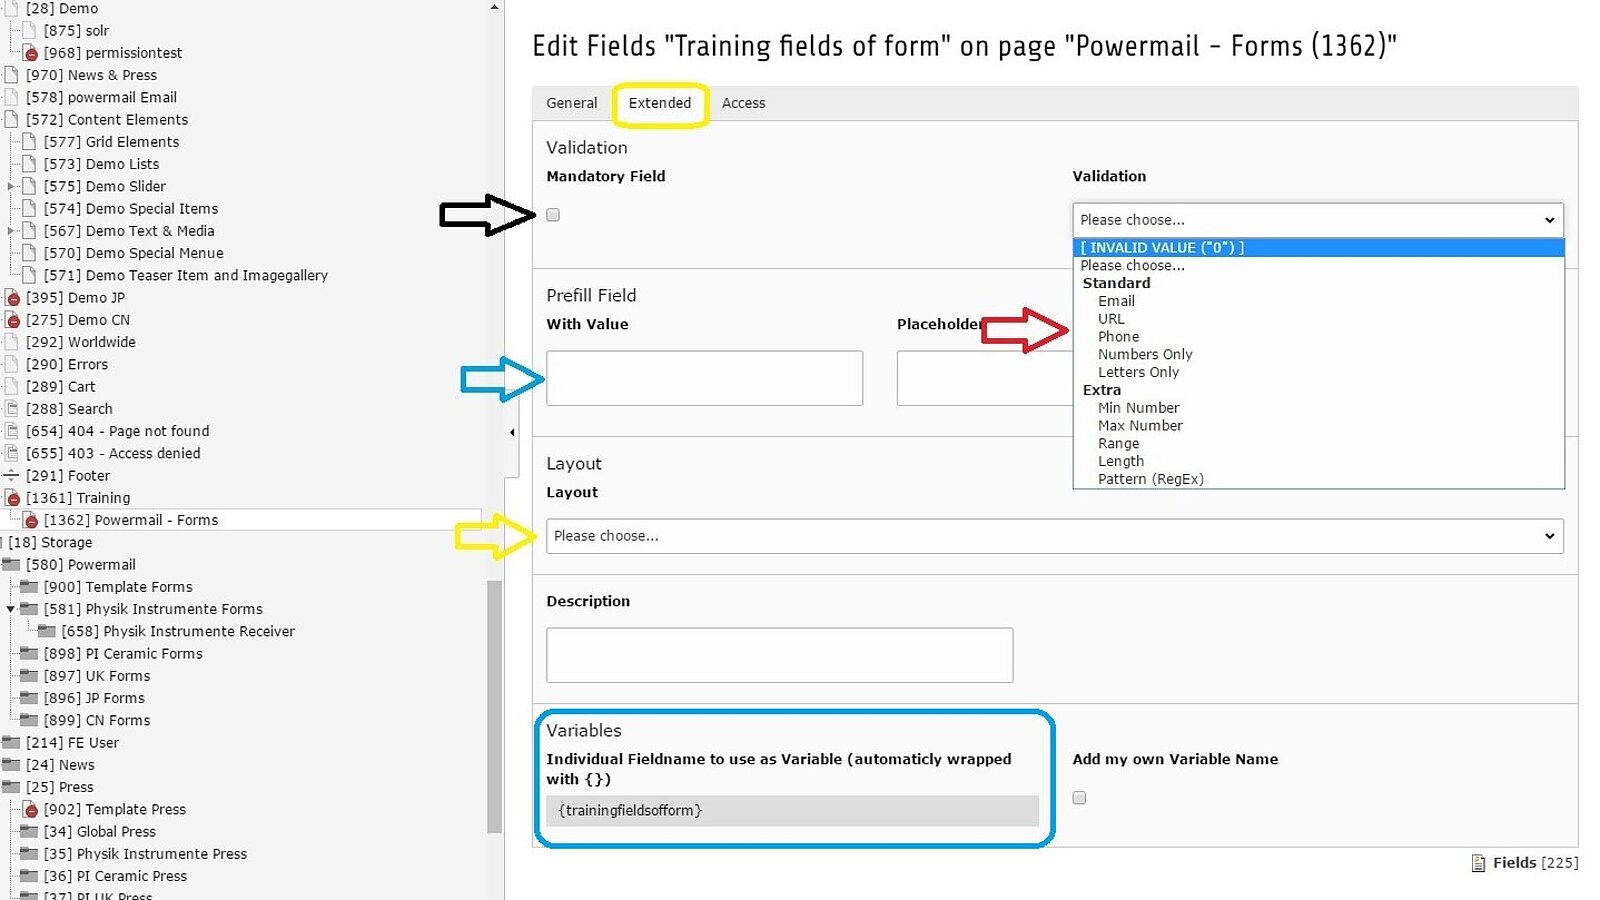
Further configurations of the fields
Under the category "Extended", marked by the yellow circle, you will find further configurations for your form fields.
- black arrow: If the mandatory field is activated, the customer must fill it out, otherwise he won't be able to submit the request
- red arrow: Here you can choose if you want to validate the datas inserted by the customer. For example if you ask the age and you just want to have number inserted, you can choose the validation "Numbers Only" and the program won't accept different signs but numbers
- blue arrow: Here you can insert a value you want to prefill the field with. For example if you sell something, you can insert the number "1" into a field, "Amount" for example, and the customer will find the box prefilled with the amount number 1
- yellow arrow: The layout of the field box can vary between a small box, a medium length box, a full width box, or a centered one
- blue circle: Choose a "Variables" for every field you create. The best is to always use the title of the field, in this case "training field of form". You will need this "Variables" later for setting up the emails you get and send, explained in IMG 10
1. First of all add a new form -> How do I create a new form?
Or edit an existing form.
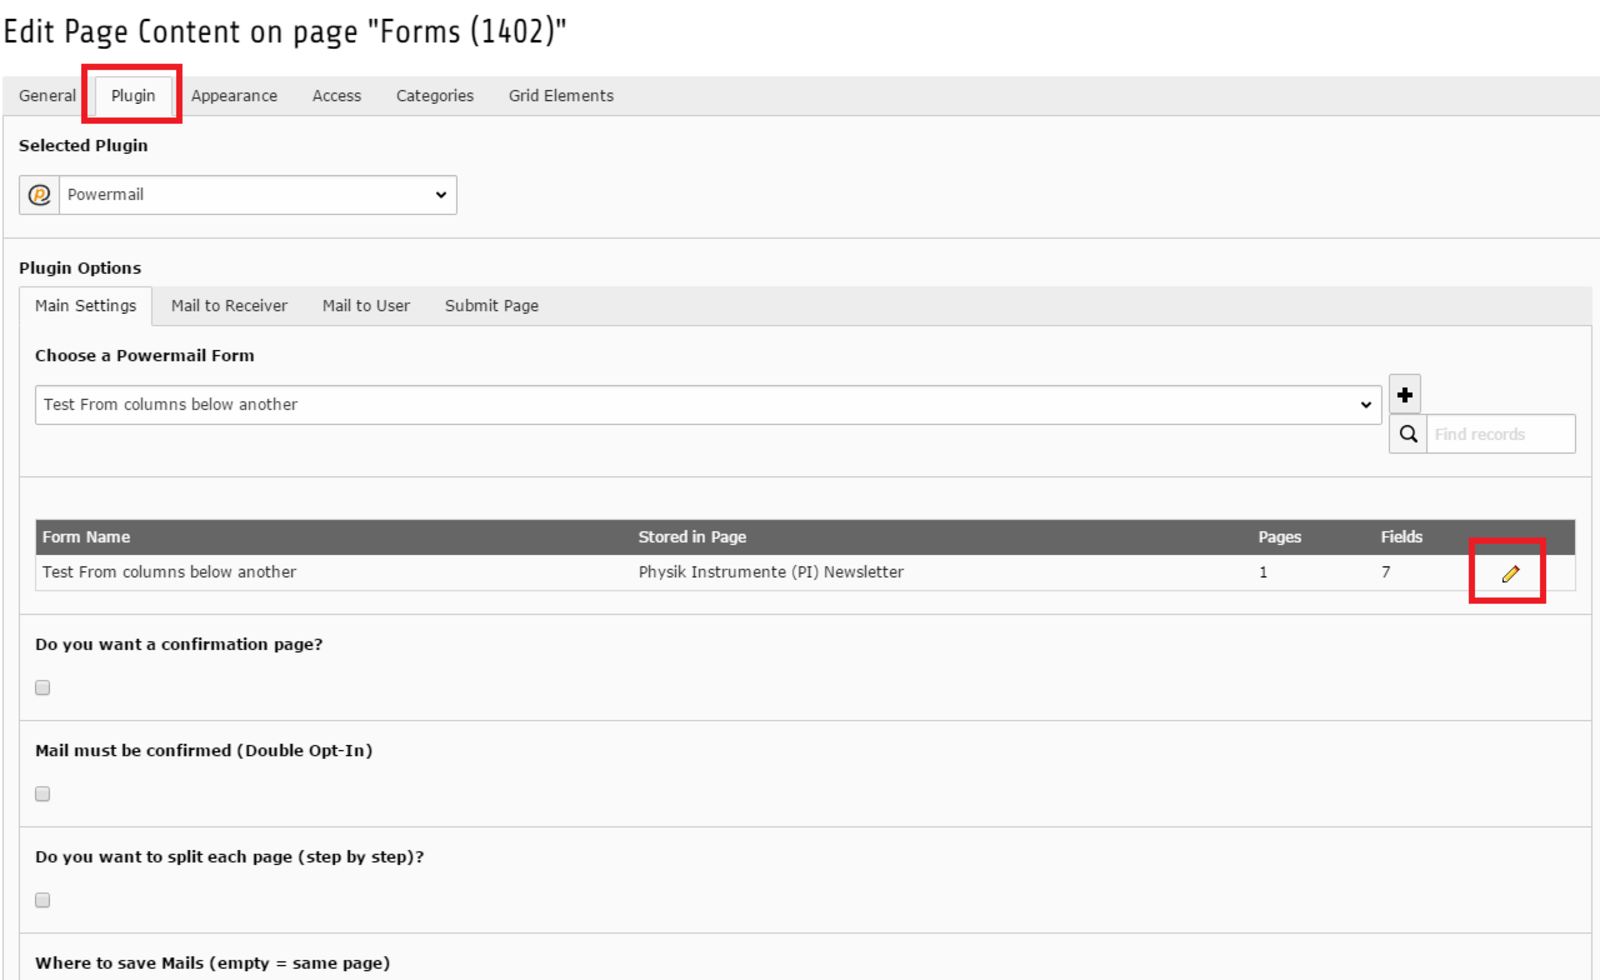
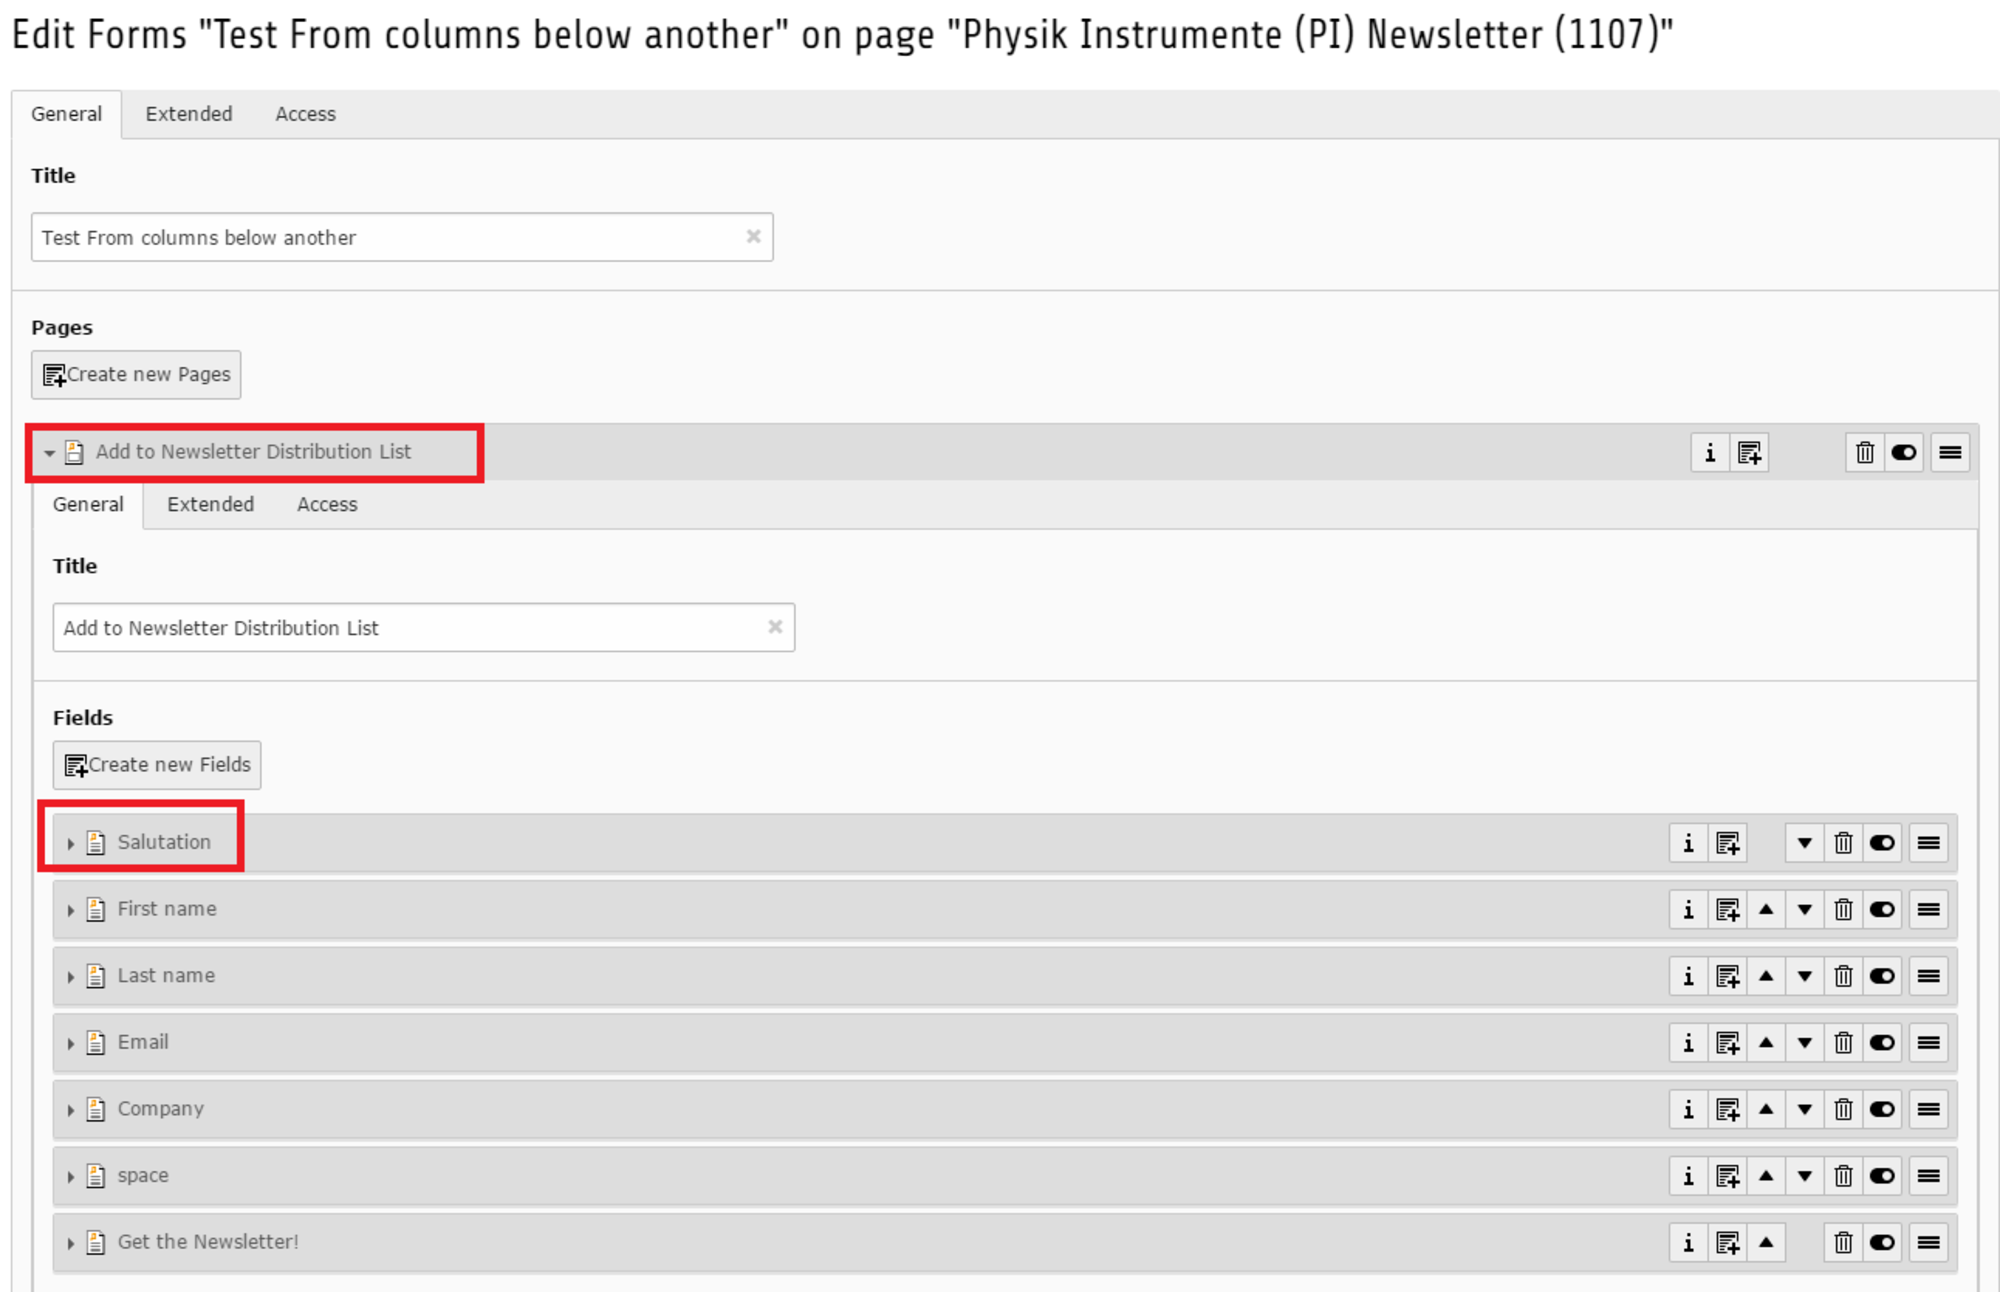
2. To edit the form plugin and open the tab "Plugin".
Open the Form Plugin by clicking the pencil in the red box.
3. Open the drop down to edit each box of the form.
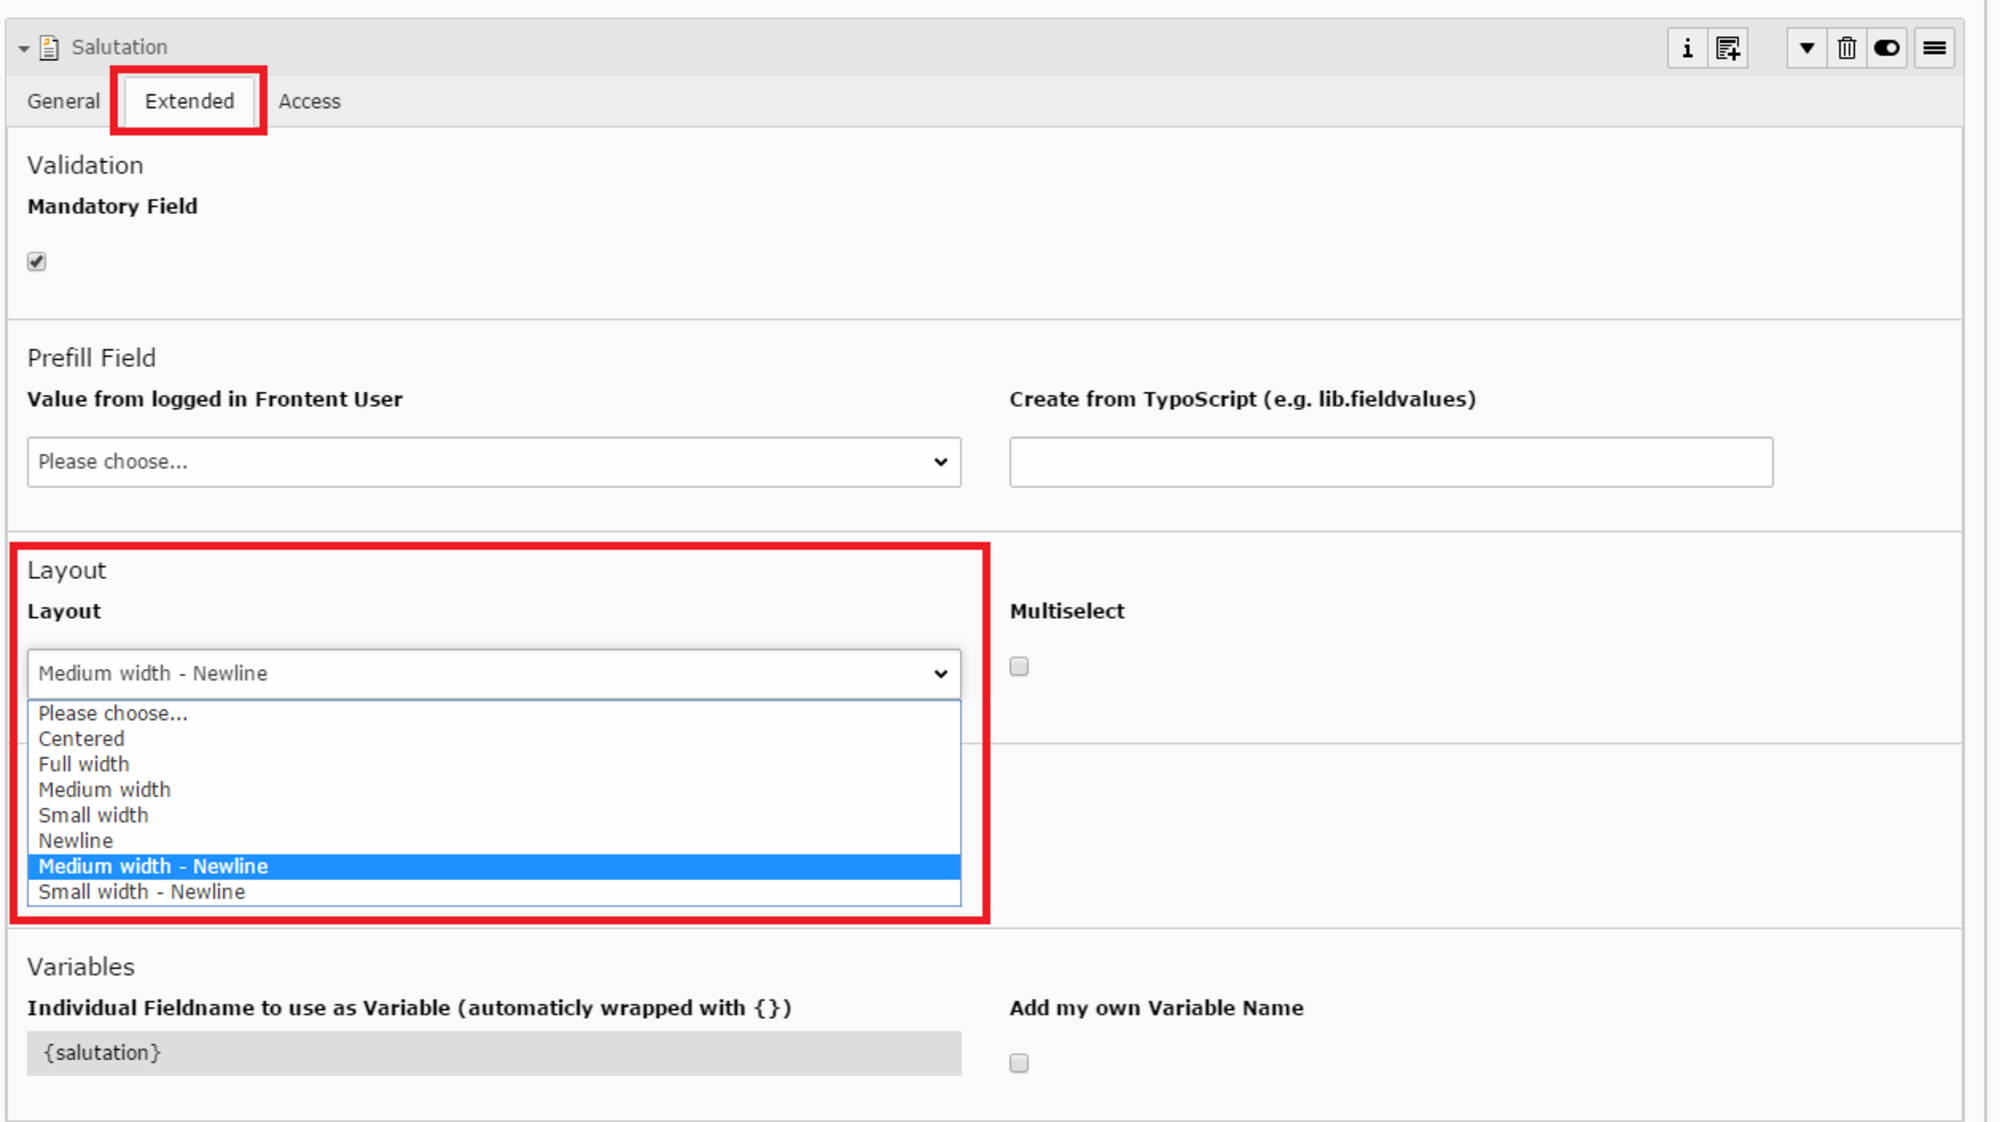
Open the setting line to change or set the layout.
By opening the tab "extended" you can choose the layout you need.
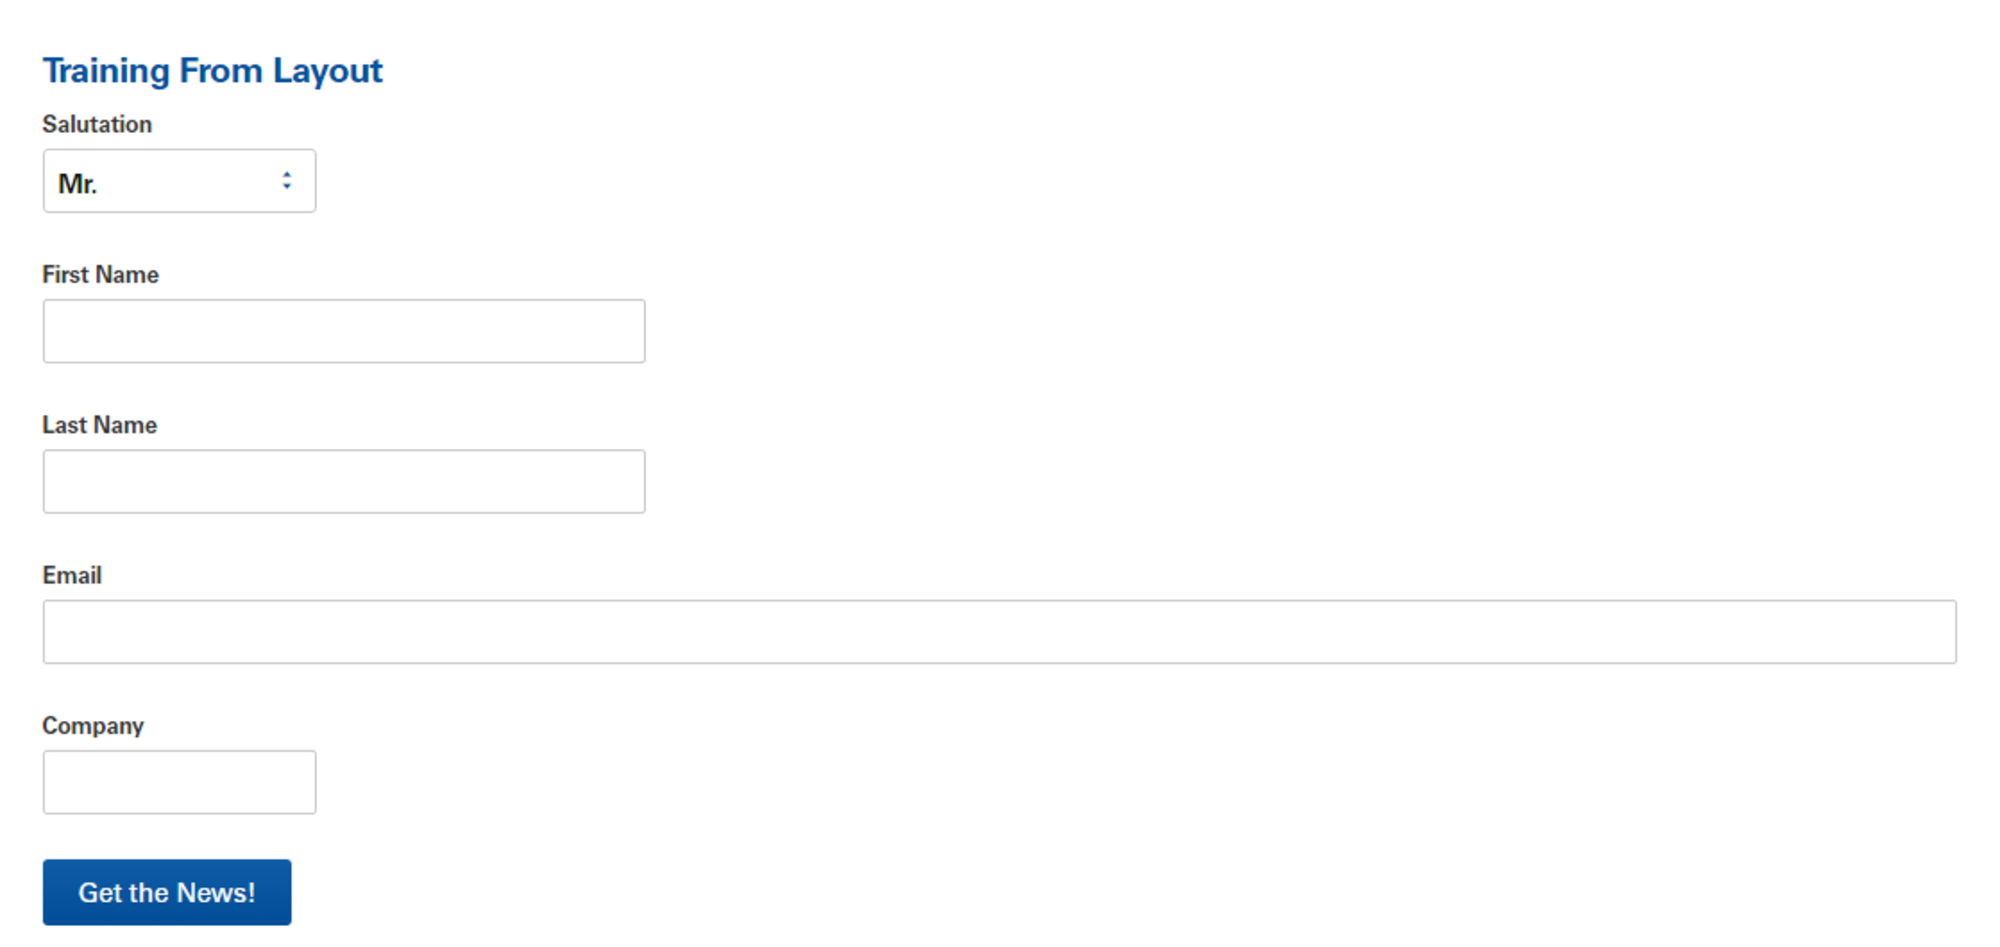
To create a form with one box per line choose the layout option "Medium width - Newline" or "Small width - Newline".
Otherwise the boxes will appear side by side in one line.

Choosing the content element for requests, powermail - forms
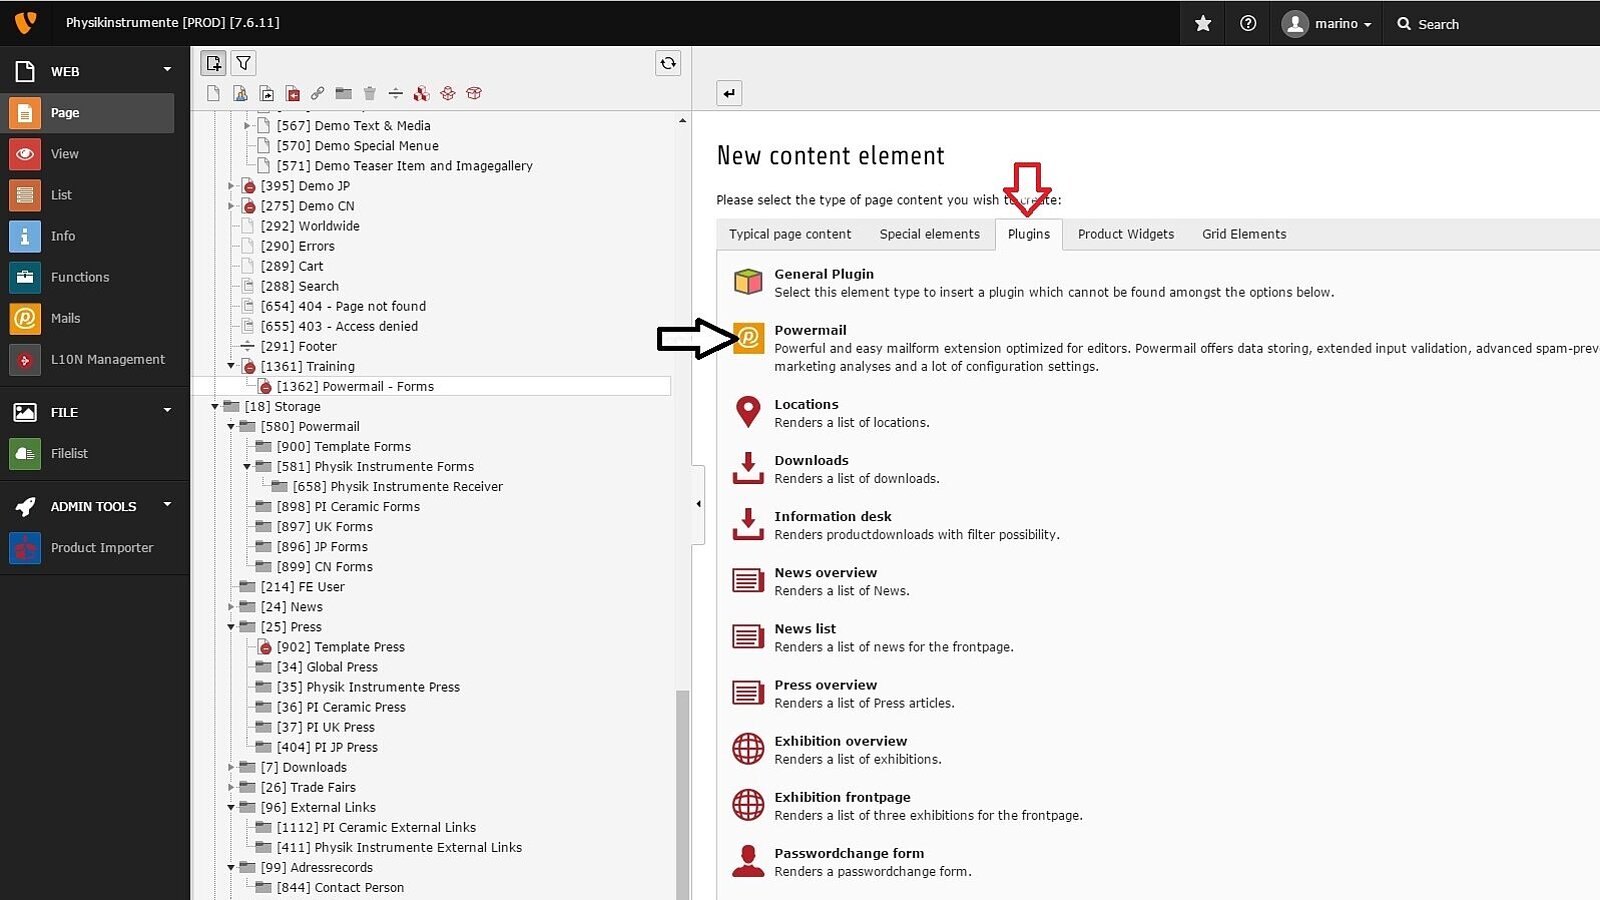
Choosing the content element for requests, powermail - forms
Now you have to choose the right content element for your needs. For the powermail form, you need to go to the third section "Plugins", indicated by the red arrow, and choose "Powermail", indicated by the black arrow.
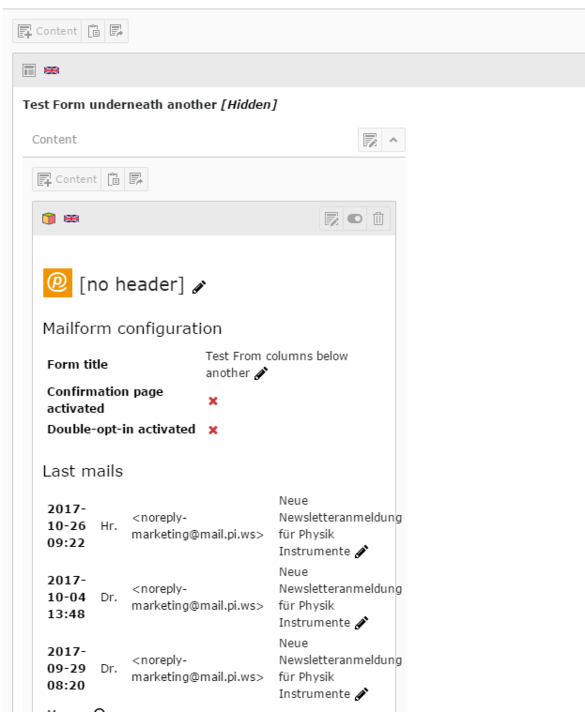
Setting the header for your powermail form
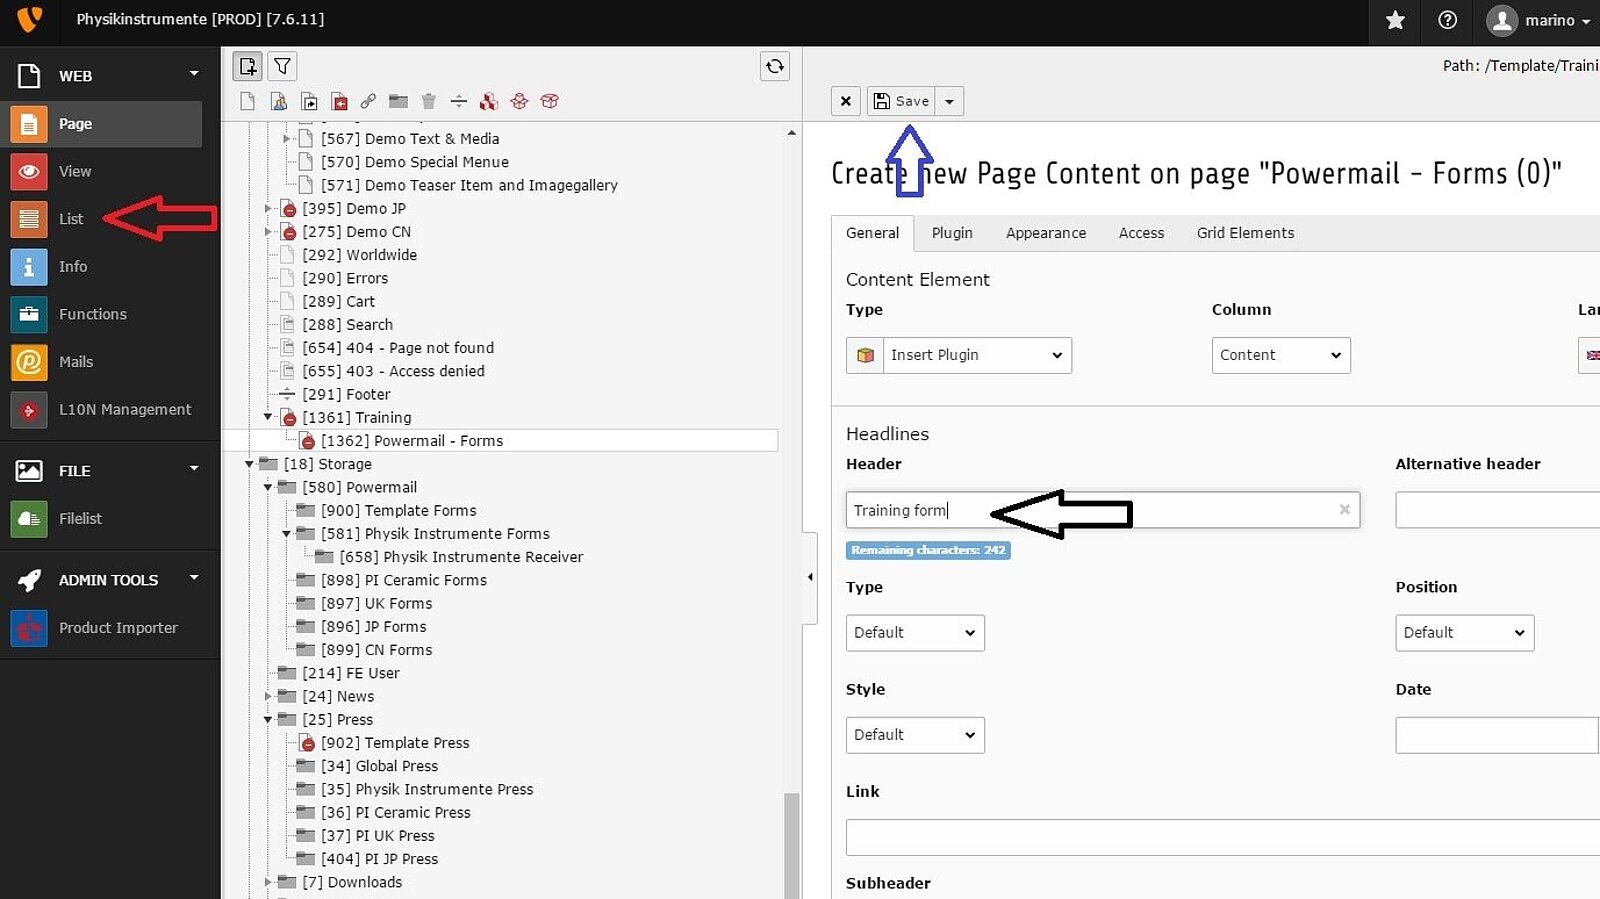
Setting the header for your powermail form
You can now insert the header of your powermail form, in this case "Training form". The box indicated by the black arrow contains text that will appear as the big header on top of your new page.
The red arrow shows you how to change the vision from "Page" to "List". You can try both and decide which one you like better.
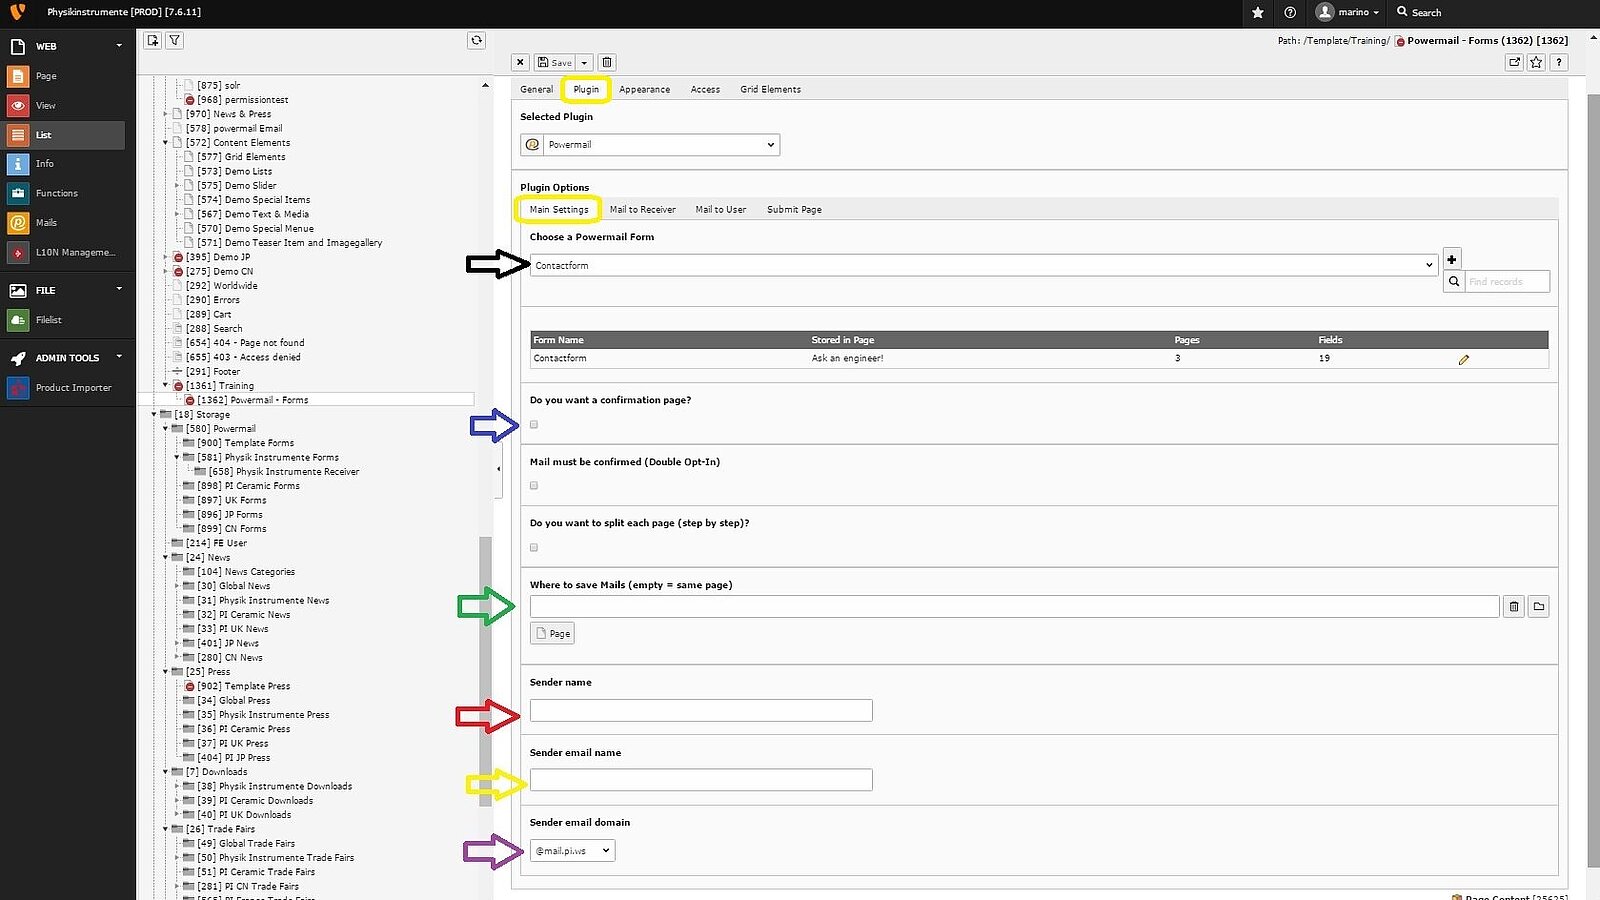
Now go to the second section called "Plugin" surrounded by the first yellow circle on top of the site.
In this section, under "Main Settings" you will find:
- black arrow: Is where to find >>premade forms. Be careful about reusing forms, more indications in the next image. We will also show you >>how to make new forms in the next chapter.
- blue arrow: If you activate this checkbox, the customer has the possibility to recheck the information inserted in the form before sending
- green arrow: Indicates the email address where the requests should be delivered
- red arrow: Here you should insert the name of your company as sender name for the confirmation email the customer will get after he sent the request
- yellow arrow: Here you should insert the email address of your company as sender address for the confirmation email the customer will get after he sent the request
- violet arrow: This space is for the domain of the senders email address, so you should insert the domain of your company address
Reusing premade forms
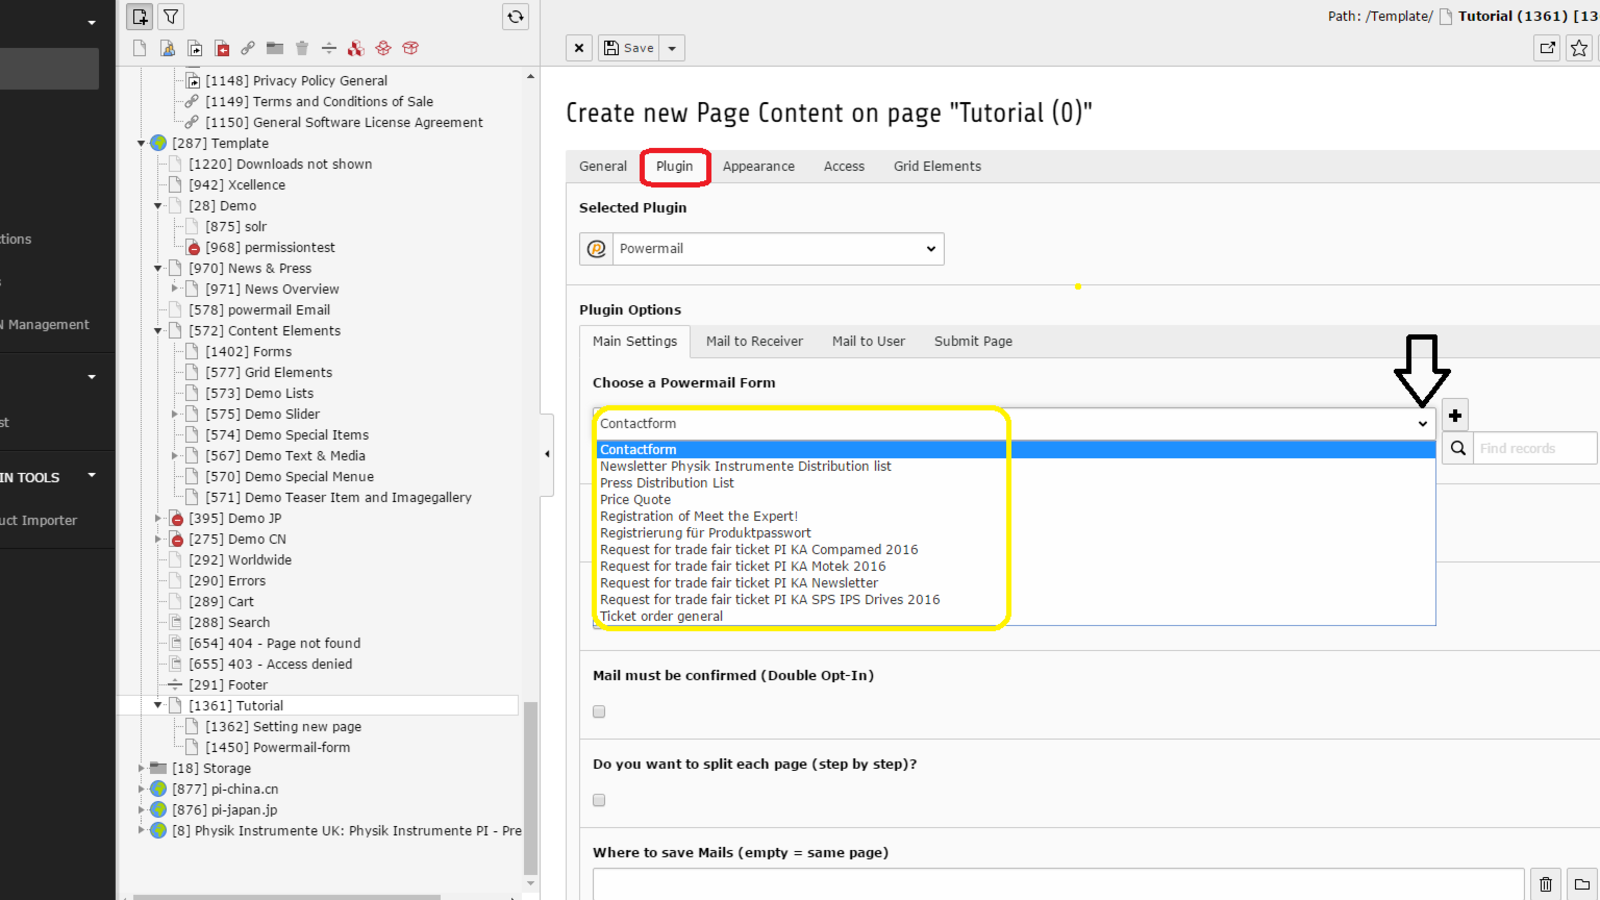
Reusing premade forms
To reuse a premade form, you can click on the arrow indicated by the black arrow and choose the form you want to reuse.
But remember, you have to use exact the same form, otherwise the changes you make will be applied everywhere you used this form.
You can find all the premade forms in the yellow box. We are constantly upgrading them, so here is also the link to find the most recent.
TYPO3 path: [287] Template -> [572] Content Elements -> [1402] forms
Settings for receiver email
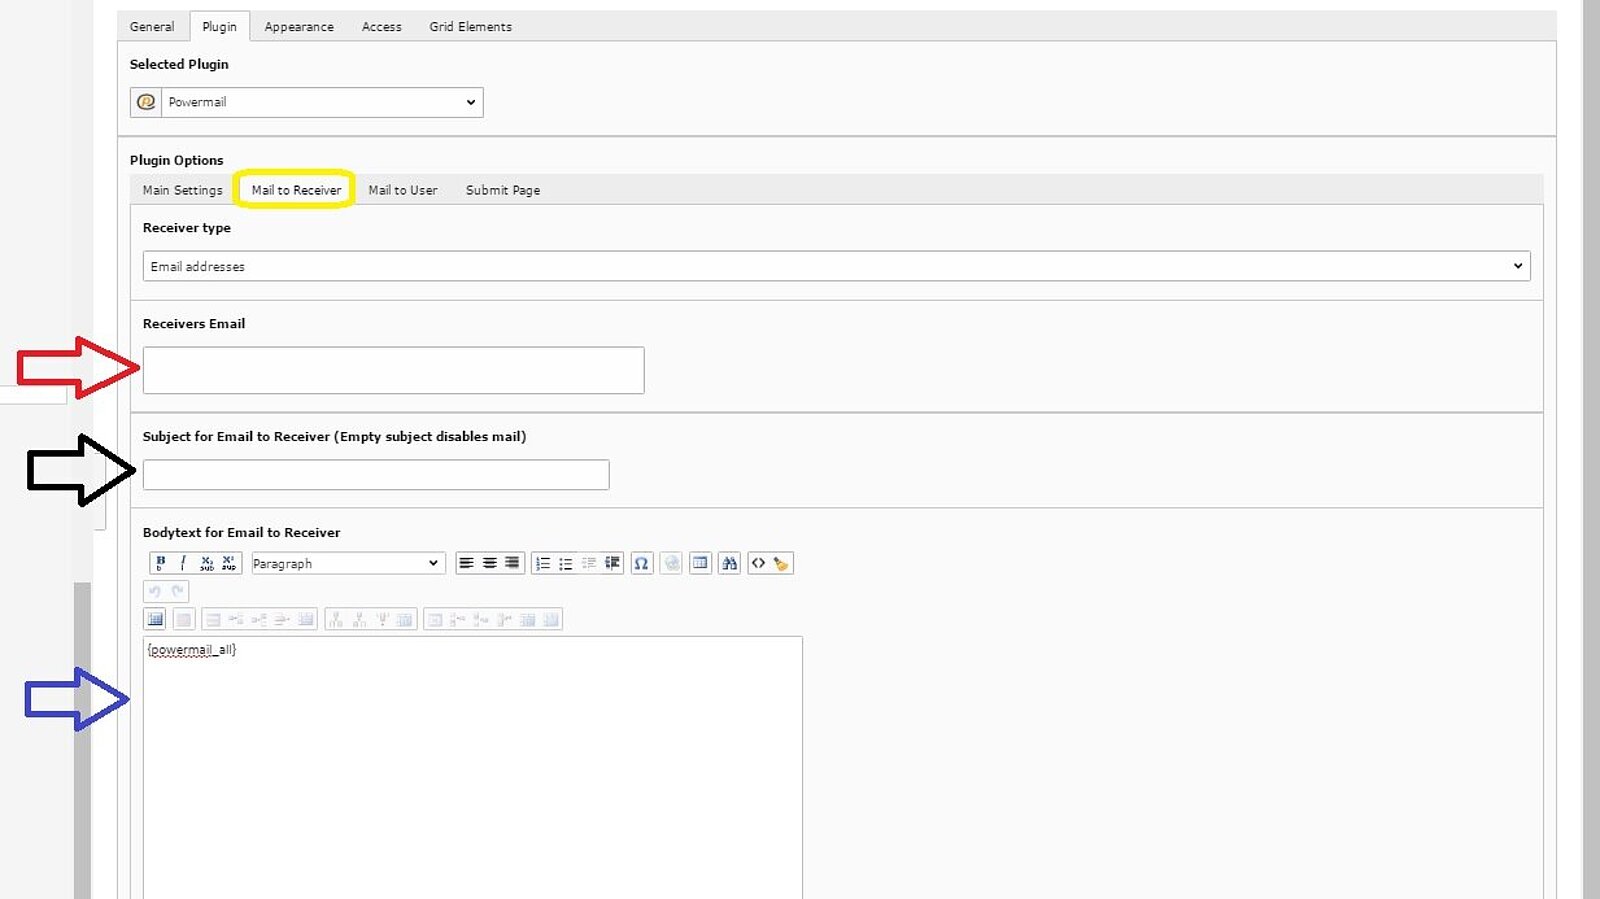
Settings for receiver email
In the subcategory "Mail to Receiver", indicated by the yellow circle, you configure the email your company receives when a customer submits his request.
- red arrow: Here you insert the email address of the receiver, e.g., your email address or the one of your company
- black arrow: Here you insert what you want to see as a subject in the email you get. You can insert a text, or you can use field contents, by writing the "Variables", indicated in IMG 18, into curly brackets. For example: "Request from {trainingfieldsofform}.". As a result, in the subject box, the curly brackets would be replaced by the datas the customer inserted in the field entitled "Training fields of form".
- blue arrow: Here you insert the text you want to see in the email. {powermail_all} is the filled form. Otherwise you can add a text to recognize the incoming email. For example, "This email was generated by the Training form"
Settings for user email
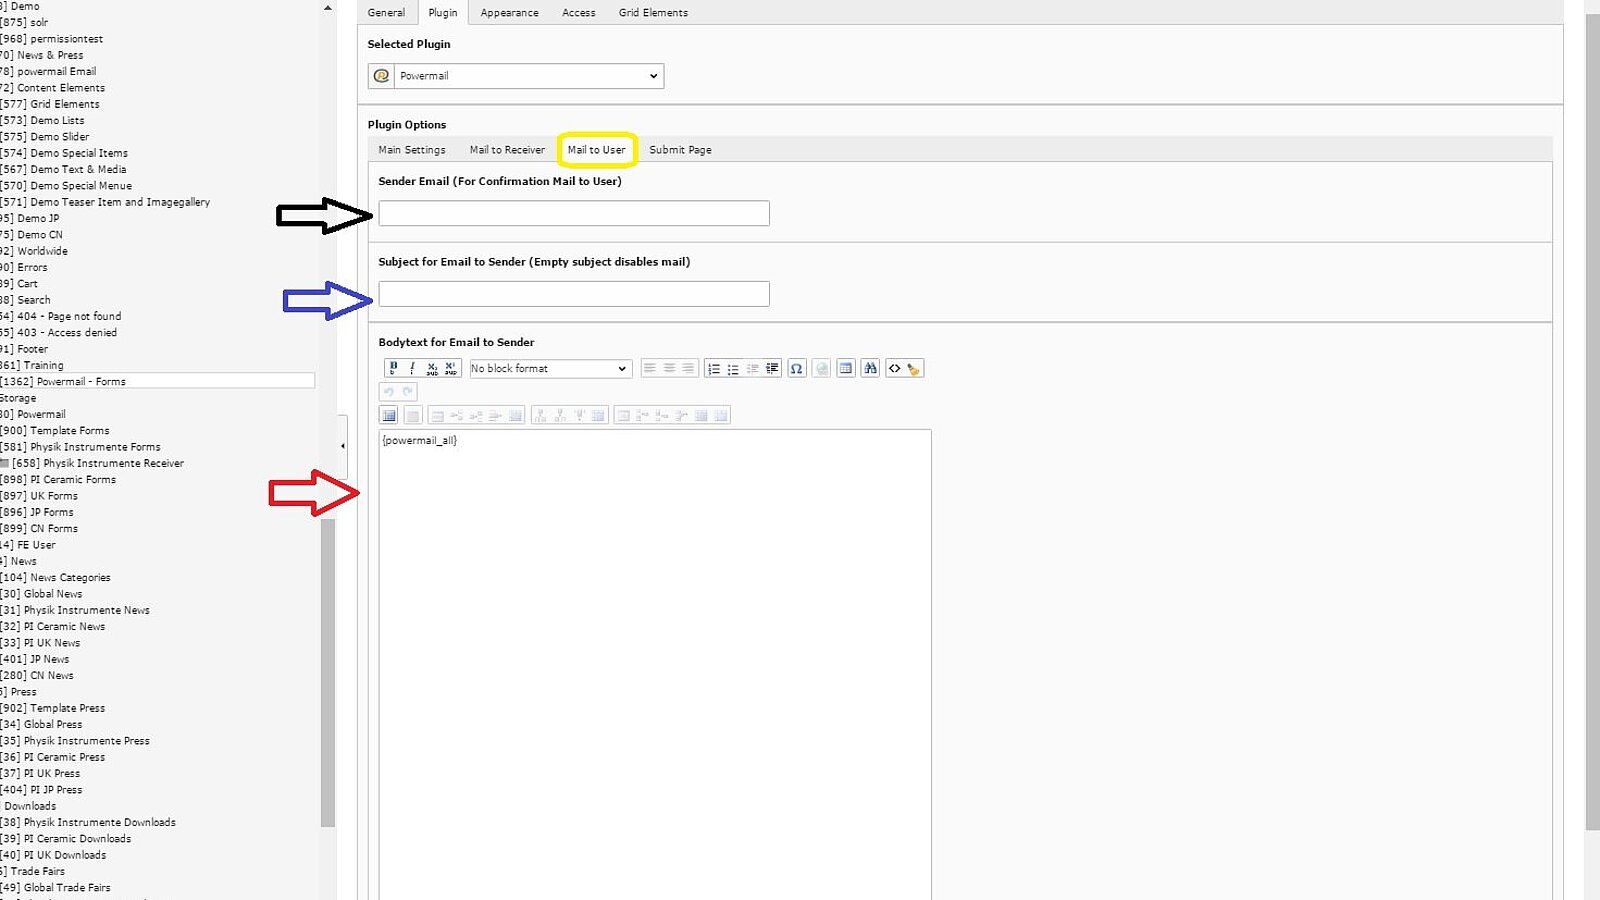
Settings for user email
In the subcategory "Mail to User", indicated by the yellow circle, you configure the email the customer receives as a confirmation after submitting his request.
- black arrow: Here you insert your email address or the one of your company again. The customer will see this field as the sender of the confirmation email
- blue arrow: Here you insert what you want the customer to see as a subject in the email he gets
- red arrow: Here you insert the text you want to show the customer in the email. {powermail_all} is the filled form. You can also insert the salutation at the beginning, by inserting the "Variables" into curly brackets of the desired field you previously made up. For example: "Dear {Salutation} {Last Name}". In addition you could also insert your company signature at the end of the email, just by copying it in.
Settings for the last page
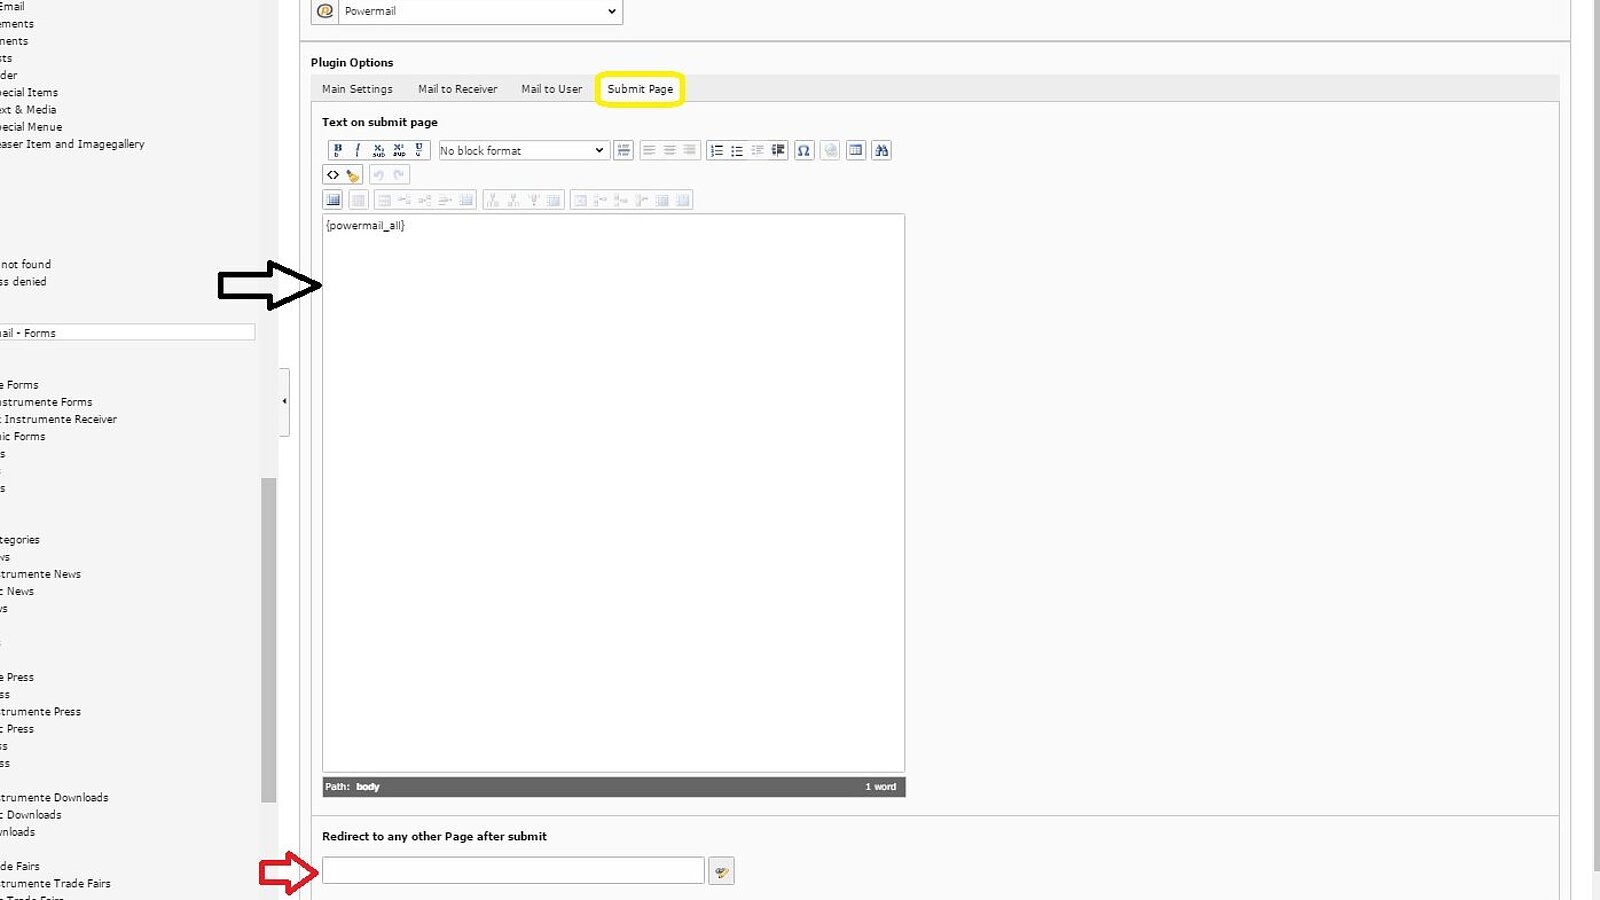
Settings for the last page
In the last subcategory "Submit Page", indicated by the yellow circle, you configure the page the customer sees as soon as he submits his request.
- black arrow: Here you insert the text you want the customer to see on the website after he submitted his request
- red arrow: In case you already have a TYPO3-confirmation page, you can choose it by searching the link in this box and the customer will be transfered to the chosen page after submitting his request