Selecting a content element from the 'Menu' tab
Selecting a content element from the 'Menu' tab
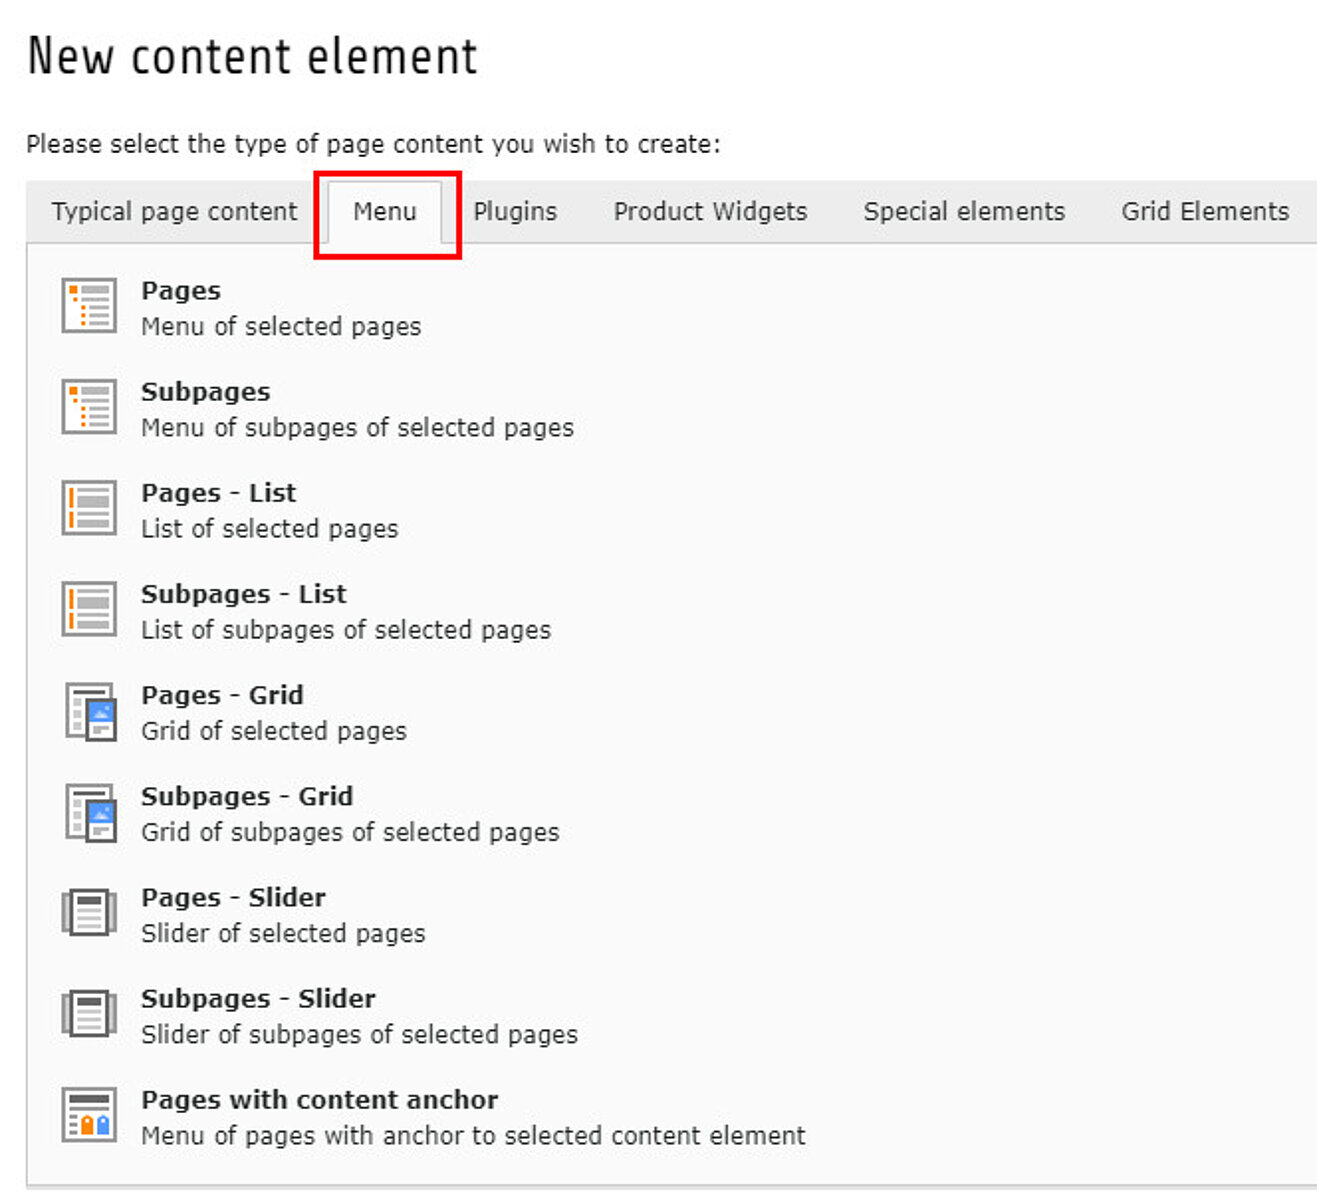
To create a preview of pages or subpages you can select one of the options from the tab 'Menu'.
You can find examples of all available options >> here.
Selecting the right illustration of your preview
Selecting the right illustration of your preview
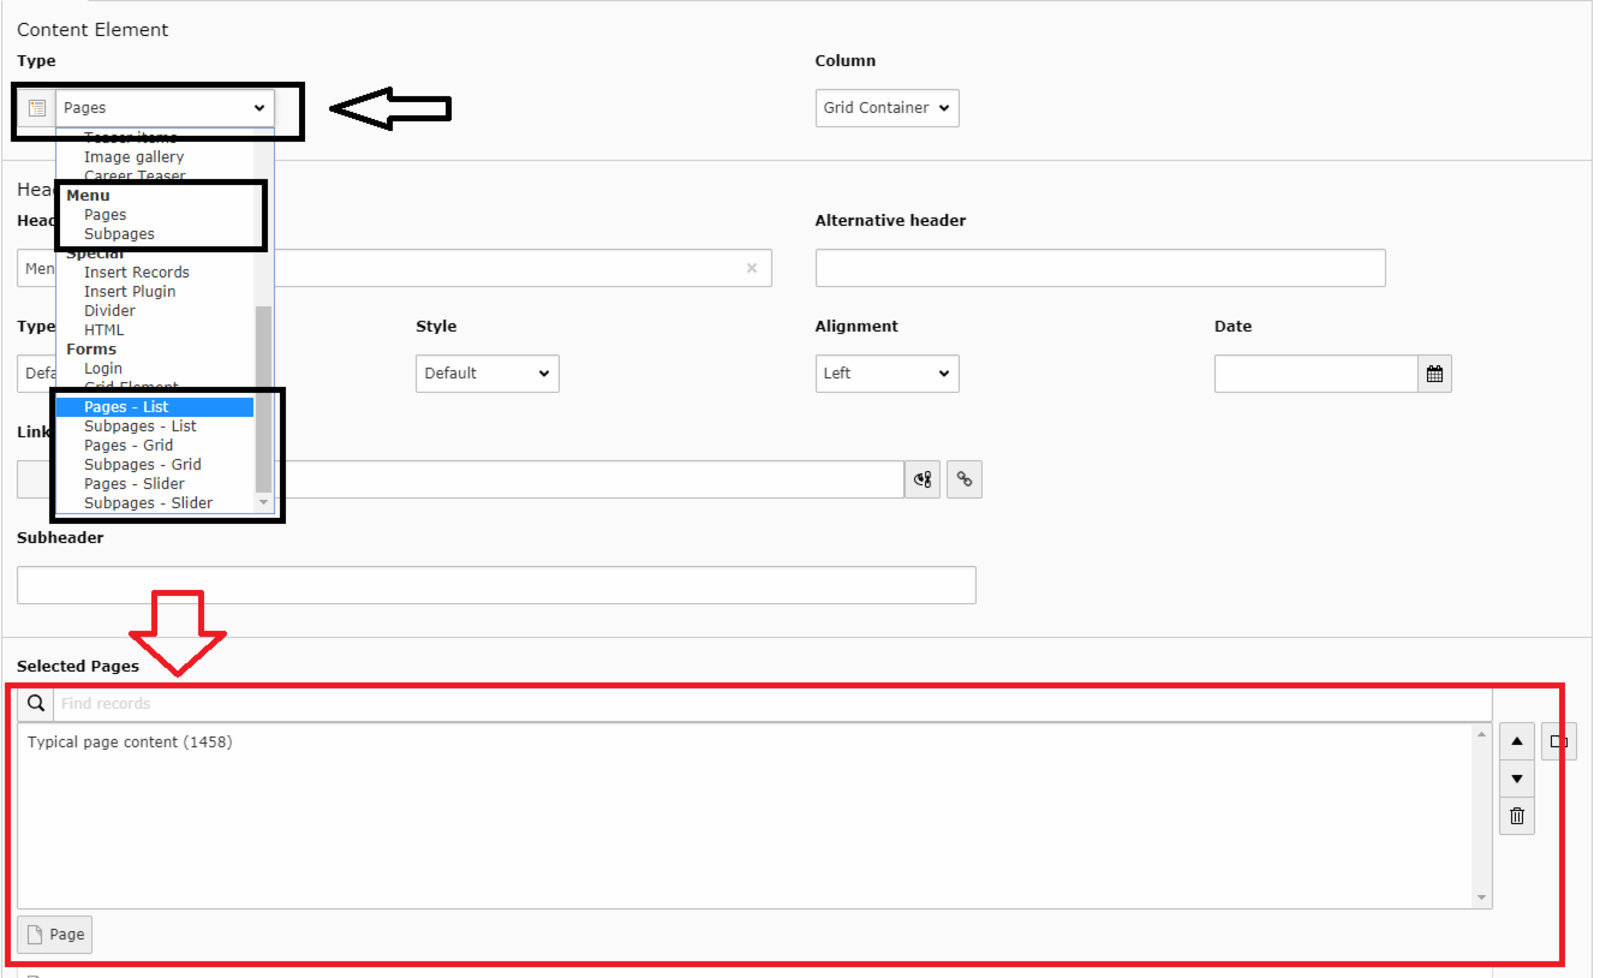
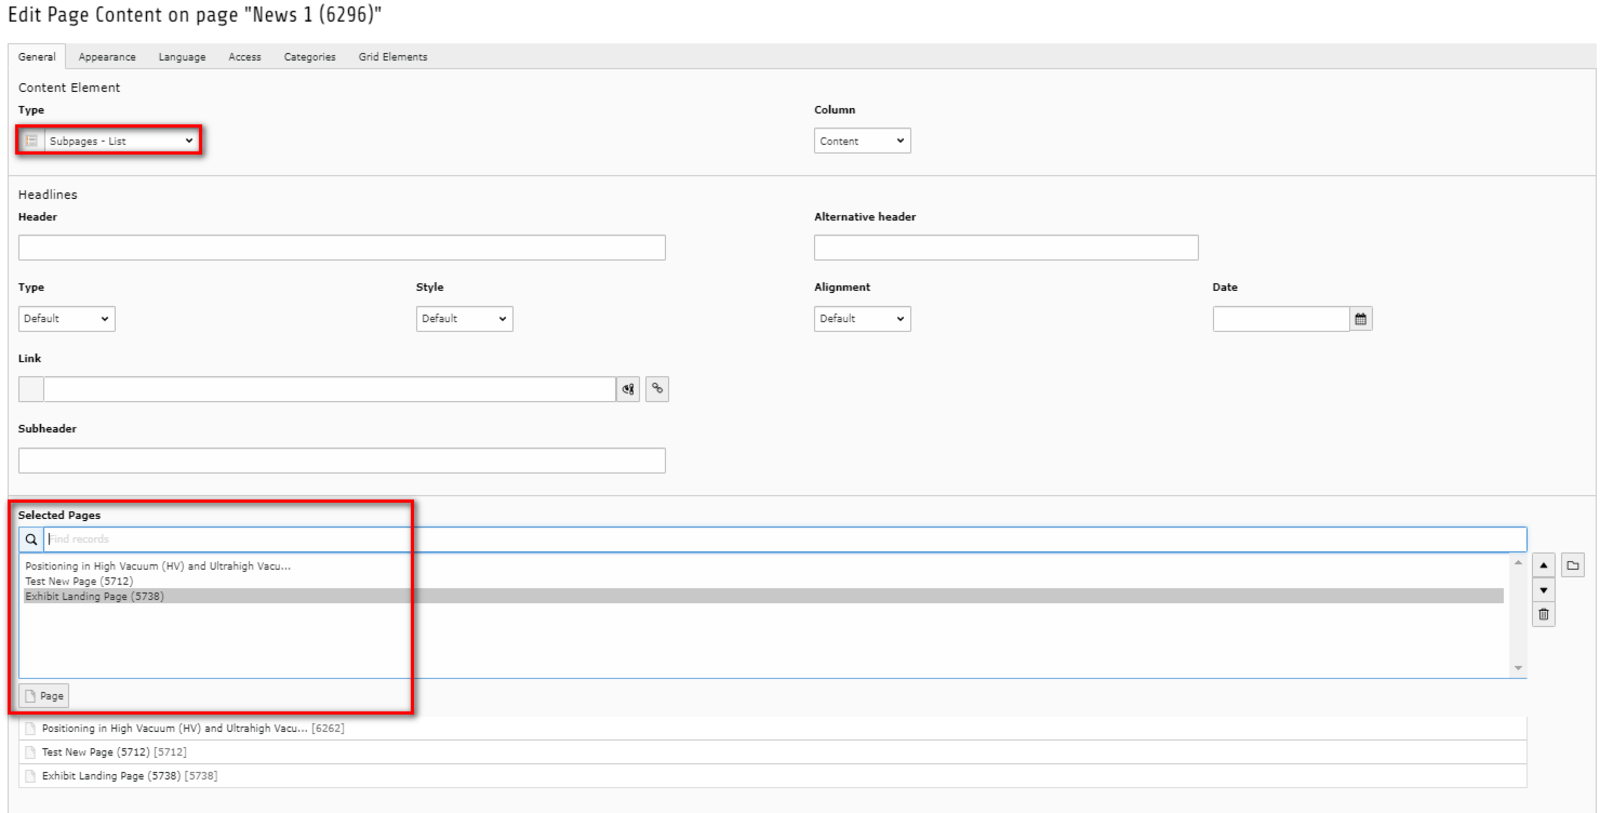
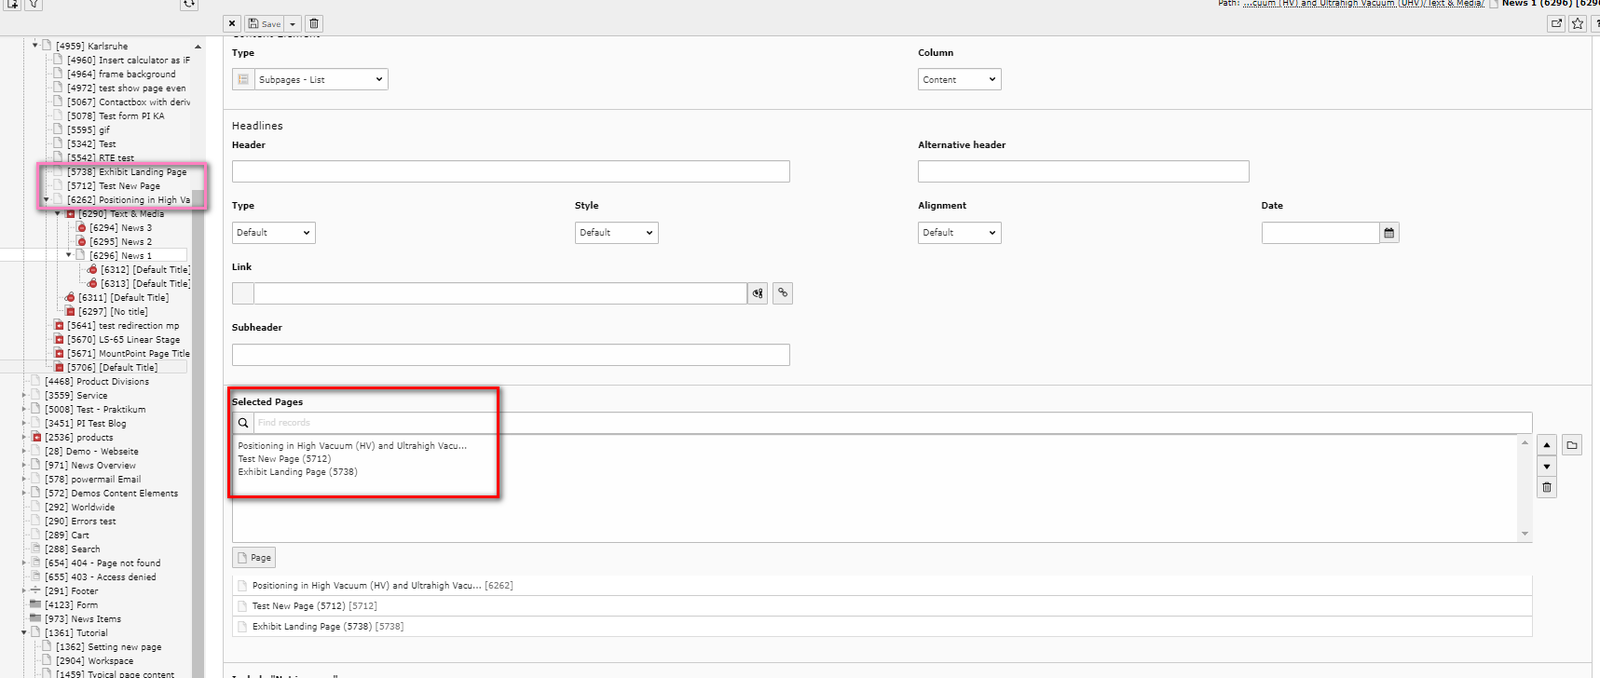
It is very simple to create a preview of pages or subpages. Just select the pages you want to display with your special menu by clicking "Page" under the box indicated by the red arrow.
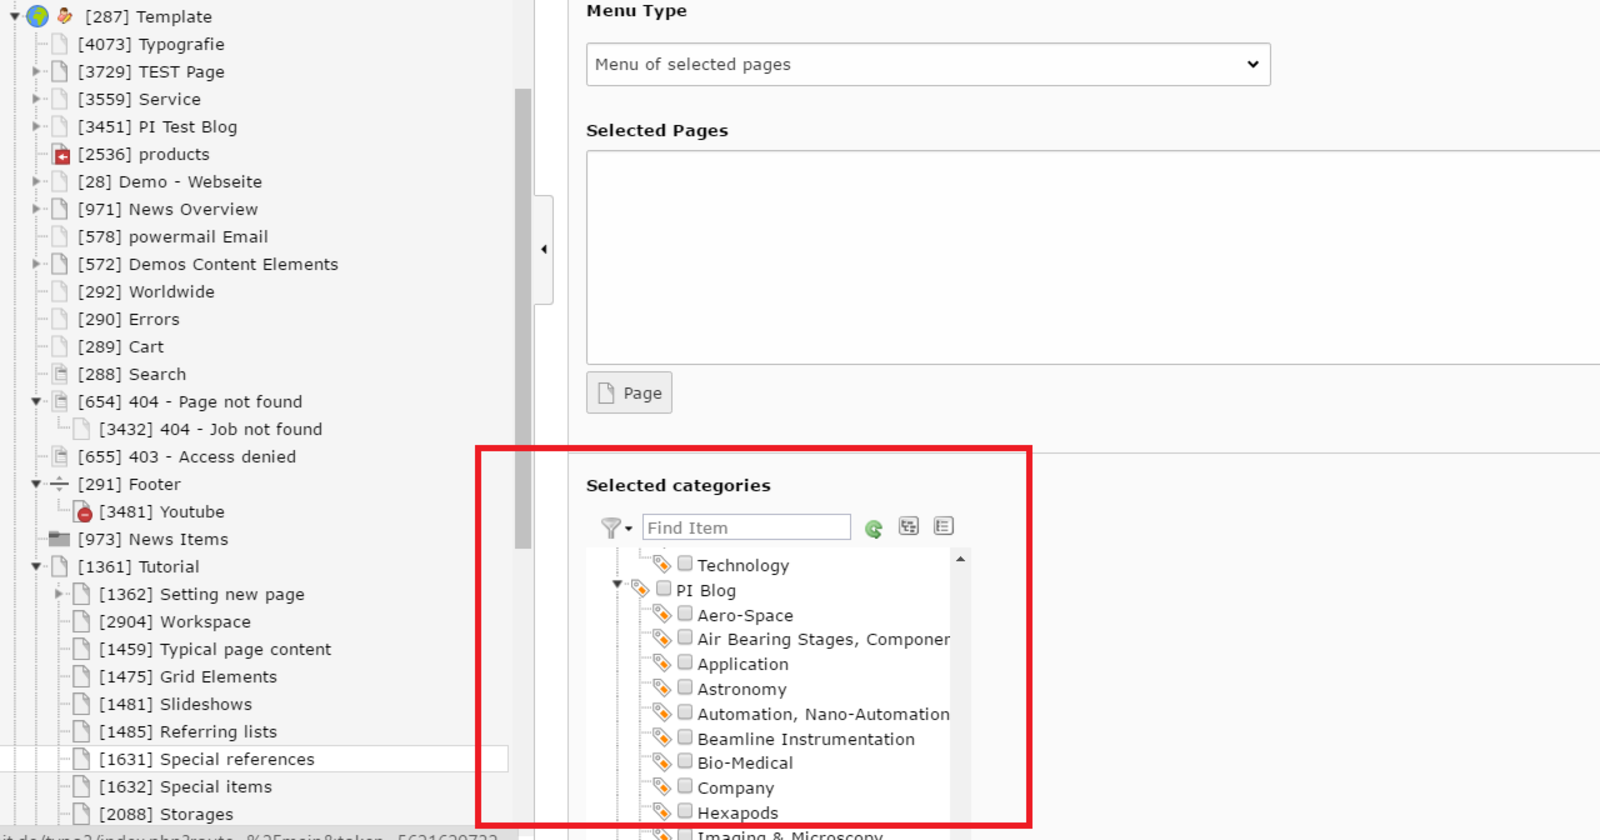
- black indication: Here you can choose how the preview of your pages will appear. You can see examples for all of them >>here. It is important for you to know that if you select "Menu of selected pages", for example, in the box indicated by the red arrow, you must choose exactly the pages you want to show in the preview. But if you choose "Menu of subpages of selected pages" you must choose the over page of the pages you want to show in the preview.
Please note that you need to choose a page from the PI.com tree if your page is mounted to your own page tree.
The user gets to your own URL anyway.
If you link to a page which is not mounted from the PI.com tree the link will open in a new tab.
So you can make sure the user always remains on your page.
Sorting of the List
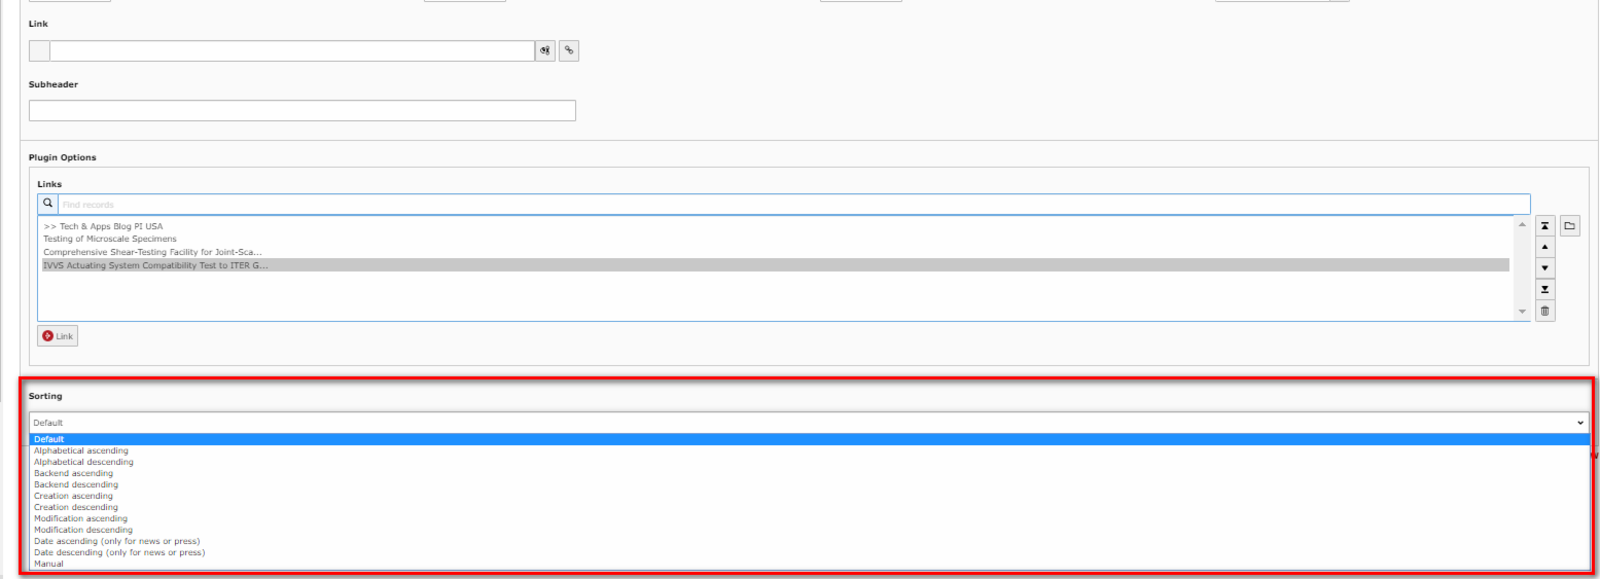
To manage the order of your added pages/ elements you got several options. Choose the one you need from the dropdown menu.
As a default option it's always sorted by the newest at first.
You got the following options to choose:
- Alphabetical
- Creation Date
- Modification Date
- Backend
- Default = Newest first
- Manual
For the green ones you also got the option to sort your list either ascending or descending.
Selecting the content element Insert records
Selecting the content element Insert records
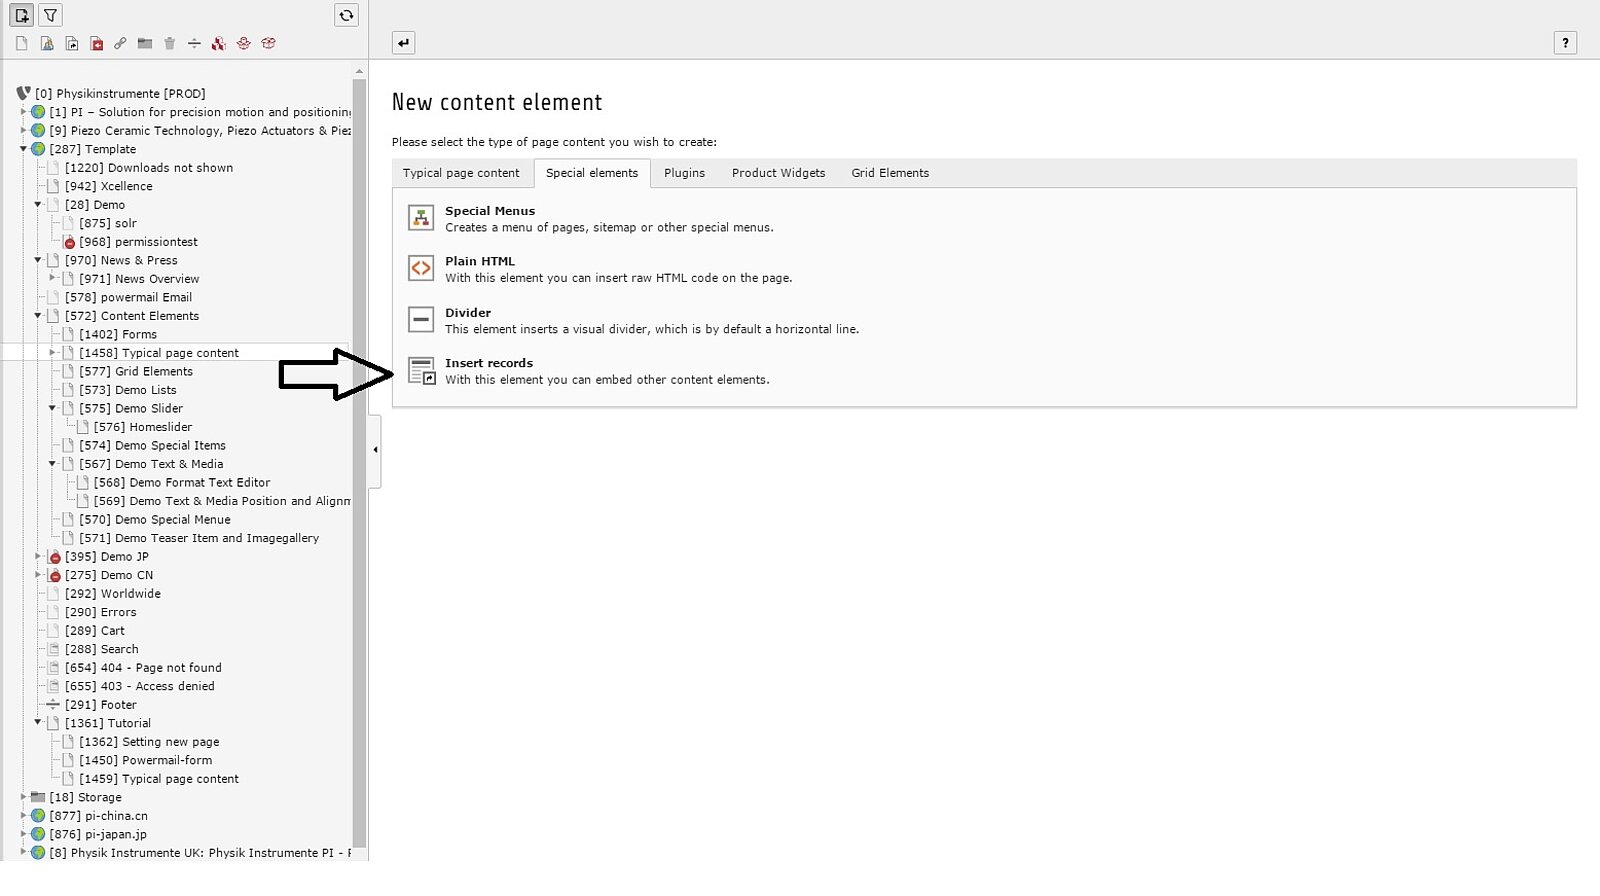
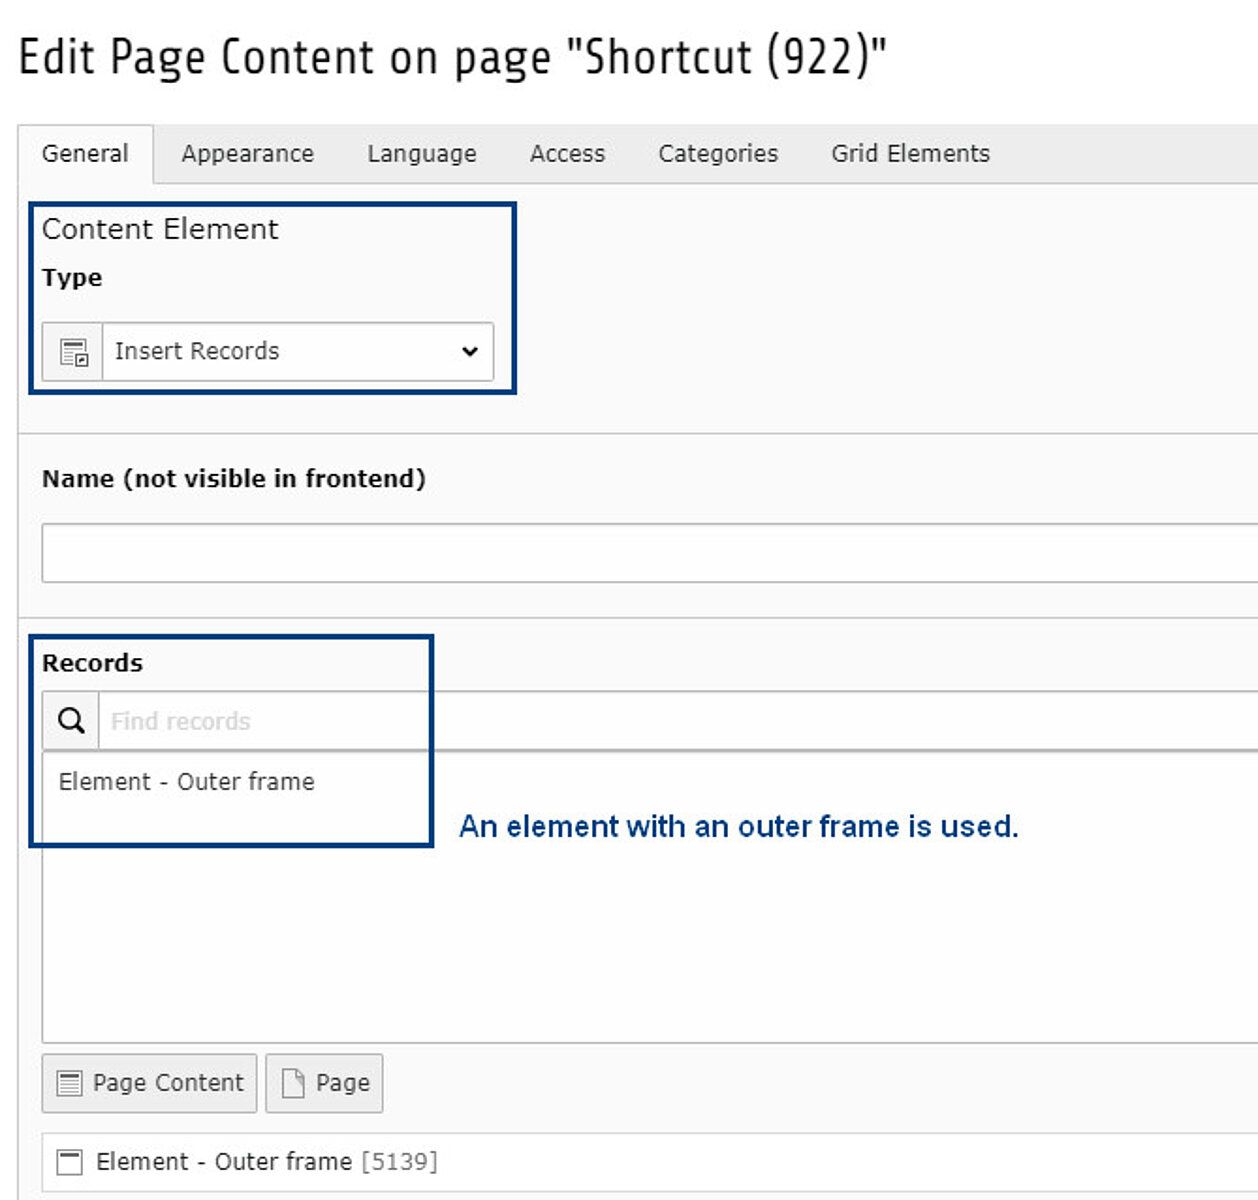
To show an existing item on the page you are creating, you can choose "Insert records" from the section "Special elements" indicated by the black arrow.
Choosing the existing item
Choosing the existing item
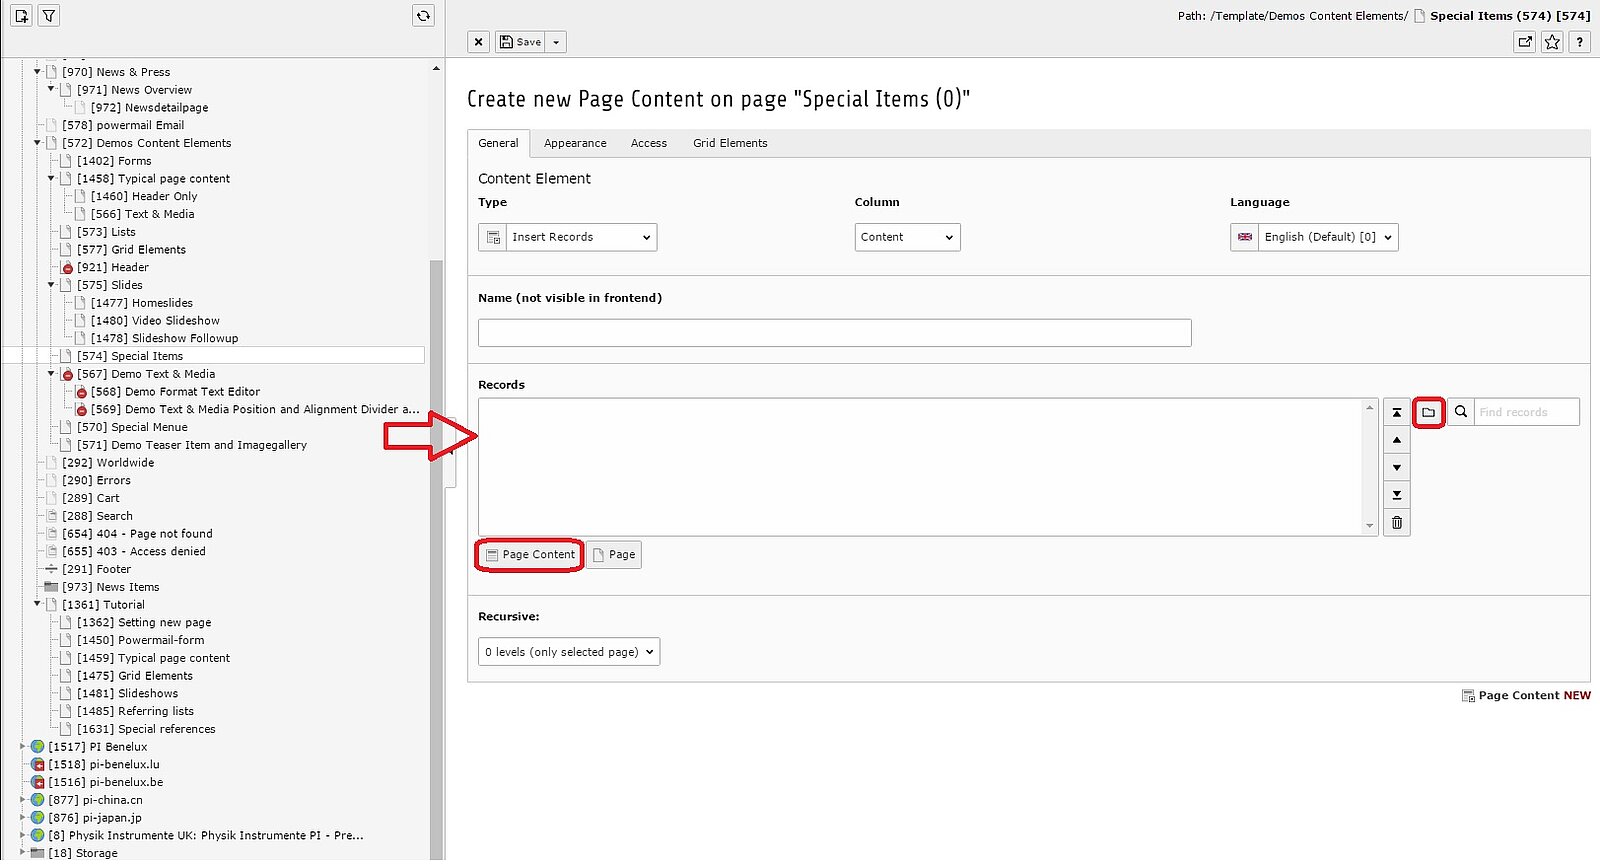
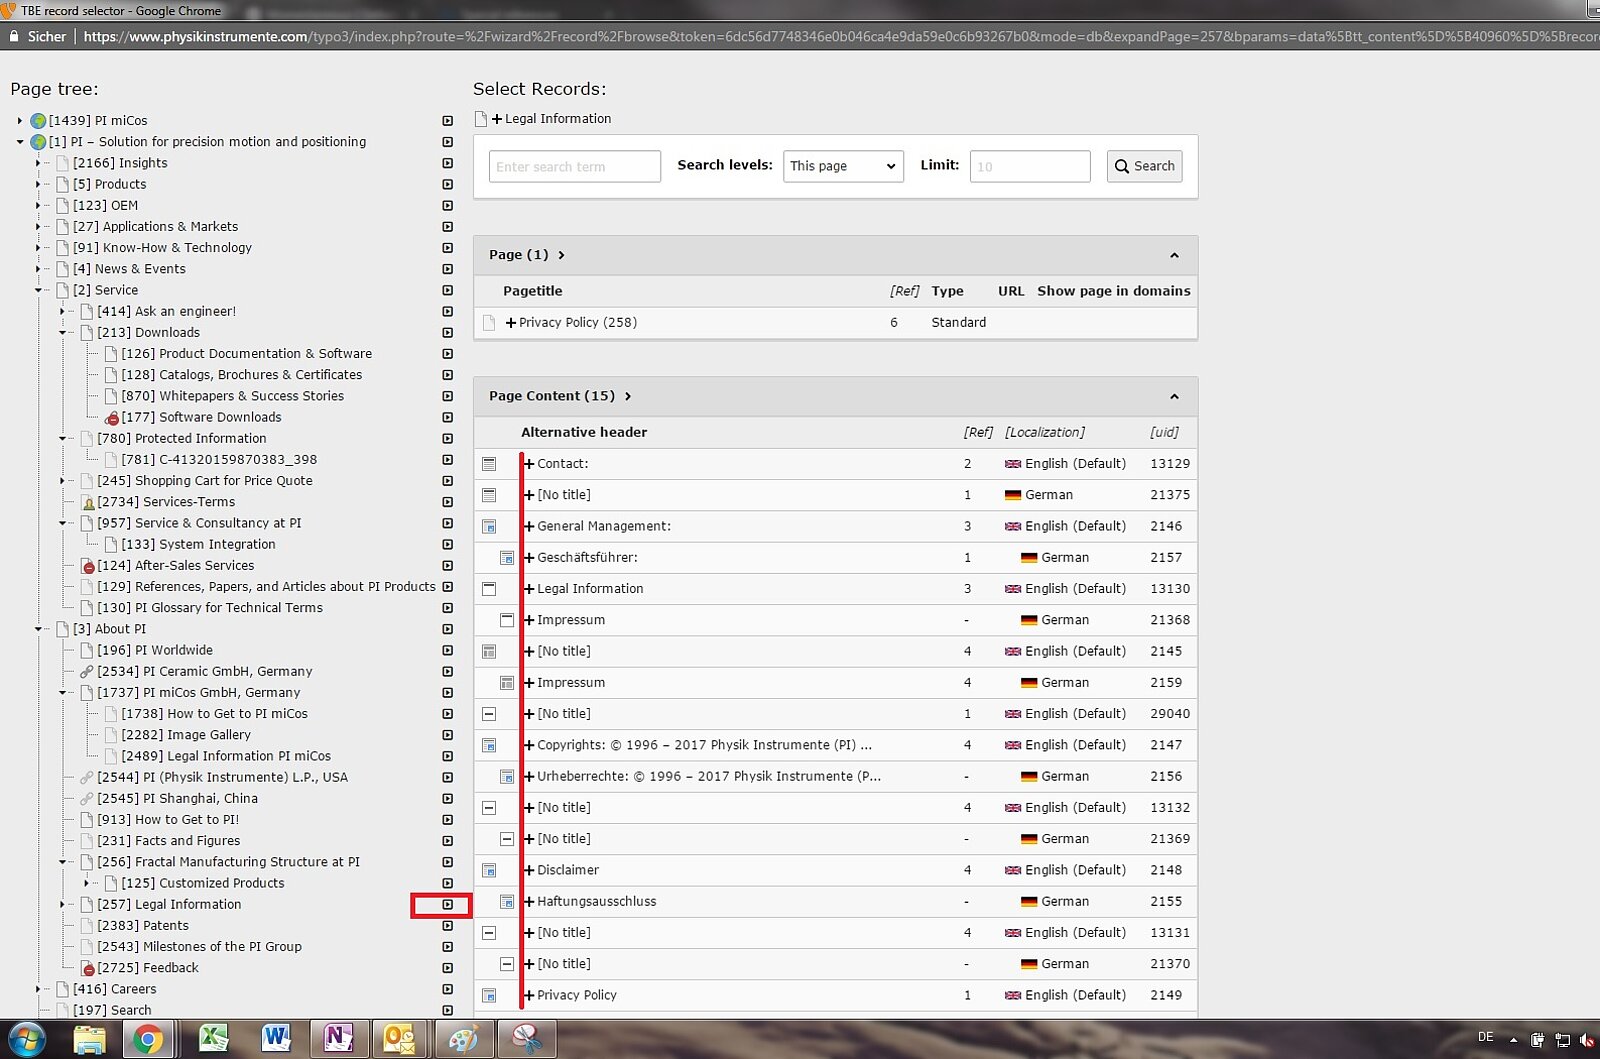
To select the existing item you want to show, you can click on the buttons indicated by the red circles. By doing this you will surf through your TYPO3 tree and you can select the single item you want to refer to. Remember, every changes or updates that will be made on the referred item will also apply to the record you created.
Selecting single or more items
Selecting single or more items
Once you search through the root knots to find the items you would like to refer to, you have to first choose the page the wanted items are in. When you found the right page, you have to click on the little arrow on the right side, indicated by the red square in IMG 56B. Now all the single item of the page will appear and you can choose whether a single item by clicking on it, or choose more single items by clicking the + sign indicated by the red line. Everytime you click a + the item jumps directly into your record box and you can go on with choosing further items. Attention: The sequence of the items will be as you chose them.
Selecting the content element Testimonials
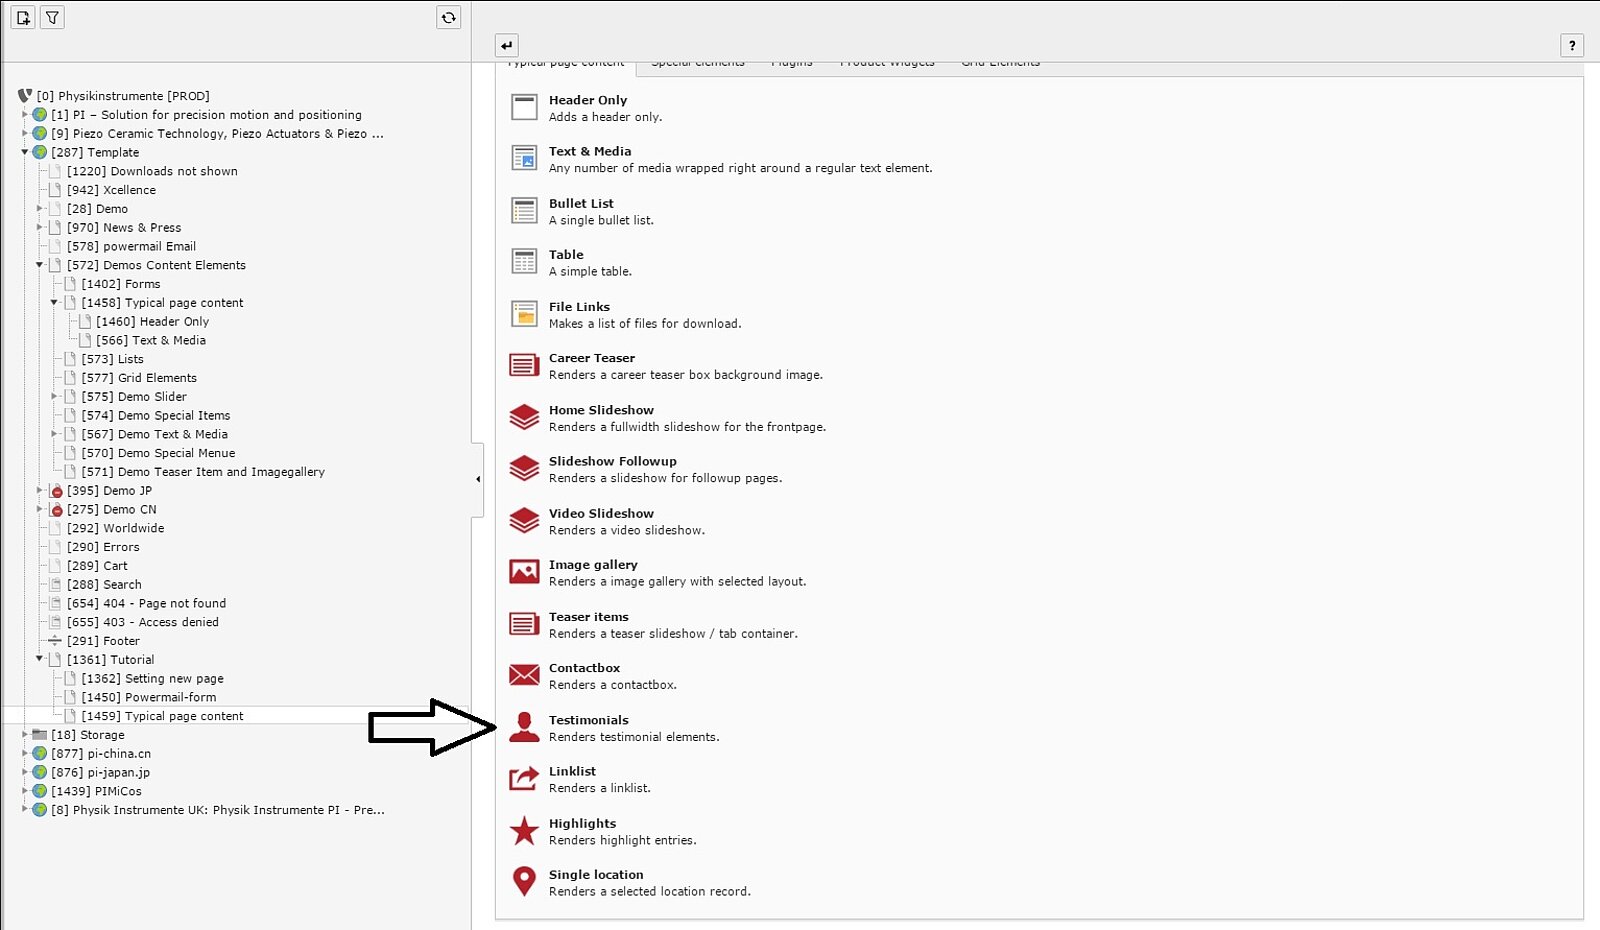
Selecting the content element Testimonials
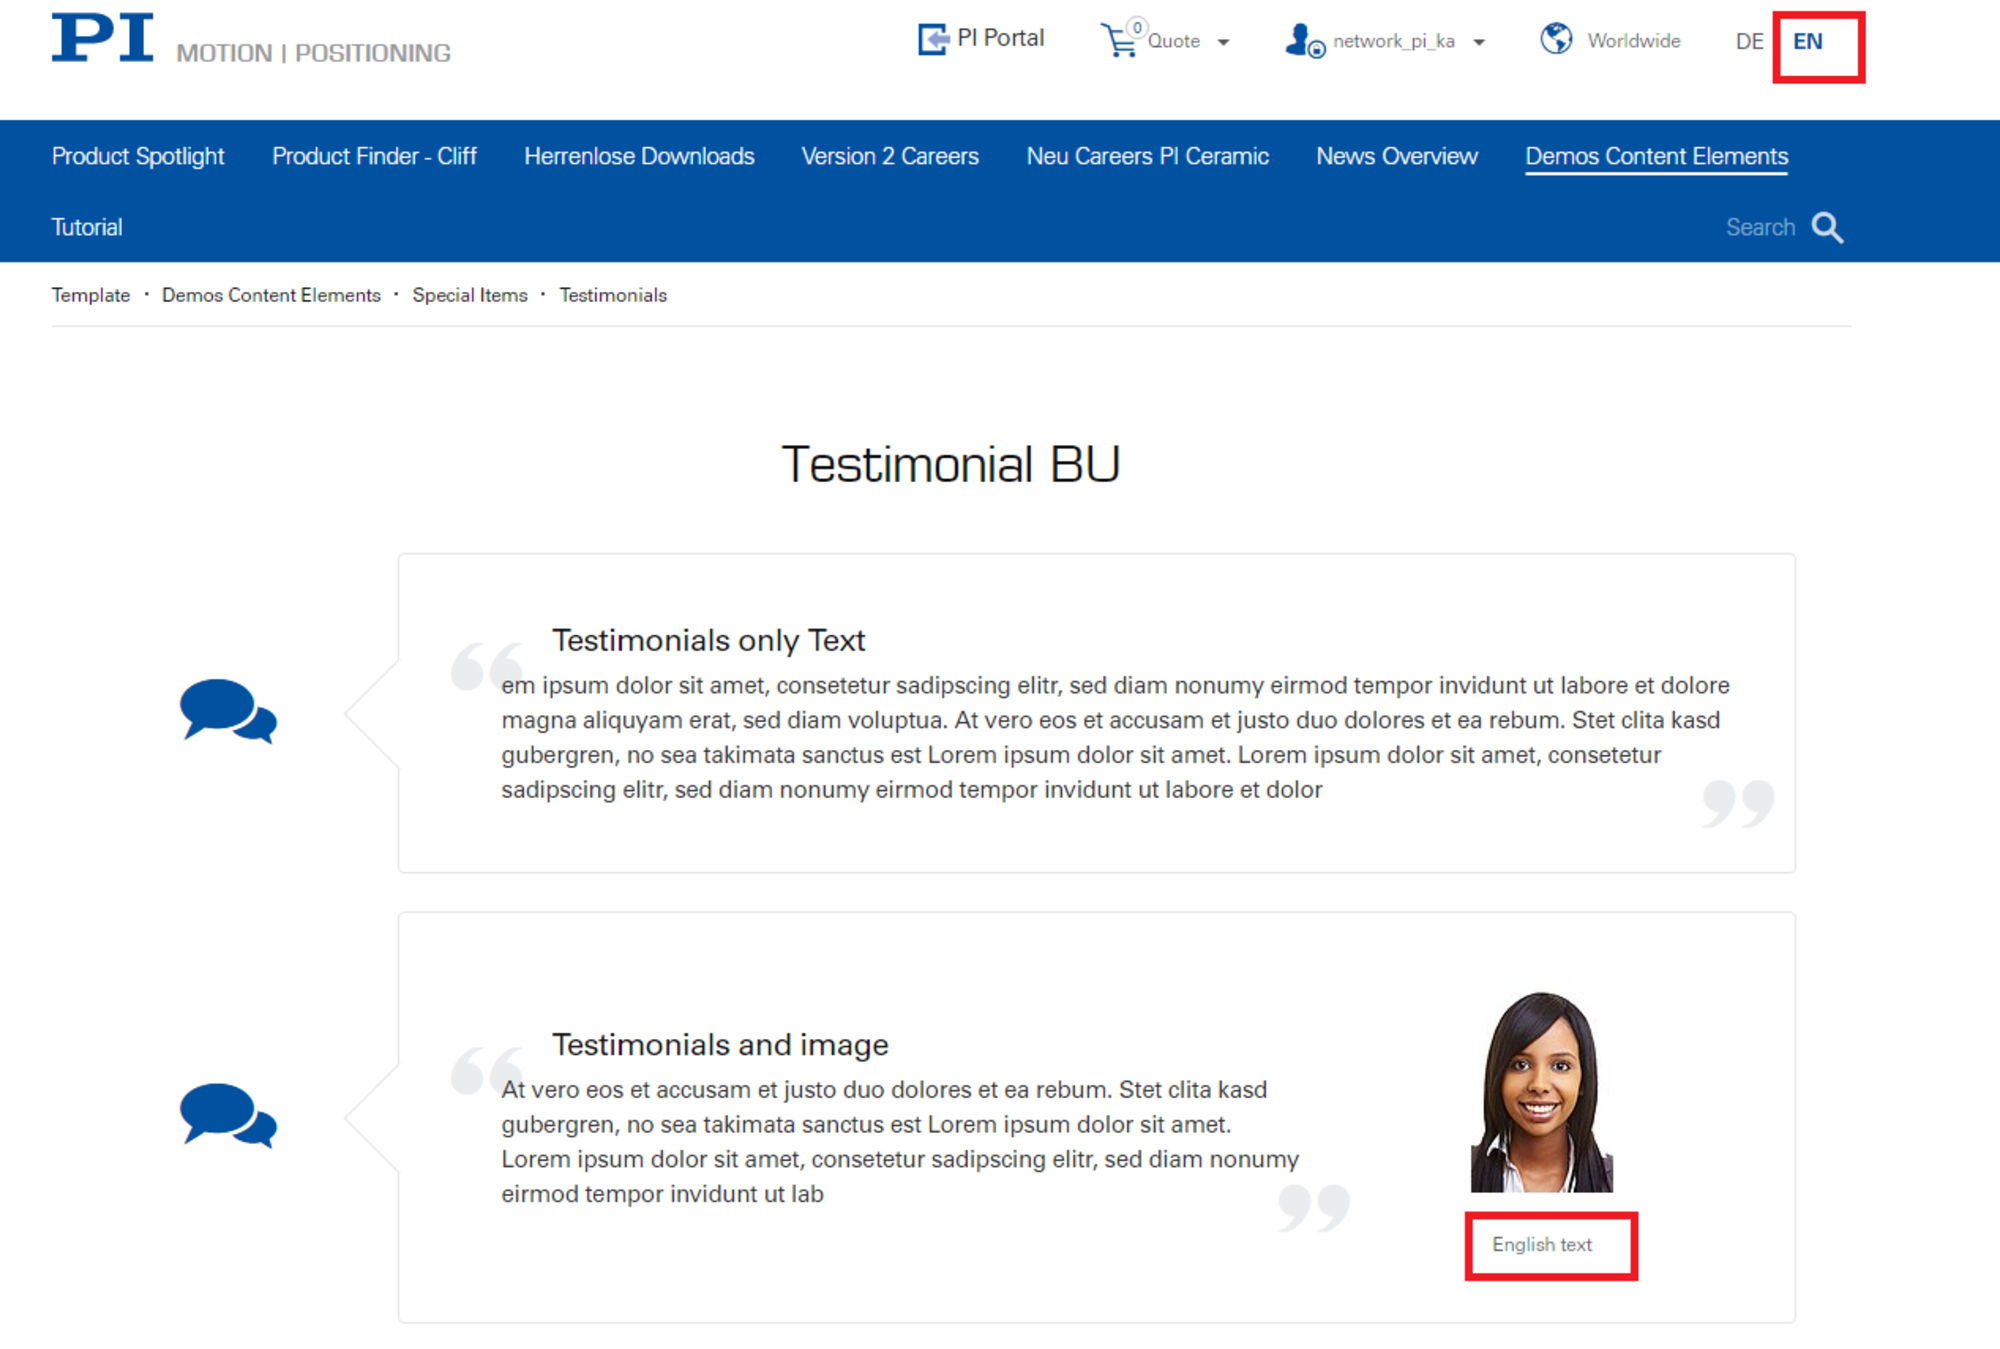
To create a speech bubble you can choose the element "Testimonials", indicated by the black arrow, from the "Typical page content". You can find some examples on how it will look like >>here.
Creating the testimonials elements
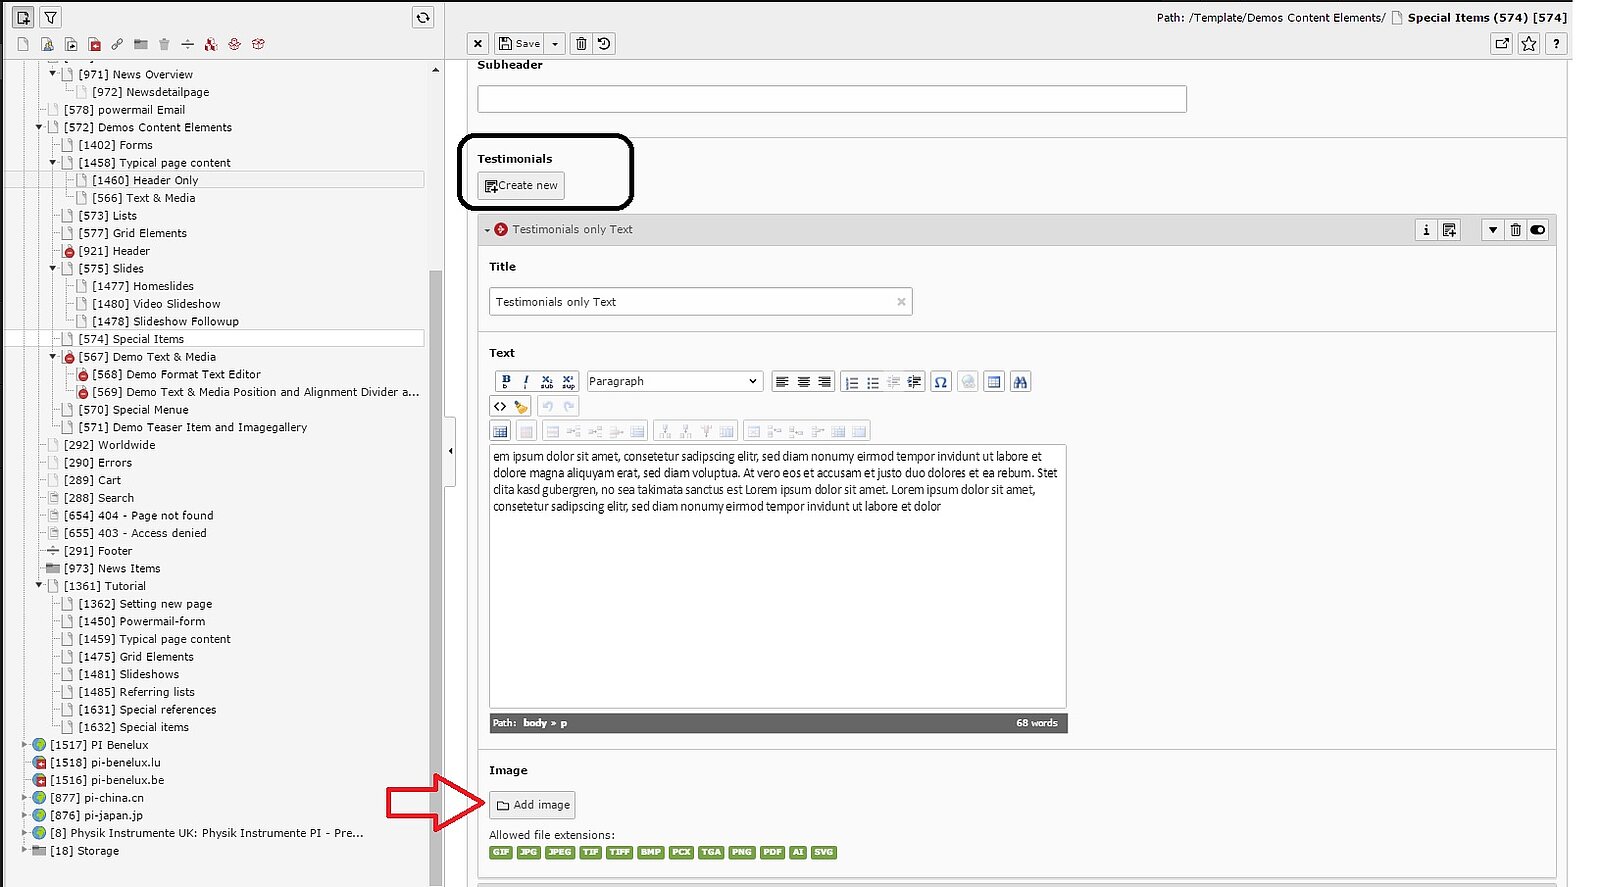
Creating the testimonials elements
Now you can start creating your testimonials by clicking "Create new", indicated by the black circle, for each single testimonial you want to make.
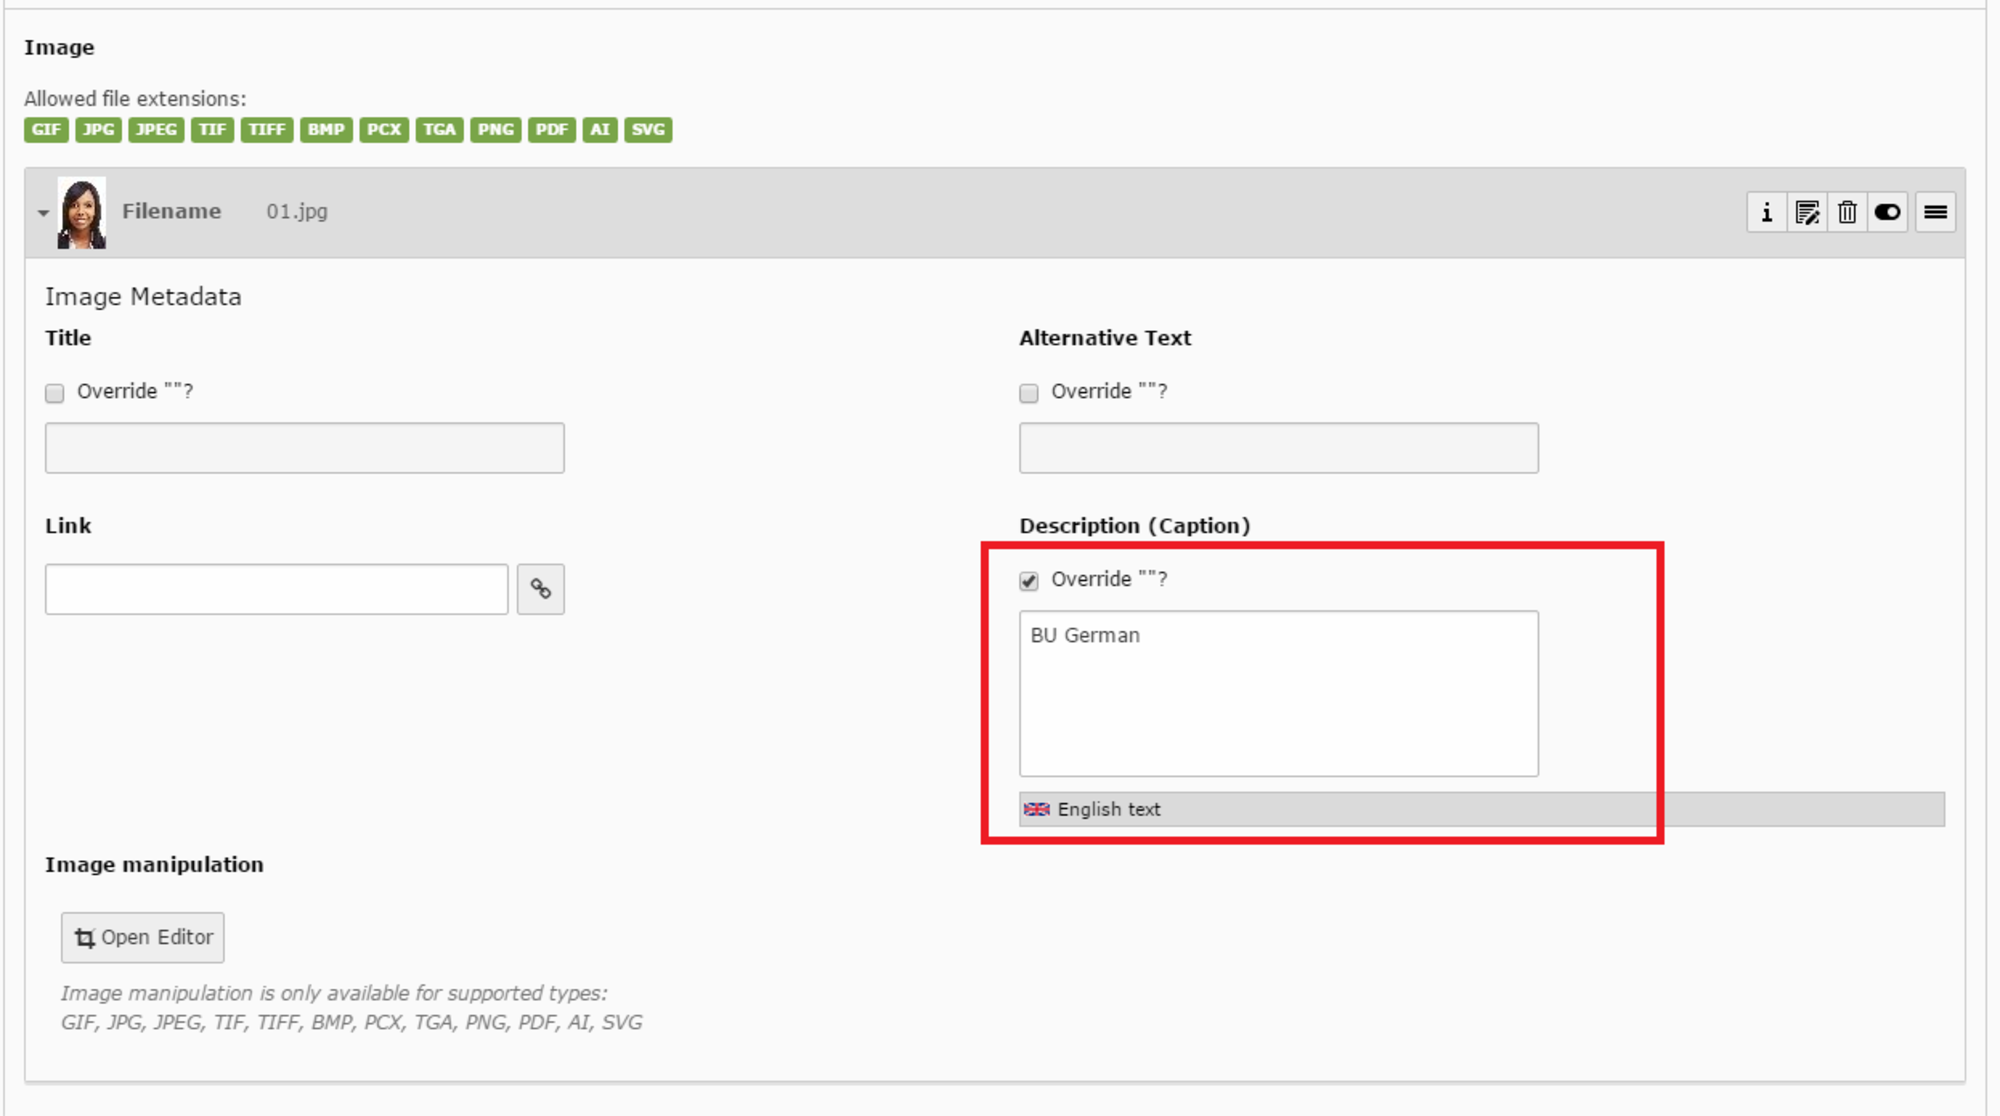
You have the possibility to insert a title, text, and image for each testimonial element you create. The configurations are the standards for images, which you can find in >>IMG 25.

Create a new contact box in the Storage
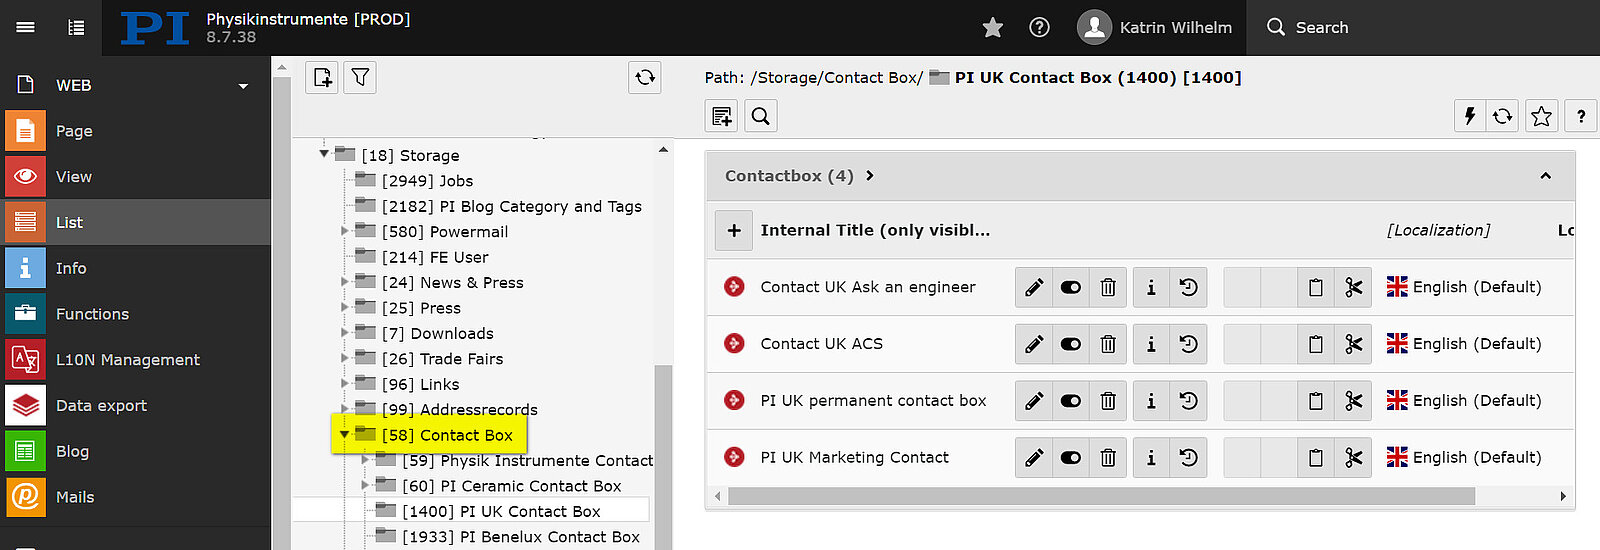
To create a blue contact box, select your local folder in the storage under "Contact Box".
Then move to the web page where you would like to place your contact box.
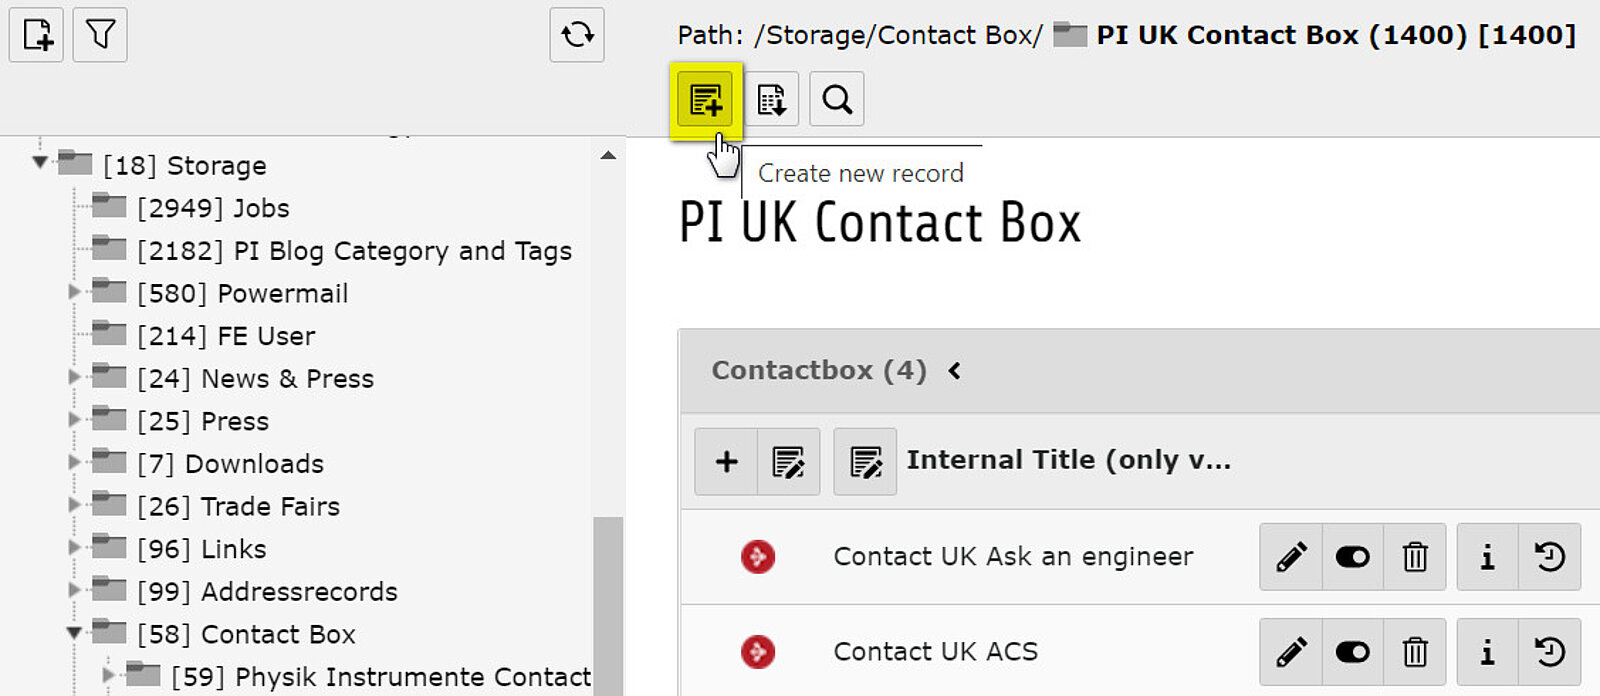
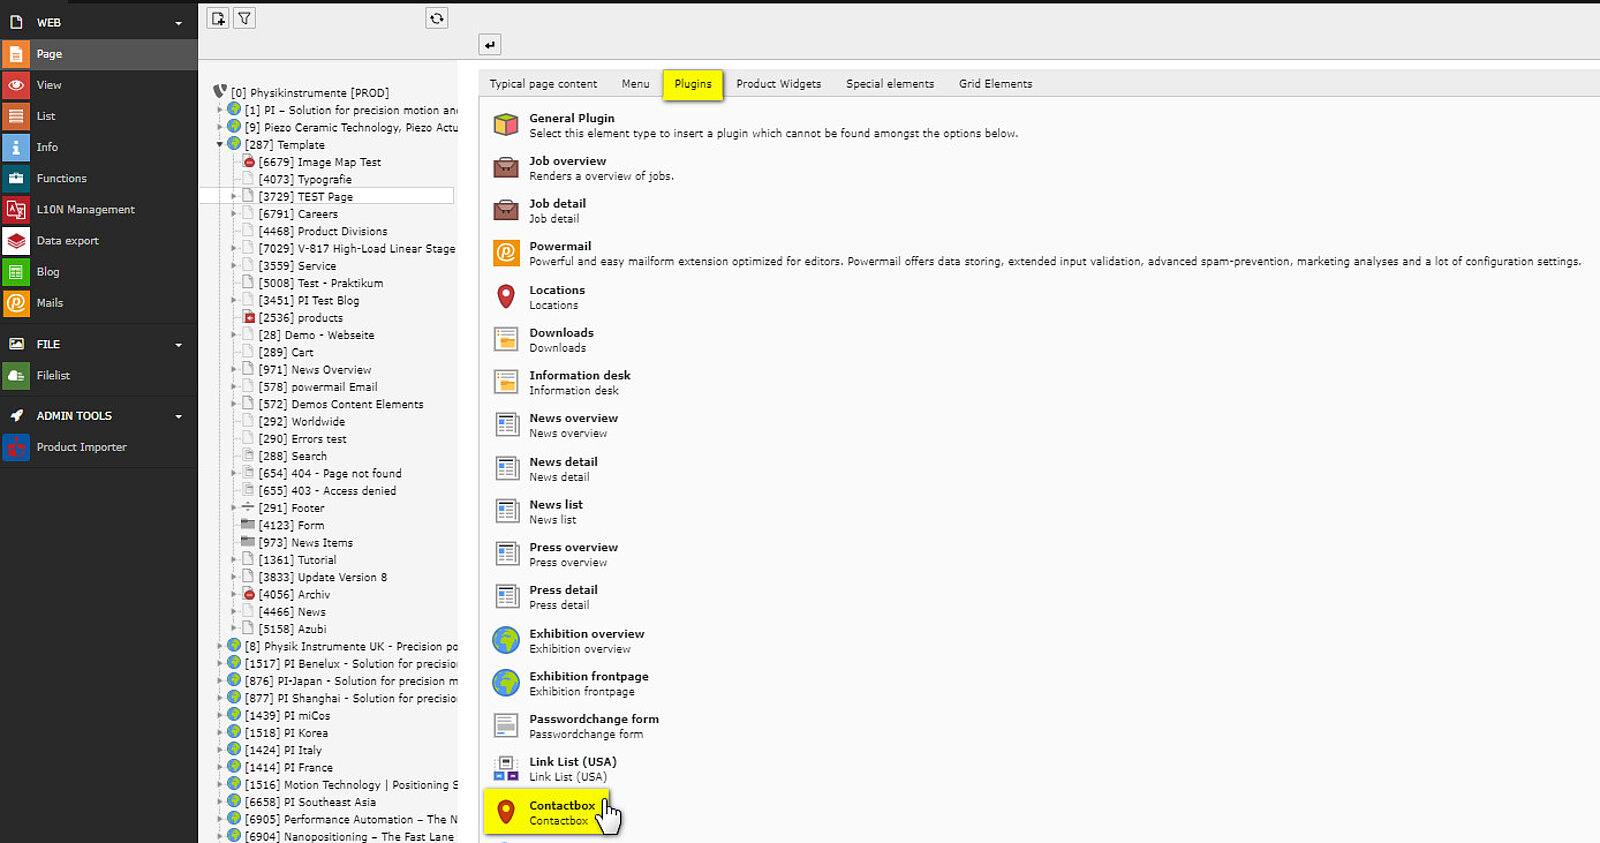
Create a new plugin (choose the "Contactbox" plugin from the list).
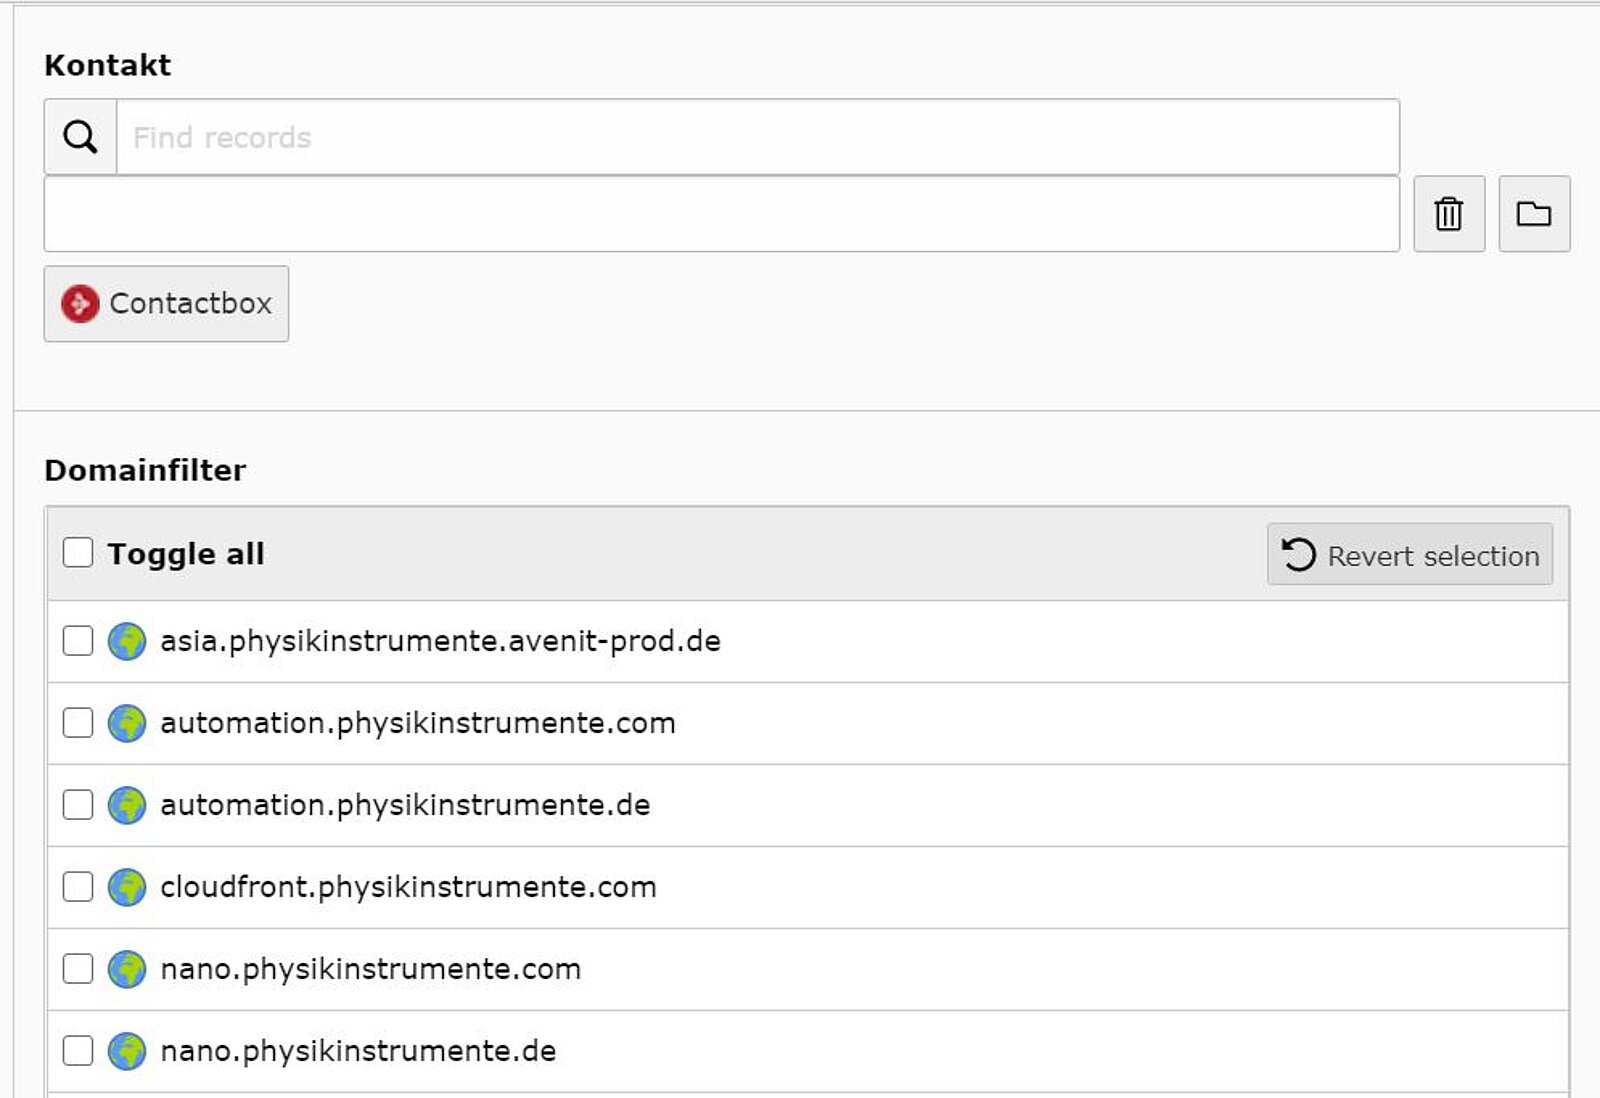
Choose the contact box you just created from your storage folder and activate it for your domain.
This was you can easily reuse your contact boxes on several pages.
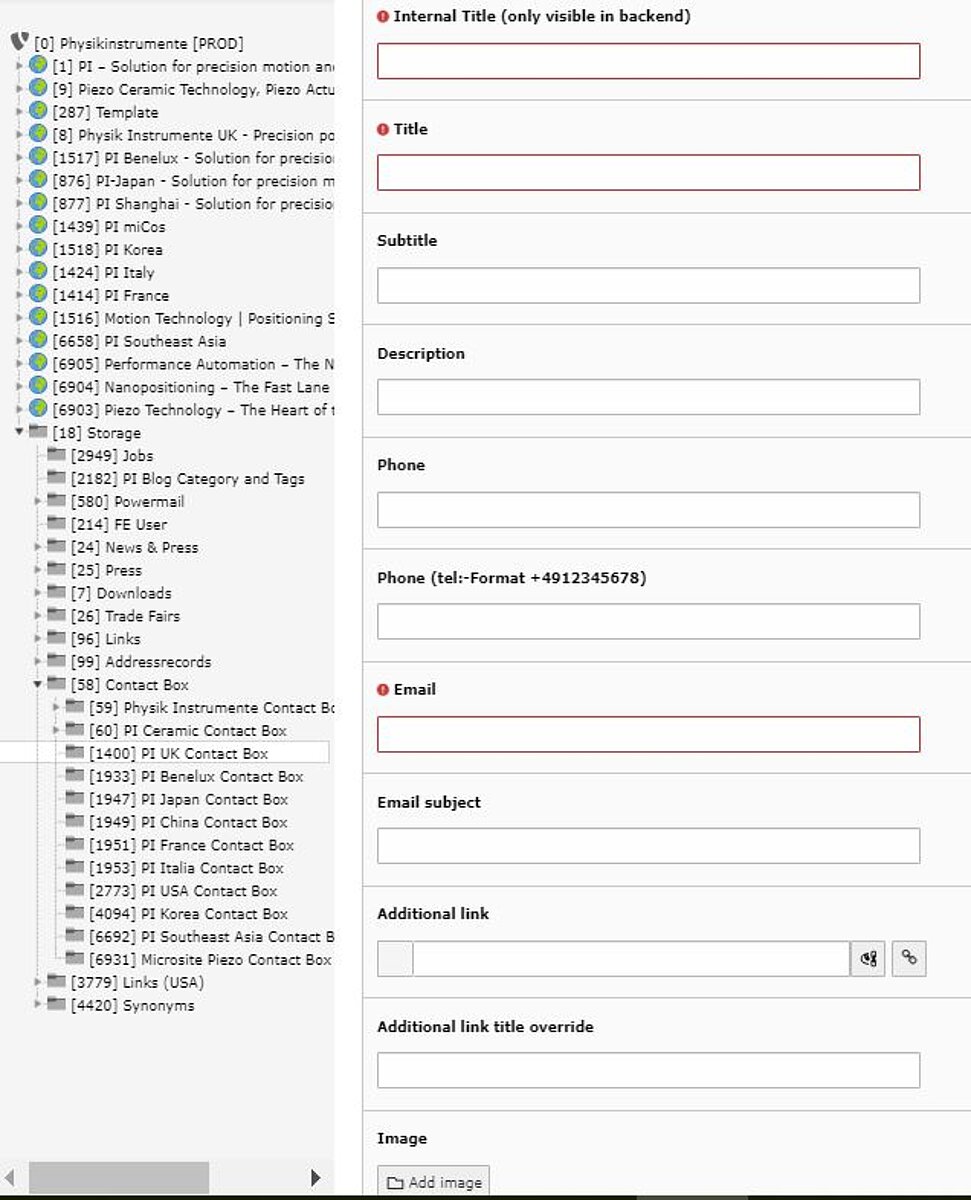
If you would like a unique contact box for only one page, you don't have to create it first in the storage but you can use the form fields given in the plugin.
Making a blue box out of it
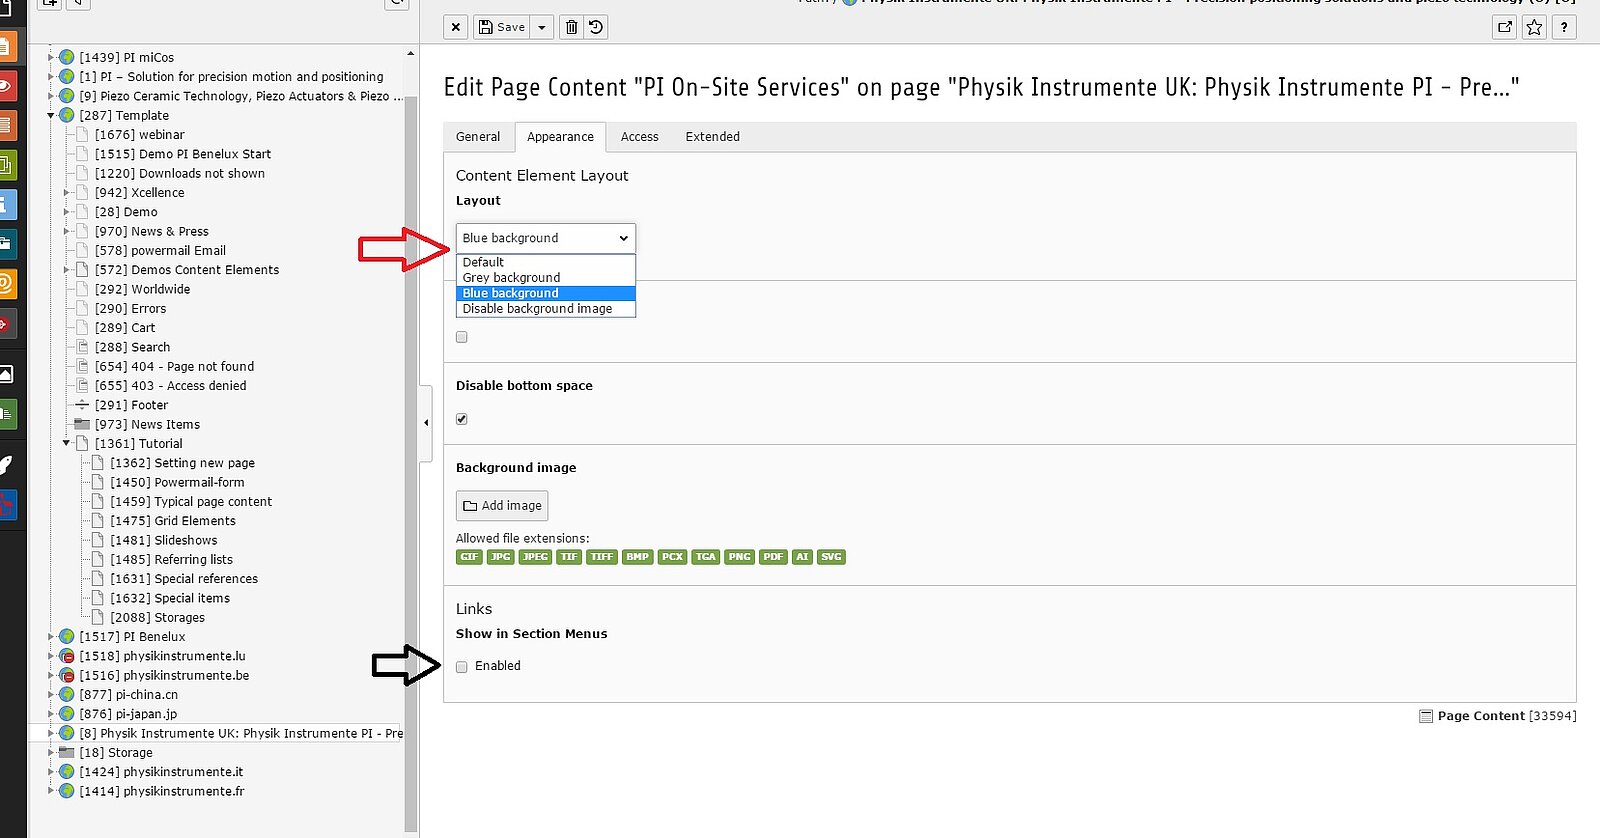
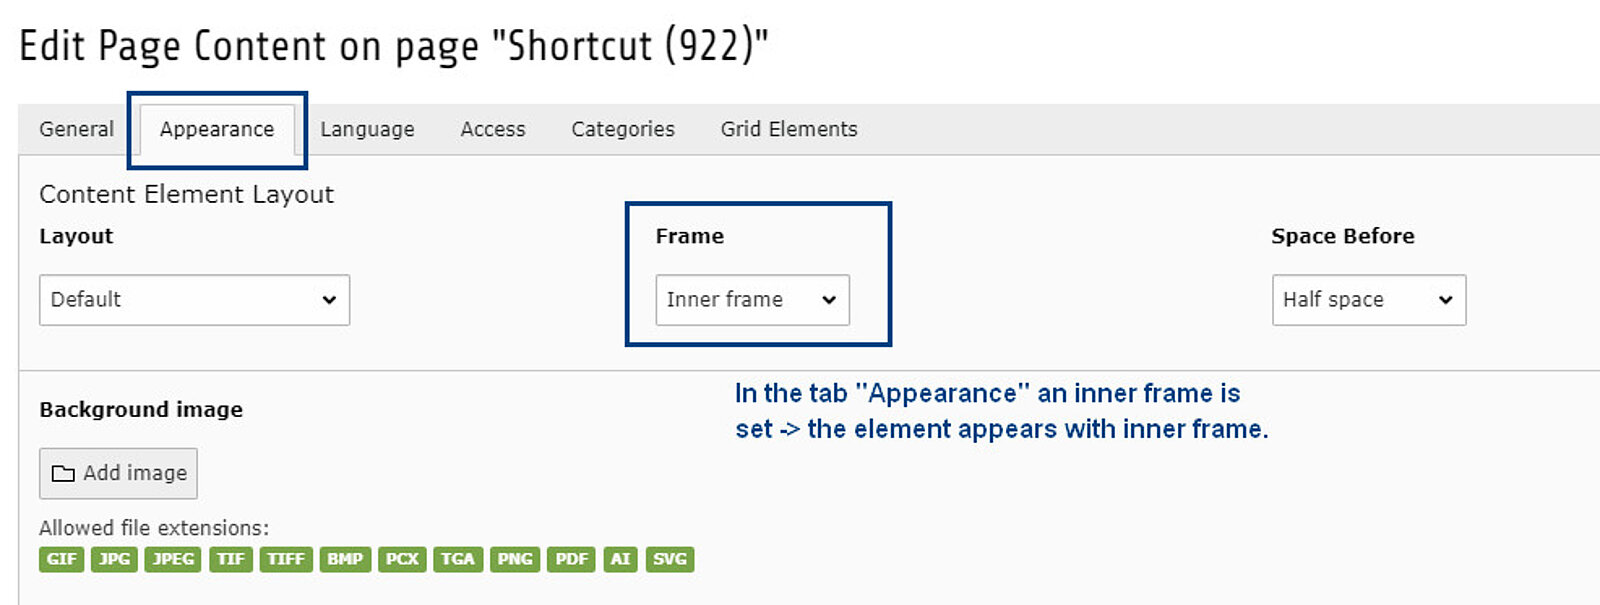
- Red arrow: In the category Appearance you will find the layout. If you want to make the contact box as our tipical ones, just click on this box and choose "Blue blackground". The contact box will be blue and a head as icon on the left hand side will appear.
- Black arrow: You can enable the checkbox "Show in Section Menus" if you want the header of your contactbox to appear on the breadcrump on top of the page on the right hand side. By pushing the title in the breadcrump, the user will jump directly to the contactbox.
Selecting the content element Product Widget
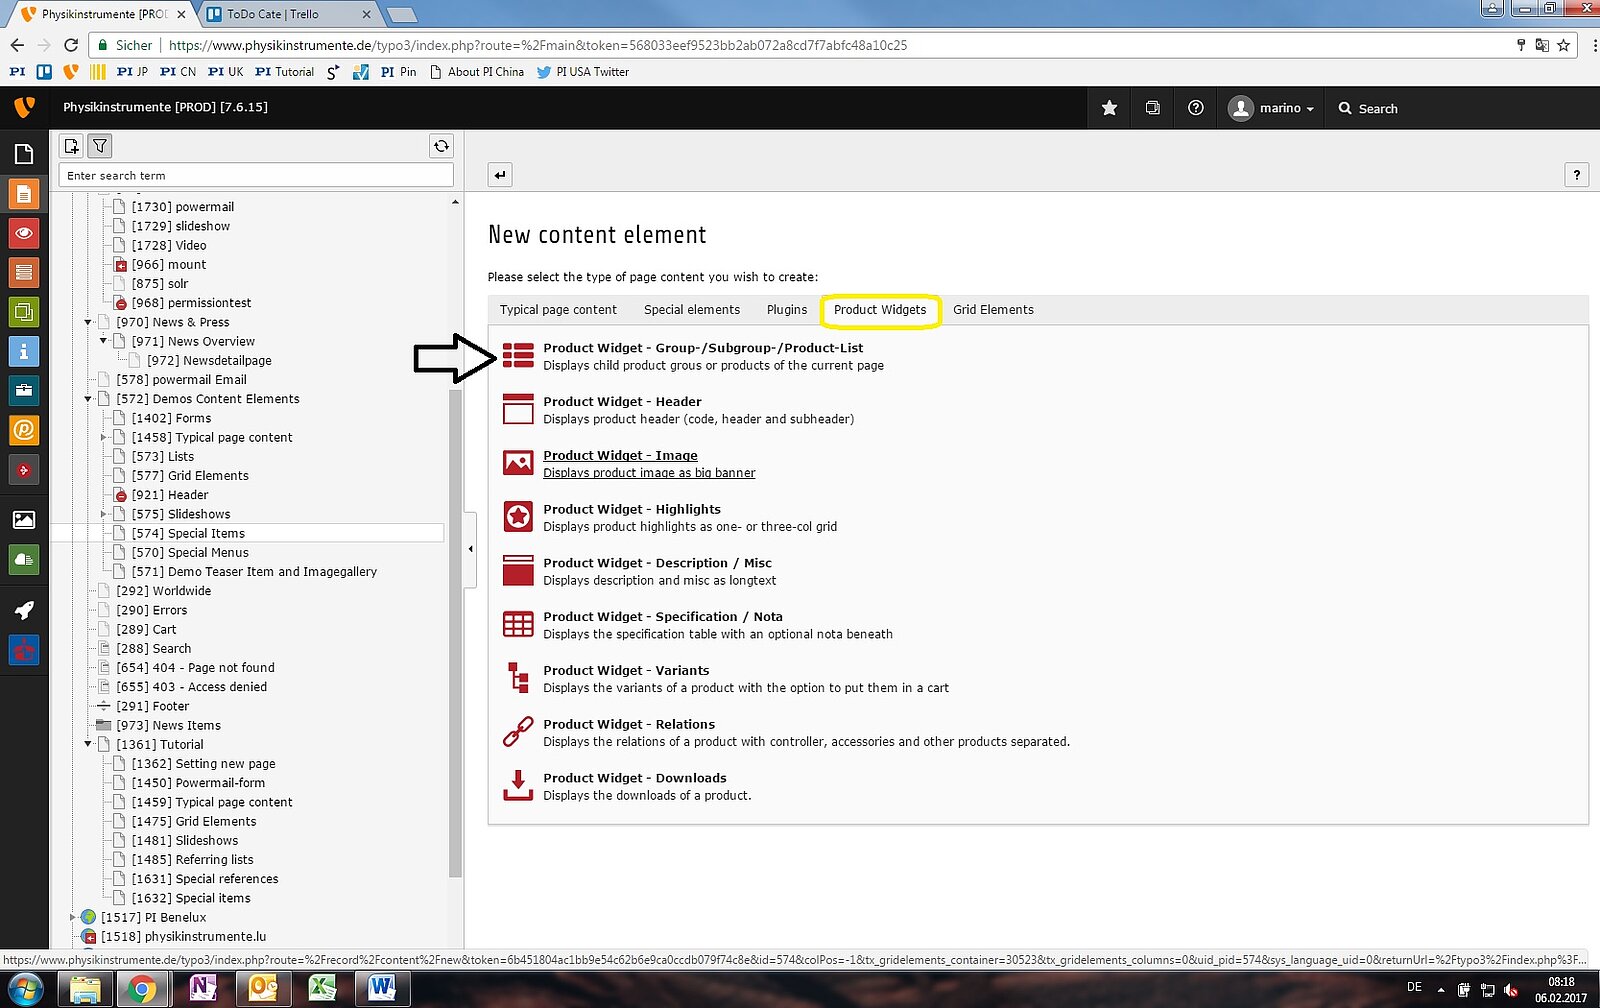
To create a preview of chosen products, you can choose the item "Product Widget", indicated by the black arrow, from the category "Product Widgets", indicated by the yellow circle.
Choosing the design and the products

The key configurations of this item are under the category "Plugin", indicated by the yellow circle.
- Blue arrow: You can ignore this box
- Black arrow: You can choose between showing the product of the selected pages itself, or the products of the subpages of the selected pages
- Green circle: There are different designs for a product preview. You can make a list, a grid, or a slider of the chosen products. Take a look on how it could look like >>here
- Yellow circle: If you click on this button, you can search through the TYPO3 tree to find the product, or the product category you want to make a preview of. Choose how many products you wish
Sorting of the List
To manage the order of your added pages/ elements you got several options. Choose the one you need from the dropdown menu.
As a default option it's always sorted by the newest at first.
You got the following options to choose:
- Alphabetical
- Creation Date
- Modification Date
- Backend
- Default = Newest first
- Manual
For the green ones you also got the option to sort your list either ascending or descending.